This post may contain affiliate links. Please read our disclosure policy.

Learn how to make the VERY BEST Vietnamese baguette! These bánh mì have the perfect light and cottony crumb with a super crispy crust! This recipe is the result of a ton of trials and help from Vietnamese friends to reach the perfect texture and flavor. Look no further for an authentic recipe!
My quest to make authentic Bánh Mì is finally over! After so many trials I lost count, I’m super excited to finally share the recipe to make these super light Vietnamese baguettes! Let’s bake!
📘 What is Bánh Mì
Bánh Mì is a Vietnamese bread that appeared during the French colonization, around 1880. French colonists brought bread as well as paté, coffee, crème caramel, yogurt, and more, influencing Vietnamese cuisine. Vietnamese tweaked the bread by filling it with paté, carrot and radish pickles, fresh herbs, and all sorts of meat. It is now considered one of the best sandwiches in the world.
Bánh Mì, which translates to “wheat cake”, is the name of the bread itself, but also the filled sandwich.
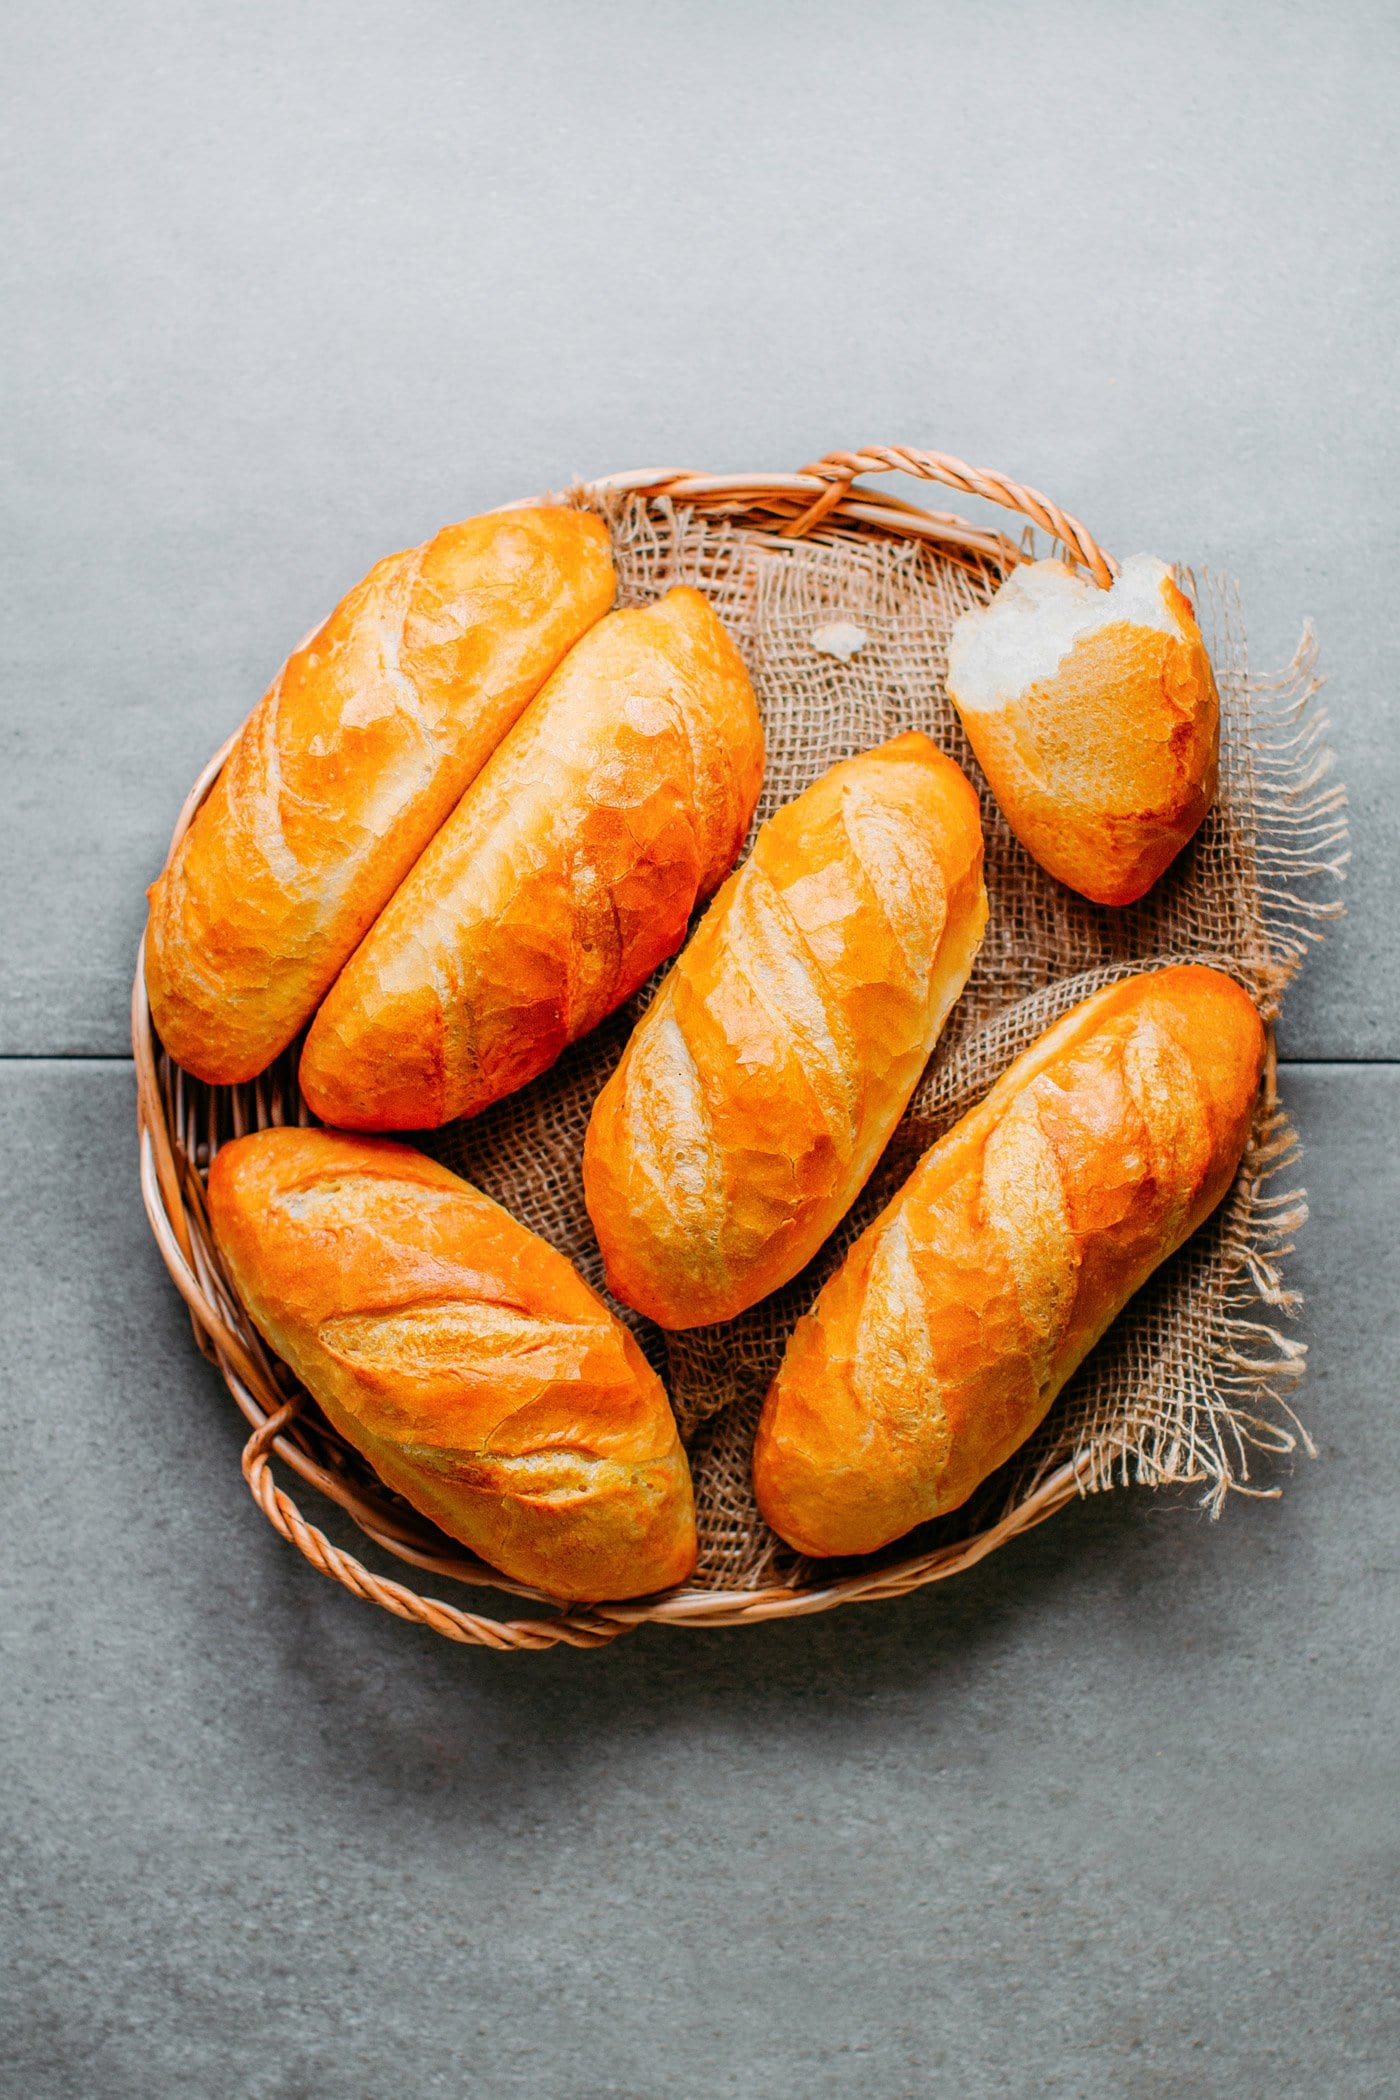
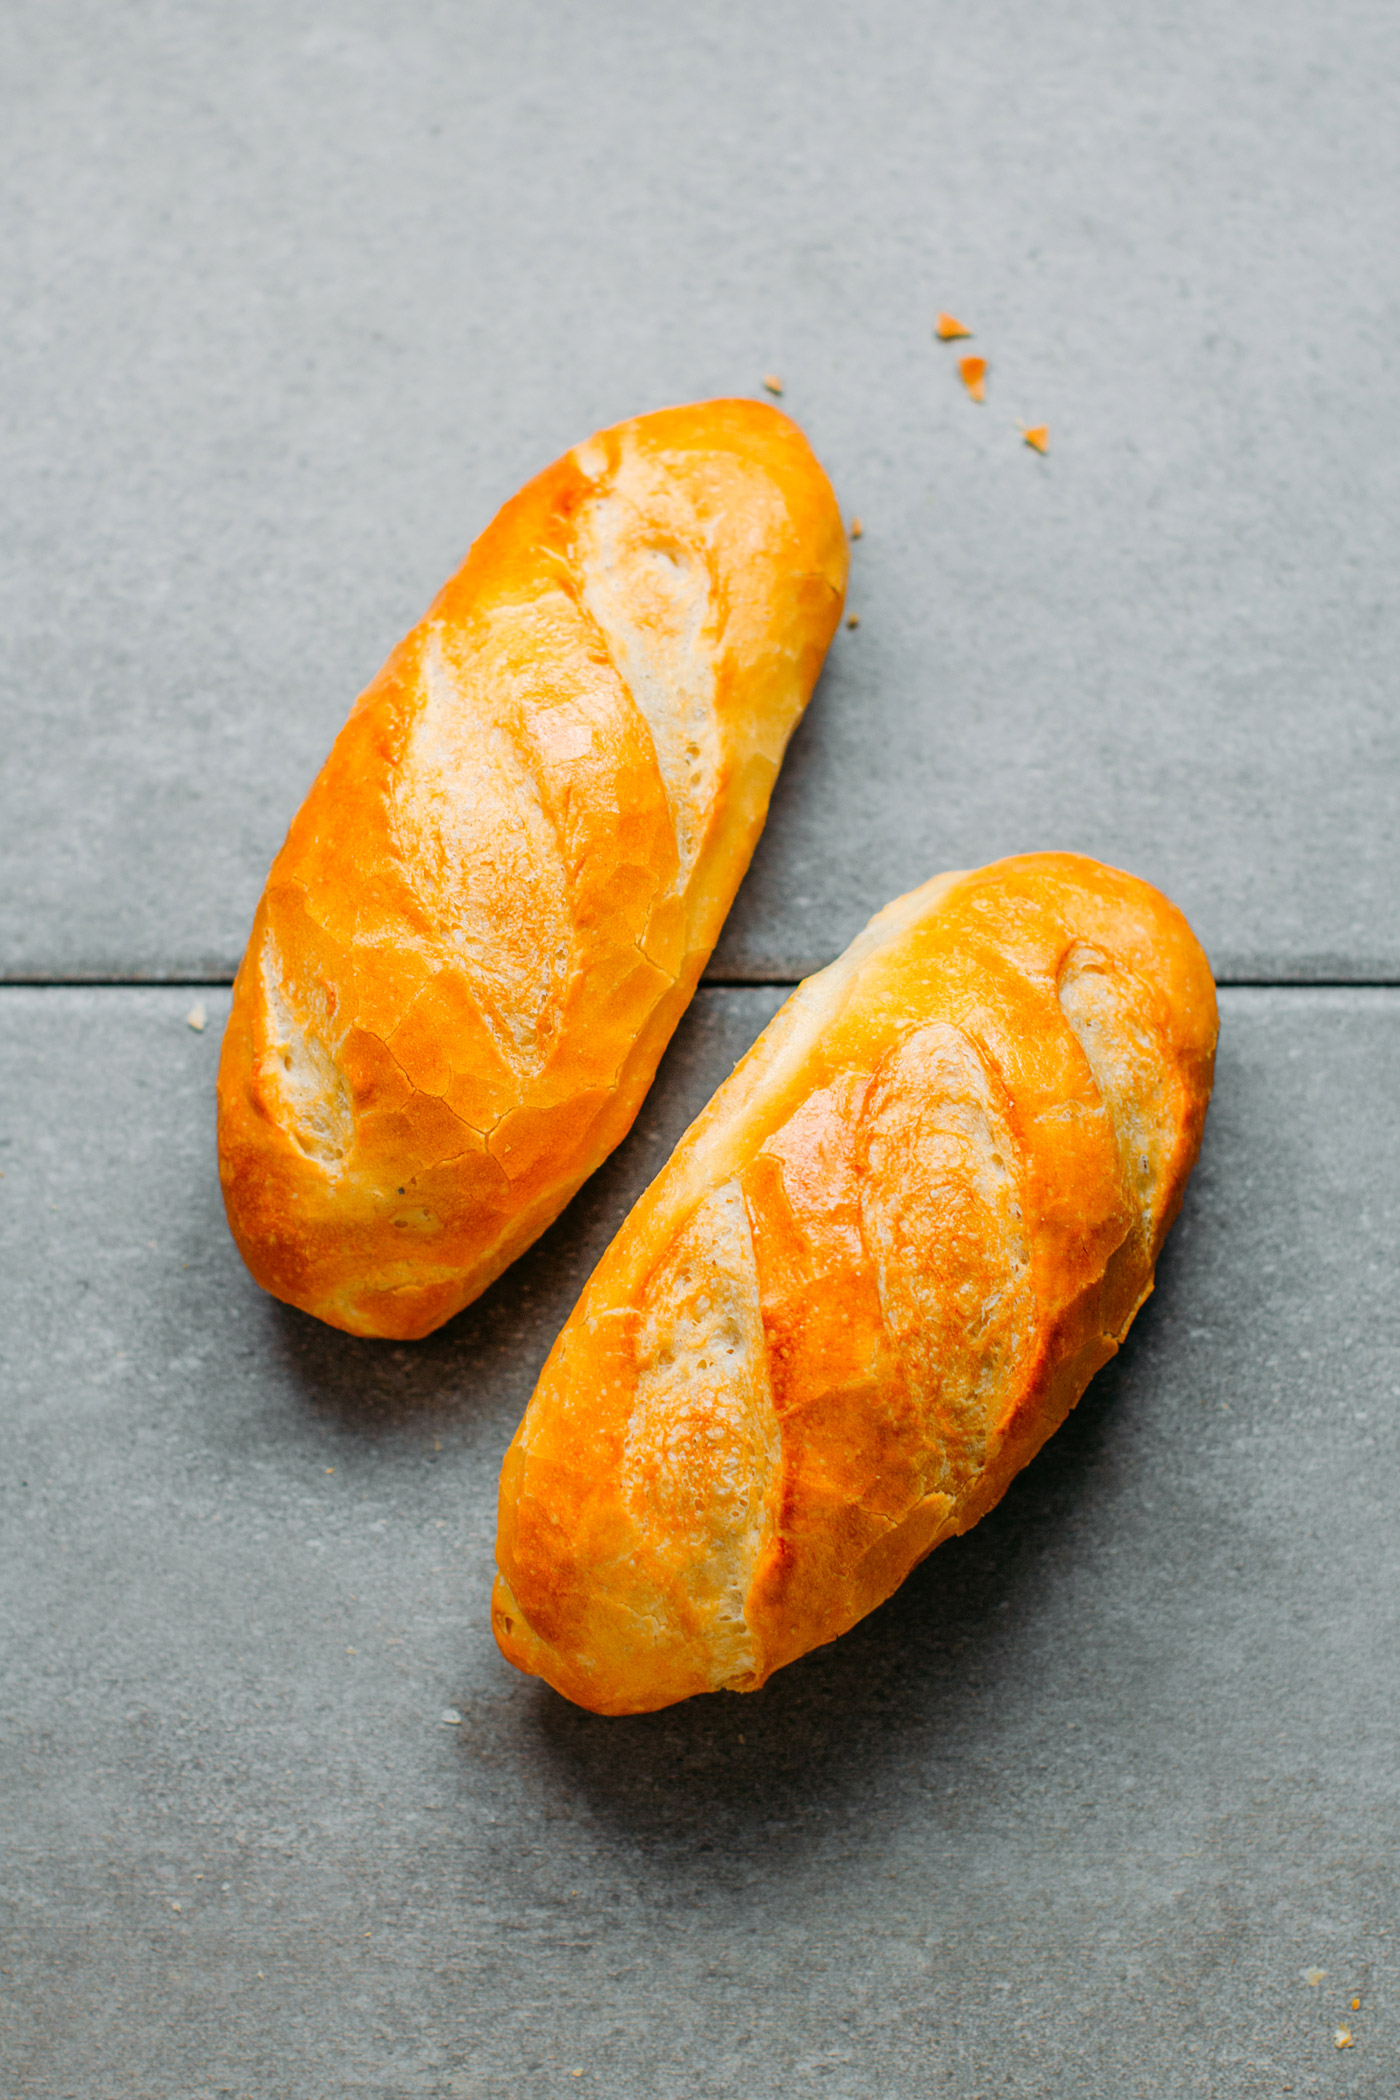
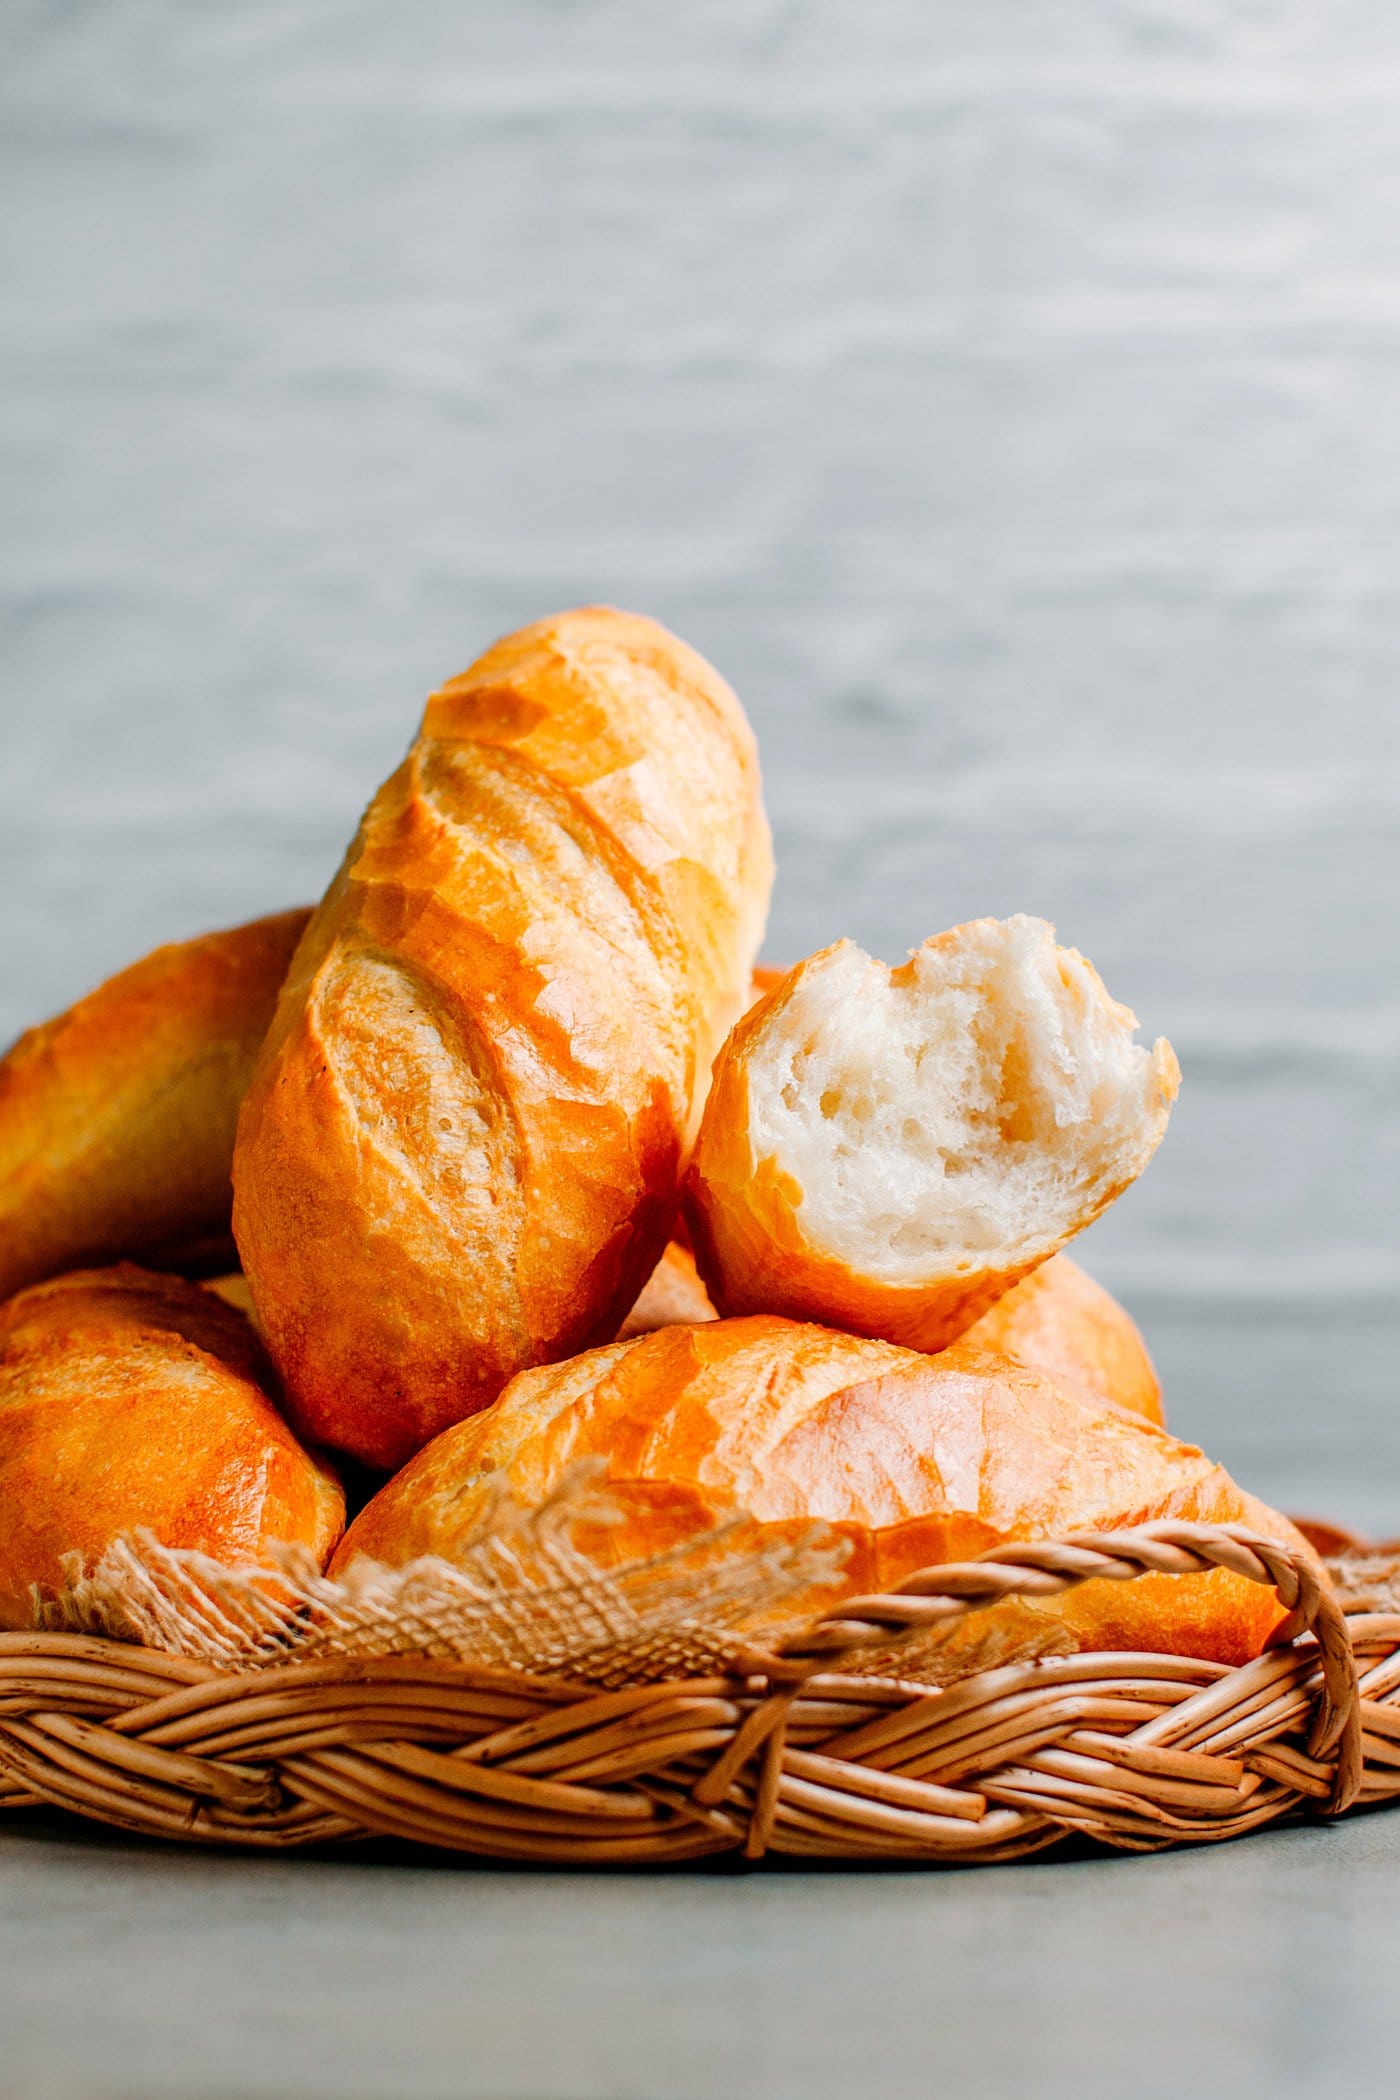
So, what’s so special about bánh mì? The uniqueness of this bread is that it is extremely light. The inside is so airy it almost looks like candy floss, and the crust is super thin and crispy with visible cracks on it. Another difference is that, as opposed to other bread, this one tends to become soft and chewy the next day, it doesn’t really dry out.
To me, preparing a Bánh Mì sandwich starts with the perfect bread, French baguette just doesn’t compare. Traditional French baguettes have a much thicker crust and more crumb, so the weight-to-volume ratio is much higher. Bánh Mì is lighter (less crumb), making it easier to digest, and perfect to add a ton of fillings!
🥣 How to Make Bánh Mì
I tried many recipes, and I could not find a single one that gave a real bánh mì texture. Most so-called Vietnamese baguette recipes yield nice results but are far from the ones I tried and loved in Việt Nam. After a lot of research, an insane amount of trials, and invaluable help from Vietnamese friends, I finally nailed it! If you are looking for an authentic bánh mì that is as light as a feather, this recipe surely won’t disappoint.
What is the secret to getting this extremely light texture and thin crust? Well, there is not a single answer to that. It’s the combination of multiple things:
- A high-hydration dough. This dough contains more moisture than most bread dough. In fact, it’s so sticky you will need to work with oiled hands when handling the dough.
- A high-protein flour: Aim for wheat flour with about 12% protein. If you only have all-purpose flour (8% protein) on hand, don’t try this recipe, as you will be disappointed by the results. The high amount of gluten allows the dough to get a light and elastic consistency, as well as a better rise. You can find high-protein flour here.
- Bread improver: An essential ingredient, the addition of bread improver allows the dough to rise for a longer period, giving it a fluffier texture. I found mine online, but you may try asking a bakery if they can sell you some (they usually have it).
- The addition of vitamin C: It acts as a boost for the yeast. I used vitamin C powder, but you can use crushed vitamin C tablets.
- A high-speed kneading: For this recipe, you will need a stand mixer. We will run it at full speed to develop the gluten.
- A long rising time: You want to let your baguettes rise for at least two hours in a warm and humid environment. The baguettes will keep rising for the whole two hours thanks to the addition of the bread improver and the vitamin C.
- A lot of steam in the oven: This will allow the crust to develop cracks and stay thin and super crispy.
Do not omit or substitute any ingredient if you want the best results. And no, this recipe cannot be made gluten-free, sorry.
Quick note: Bánh mì dough doesn’t contain any rice flour nowadays, unfortunately, there is a lot of misinformation about that (Wikipedia included). IT IS NOT the secret to its light texture, neither is the shaping/rolling of the dough. It’s all about what is listed above.
Equipment Needed
Before starting, you will need a few essential tools:
- A high-speed stand mixer: This one is a must. I would not recommend kneading by hand for this recipe.
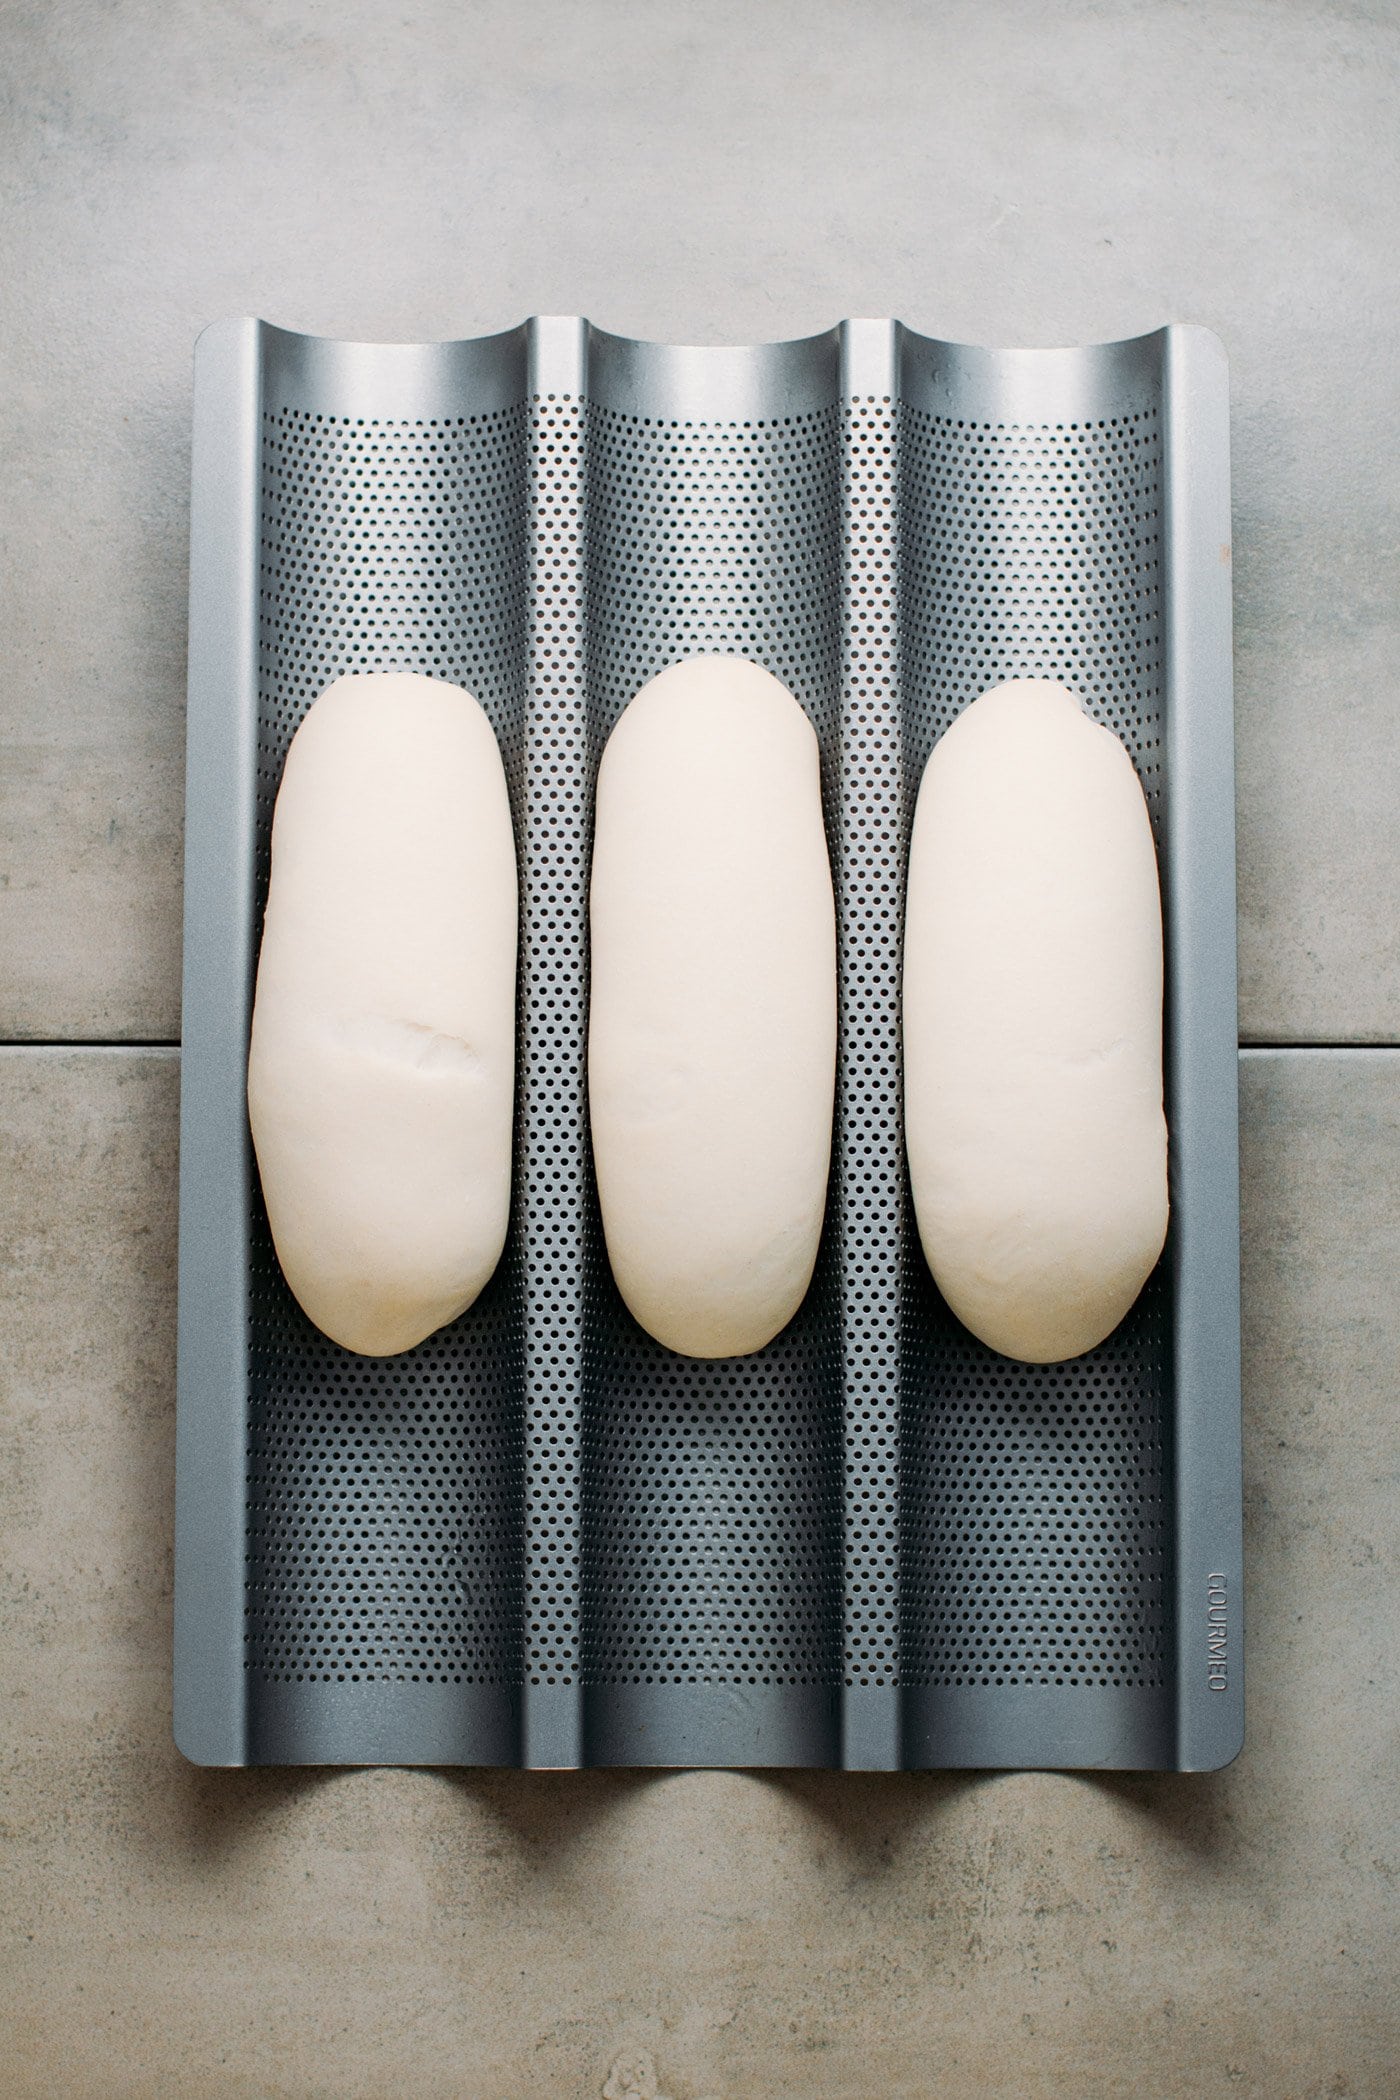
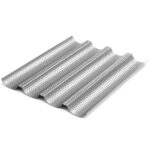
- A perforated baguette pan: If you want round and good-looking baguettes, a baguette pan will definitely help. It also helps the heat distribute better, giving the baguettes a more uniform, golden brown color.
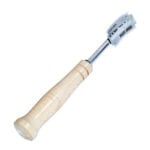
- A bread lame: For scoring the loaves before baking. You actually don’t need the handle, just a standard razor blade works well.
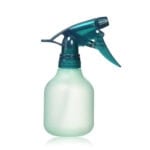
- A spray bottle: To spray the baguettes before baking.
- And a good oven!
Preparing the dough
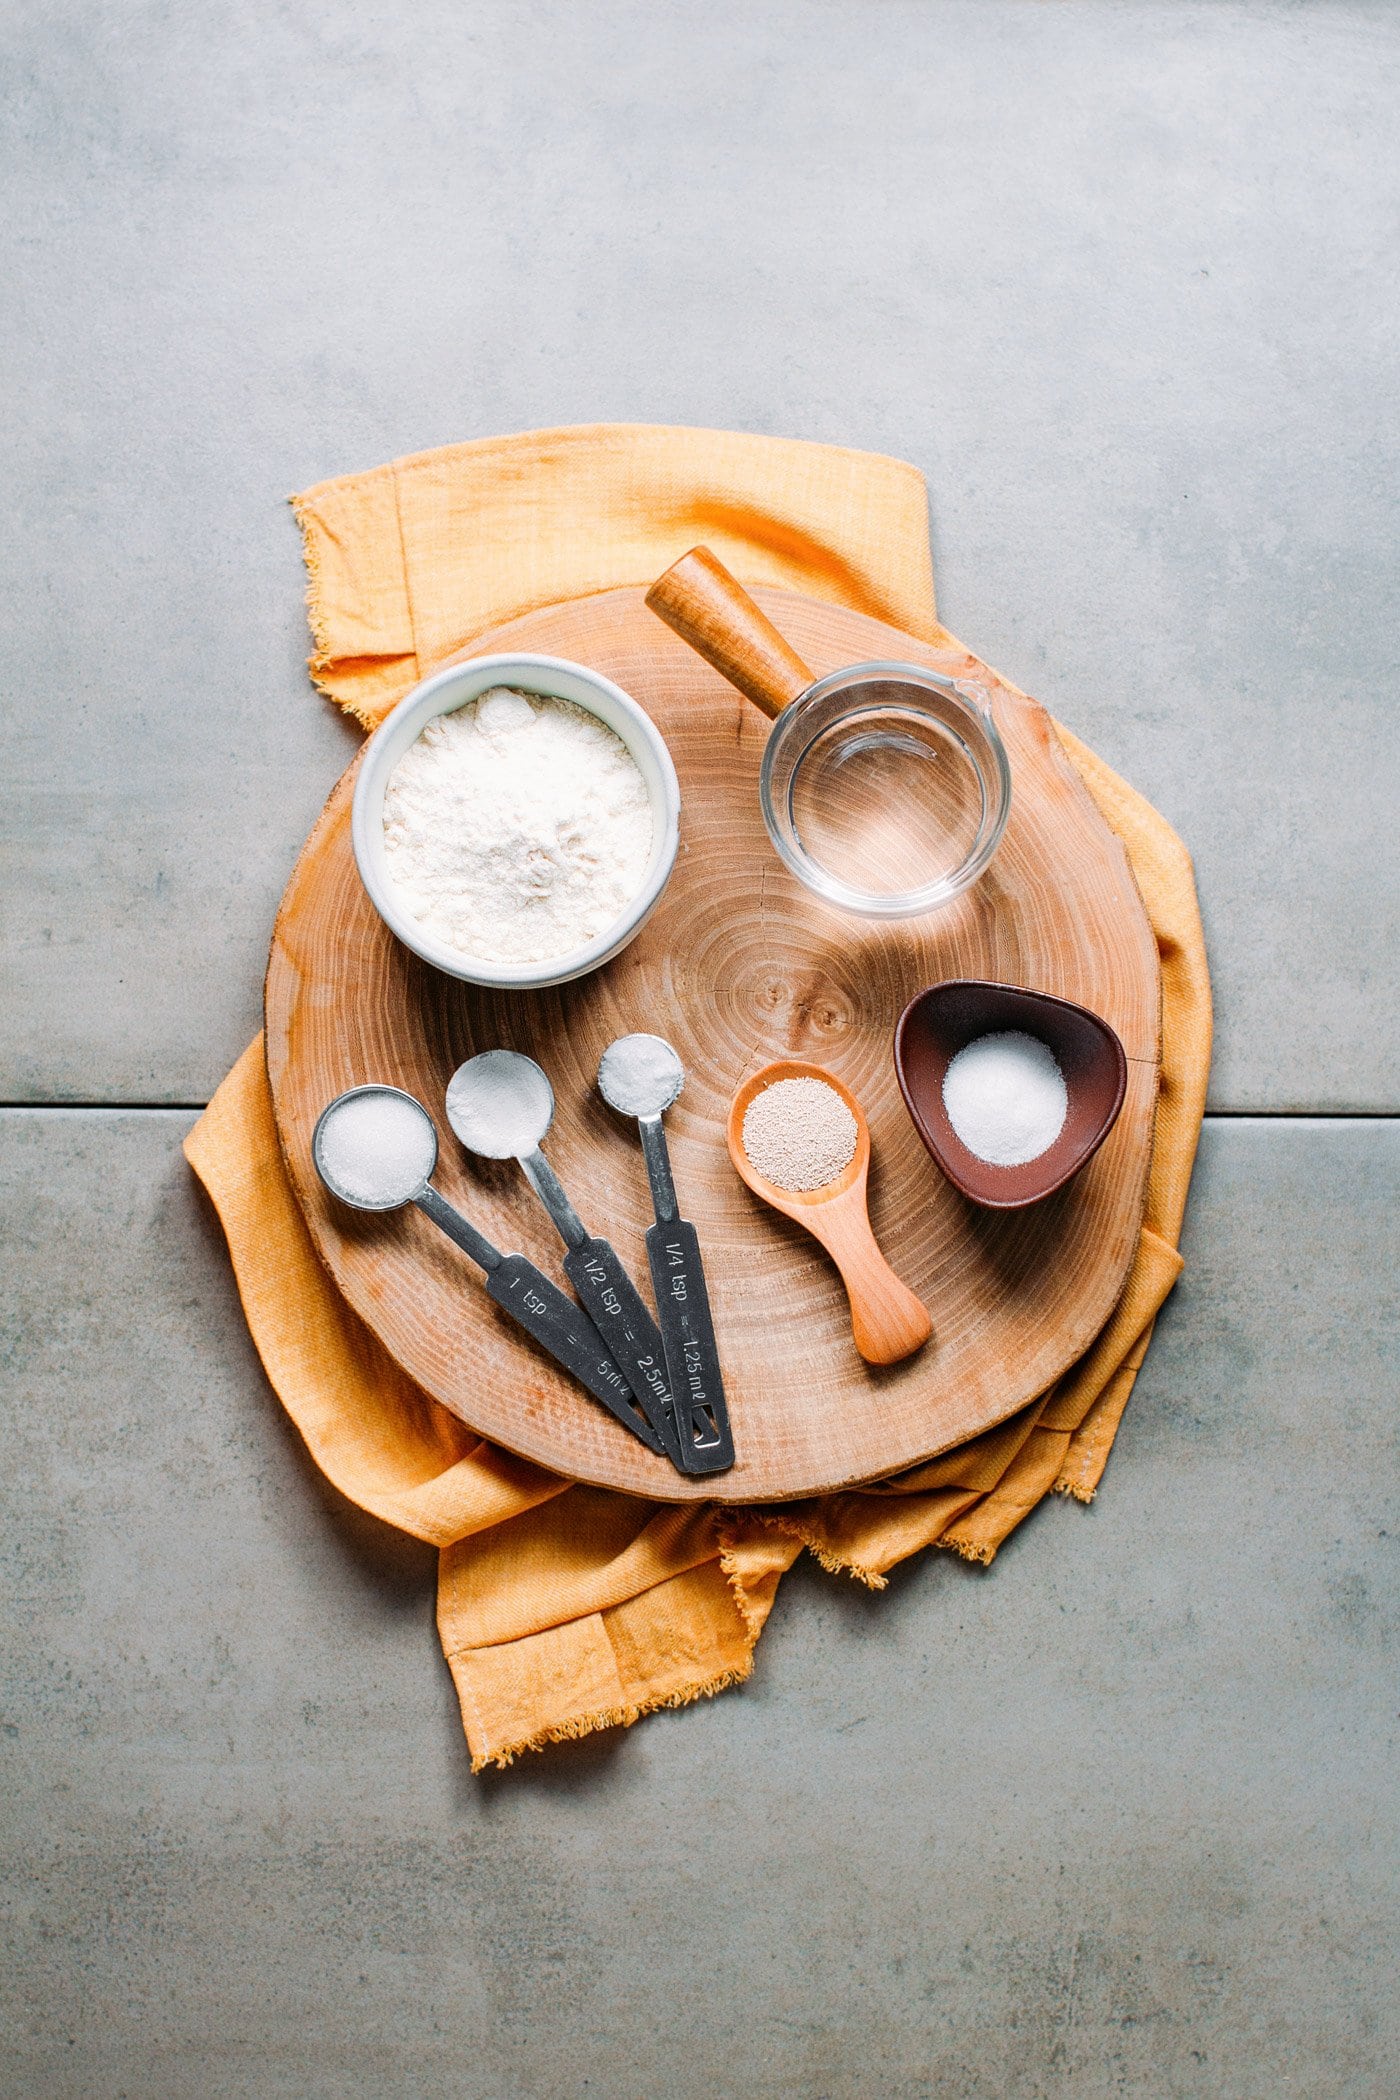
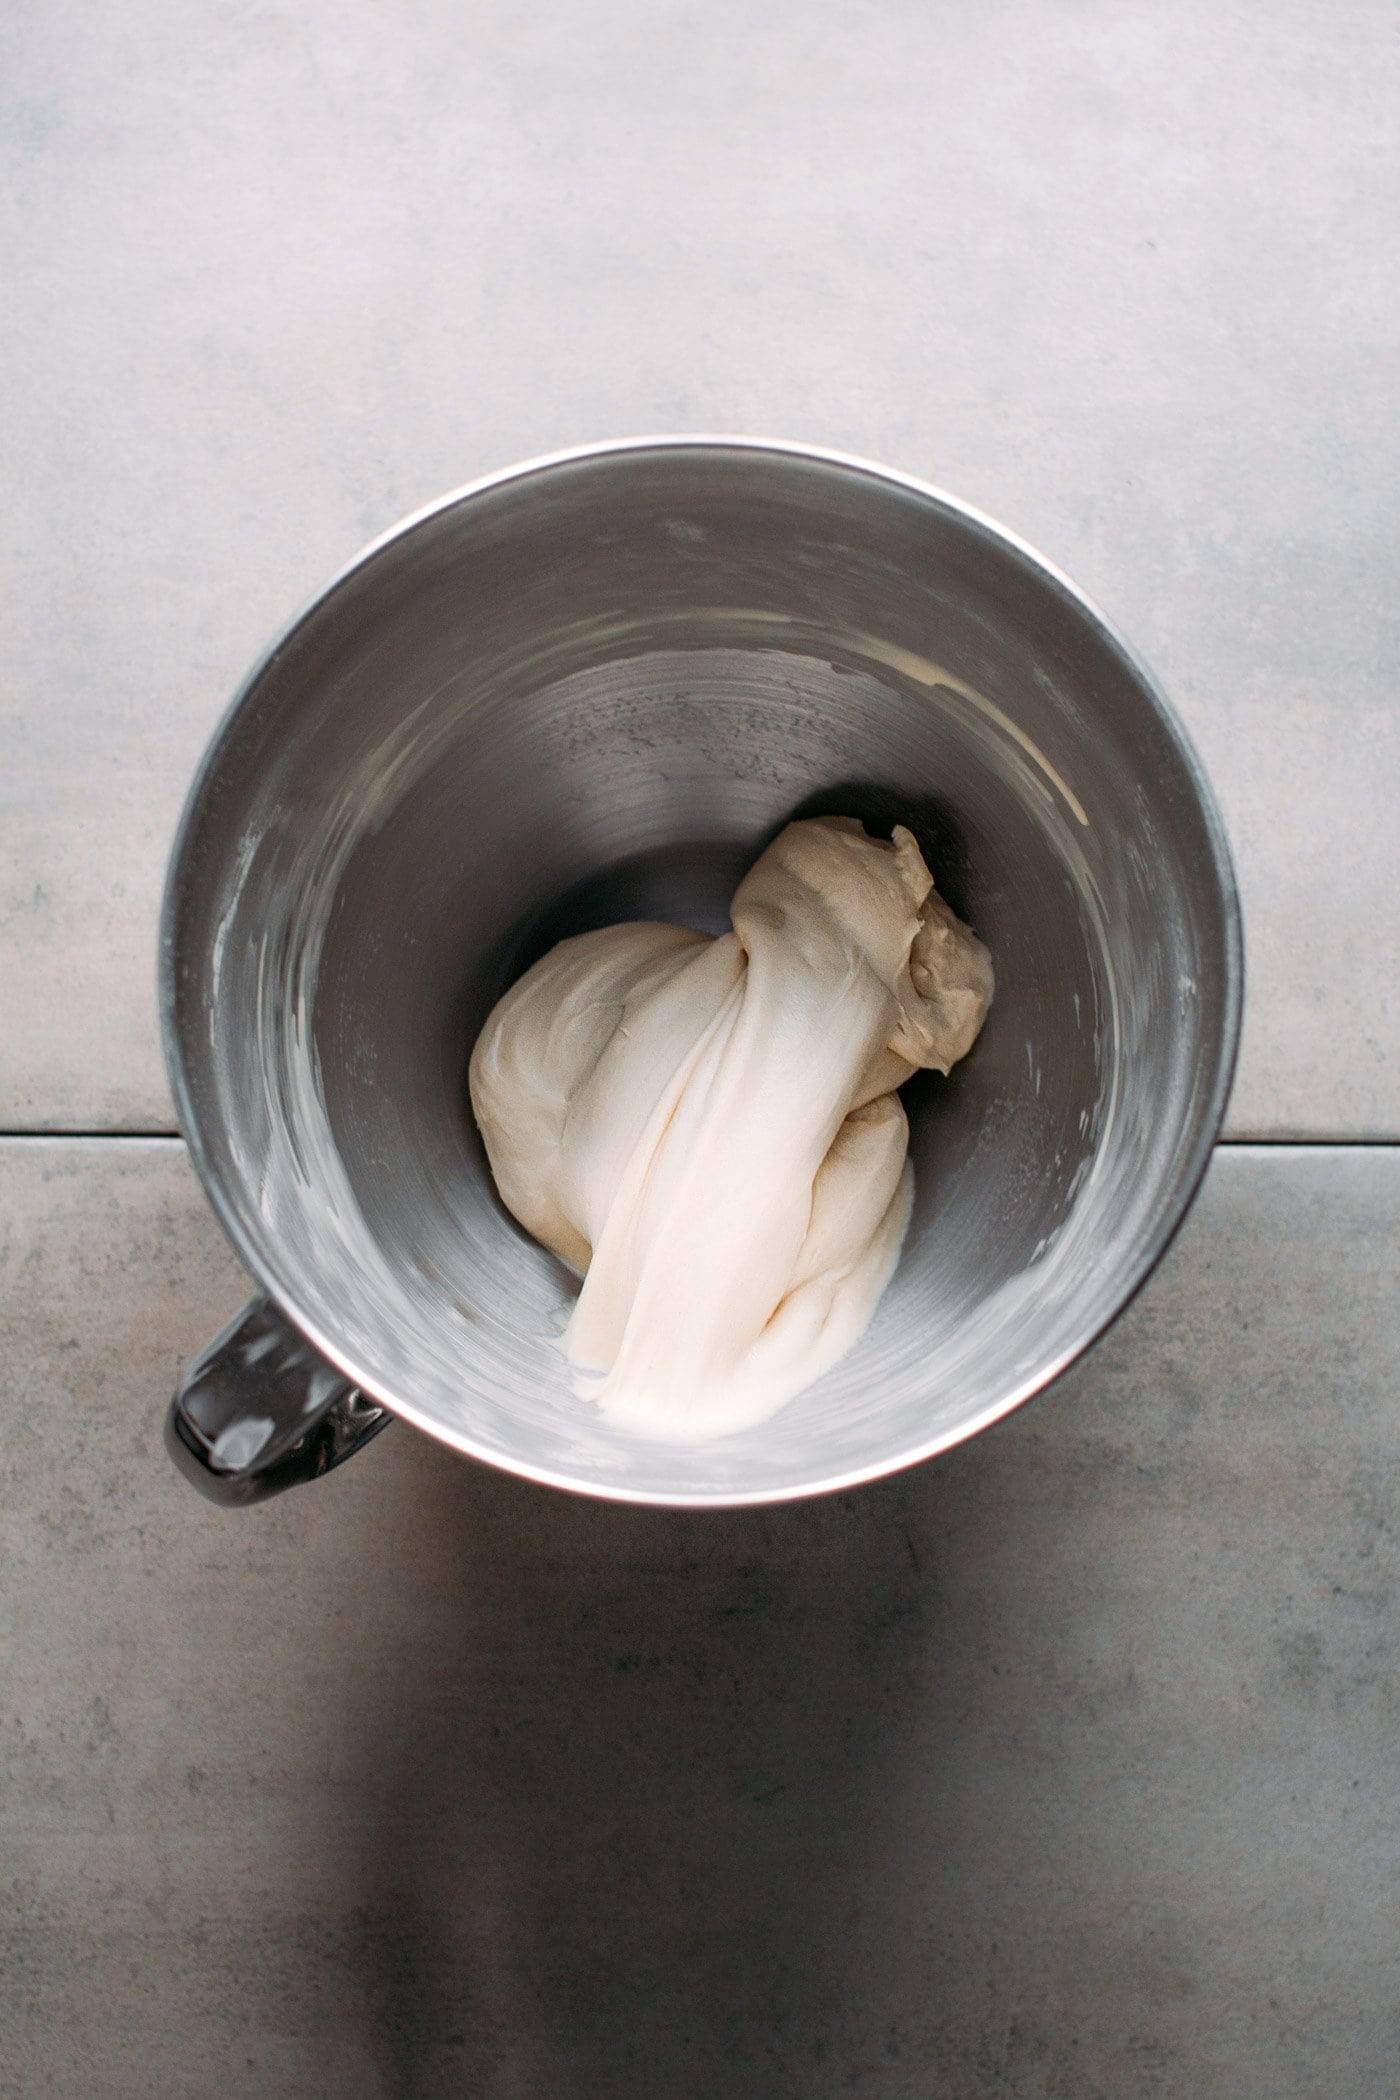
Alright, let’s start! First, add all the ingredients to the bowl of a stand mixer: bread flour, salt, sugar, bread improver, vitamin C, dry yeast, and water. Then, knead at the highest speed for 7-8 minutes.
Once the dough is silky smooth and sticky, transfer it to a greased surface and let it rest covered for about 20 minutes. Then, divide it into either six pieces of about 70g each or five pieces of 84g. I went with 70g as this seems to be the norm for most bánh mì in Việt Nam.
Shaping
It’s now time to shape the baguettes!
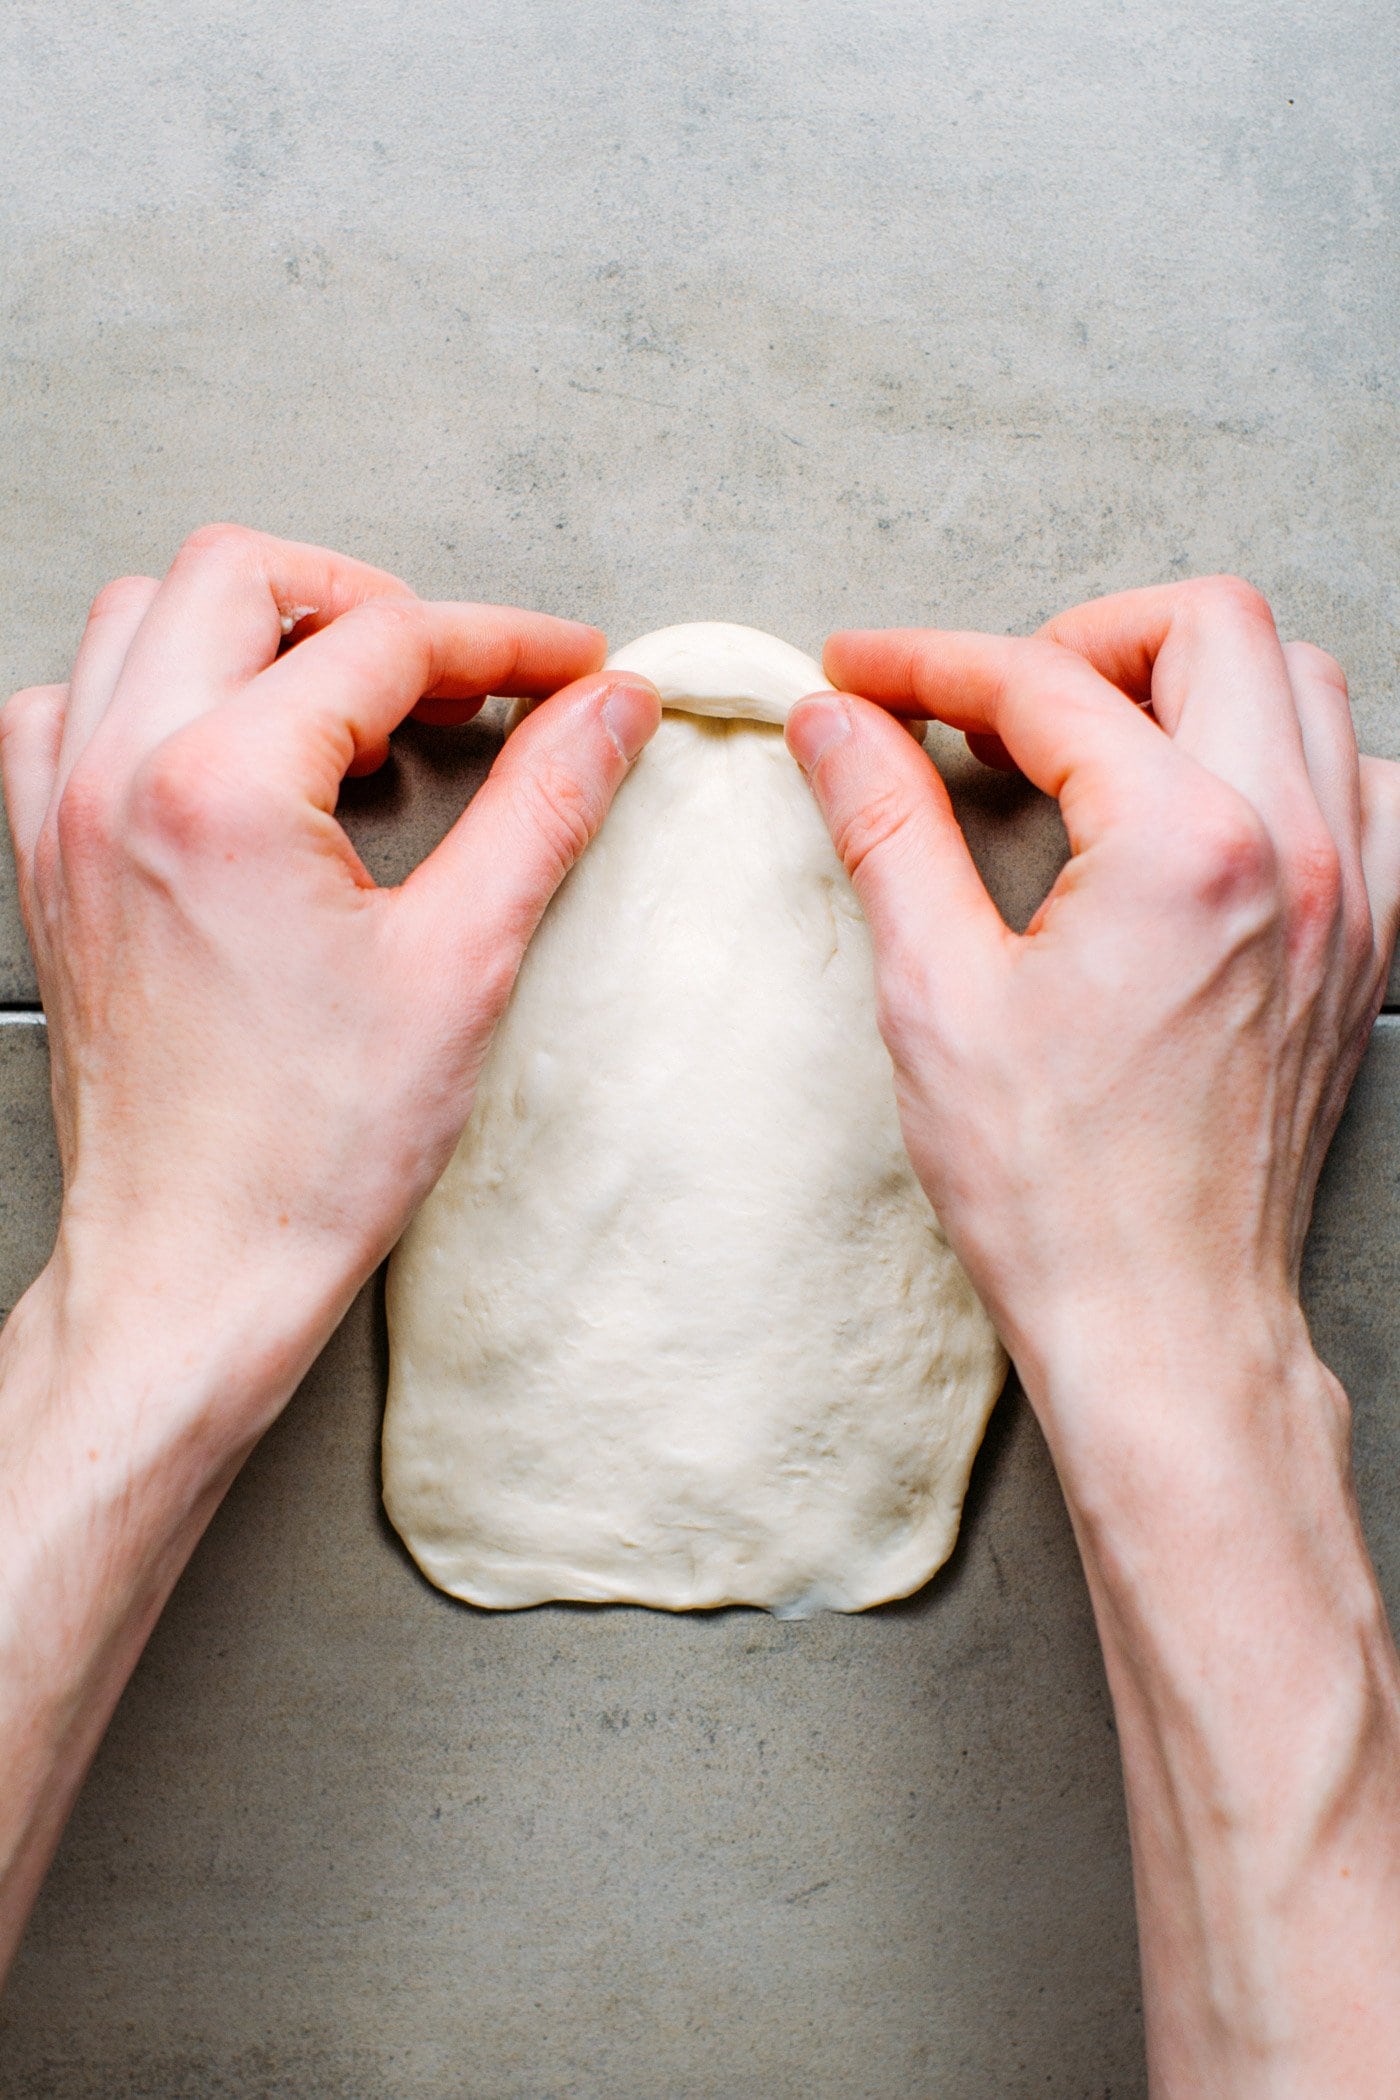
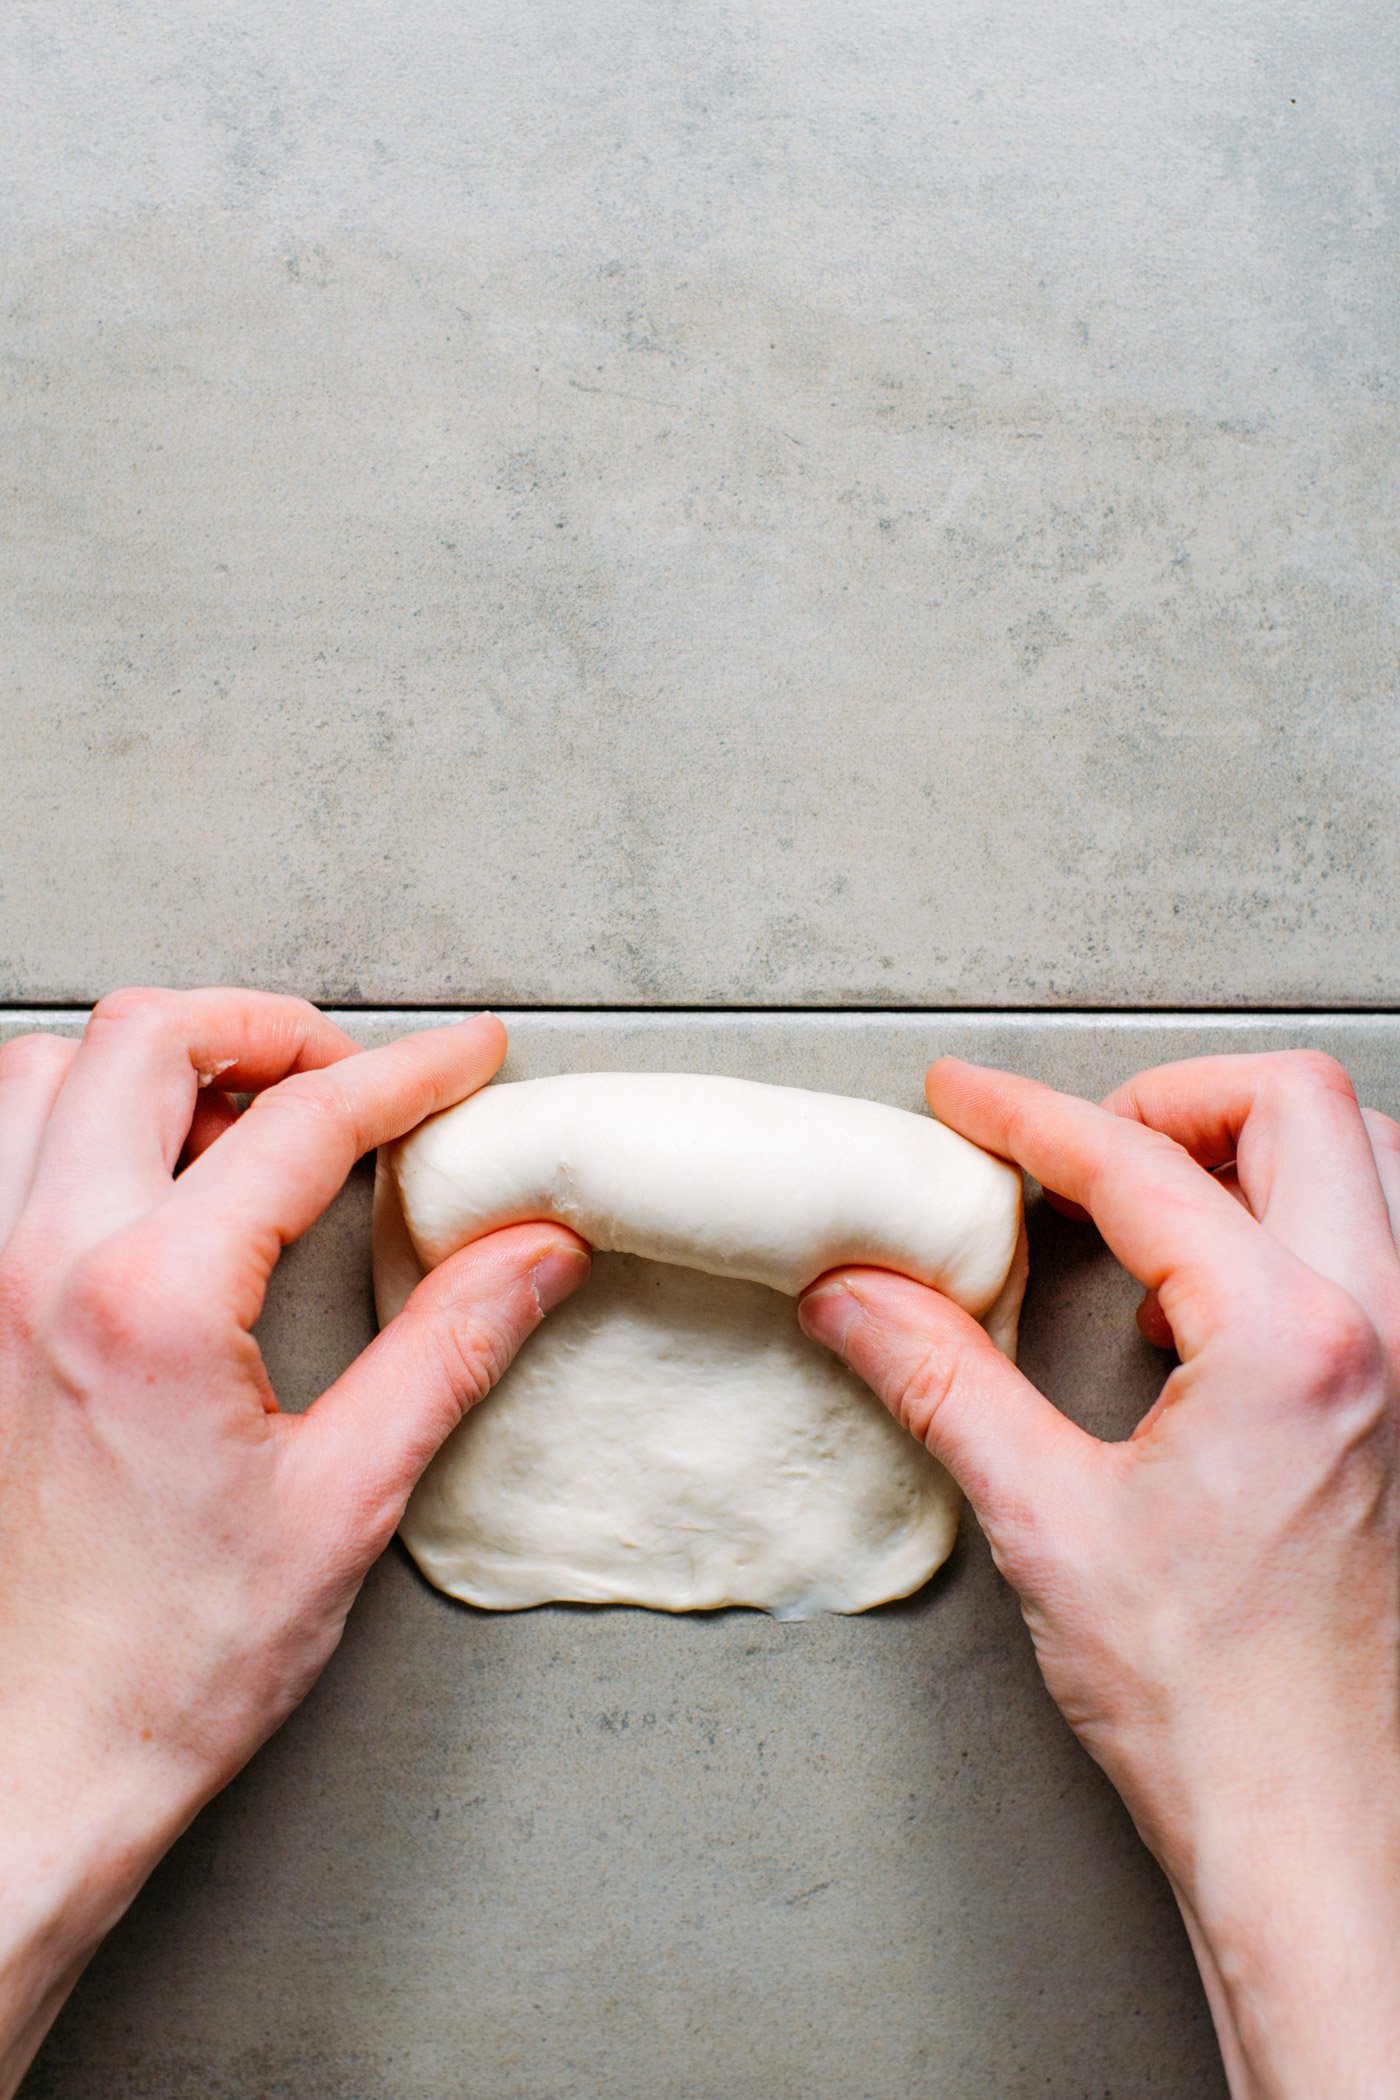
For the shaping, I would recommend checking some videos like this one to get an idea of how to do it. There are different ways to shape your baguettes, you can slap the dough into a long trapeze, then fold it in half, flatten it, and then roll. Or, flatten the dough into a rectangle and then simply roll it. Don’t be too hard on yourself, the shaping will not have a huge impact on the overall texture of your bread. Try to do your best though, but don’t worry, it’s pretty forgiving once they rise as you can see below.
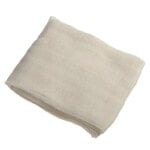
Next, place your little loaves of dough on a greased baguette pan. To proof, I recommend placing your pans in an oven at about 86°F (30°C) with a baking sheet or bowl filled with warm water to keep enough humidity. I had a lot of trouble at first with the baguettes developing a crust and drying out during proofing (a dry crust stops the dough from rising more). To prevent that, you want to cover your baguettes with a wet cheese cloth. Don’t use a kitchen towel as it’s too heavy and could prevent the baguettes from rising well.

After 2 hours, your baguettes should have almost quadrupled in size! Time to bake!
Baking
A lot of moisture in the oven is the secret to that thin crust. Preheat your oven to 475°F (250°C) with an iron skillet placed at the bottom. The skillet will retain a lot of heat, so when you will open the oven to bake your baguettes, it will come back to a high temperature more quickly.
Once your oven is at the right temperature, spray the baguettes with water and score at a 45 degrees angle using an oiled razor blade. Pour boiling water into the iron skillet to create a lot of steam, add your pans to the oven, and turn off the oven fan. By baking with no fan, we keep a ton of moisture inside the oven.
Be careful! DO NOT open the door of the oven during the first 15 minutes; otherwise, your baguettes will slightly collapse. See, the high heat and steam inside the oven make the bread rise, but if you open the door before the crust has set, it will simply collapse, and you will lose that super airy crumb. We won’t spray the baguettes with water during baking as there is already enough humidity.
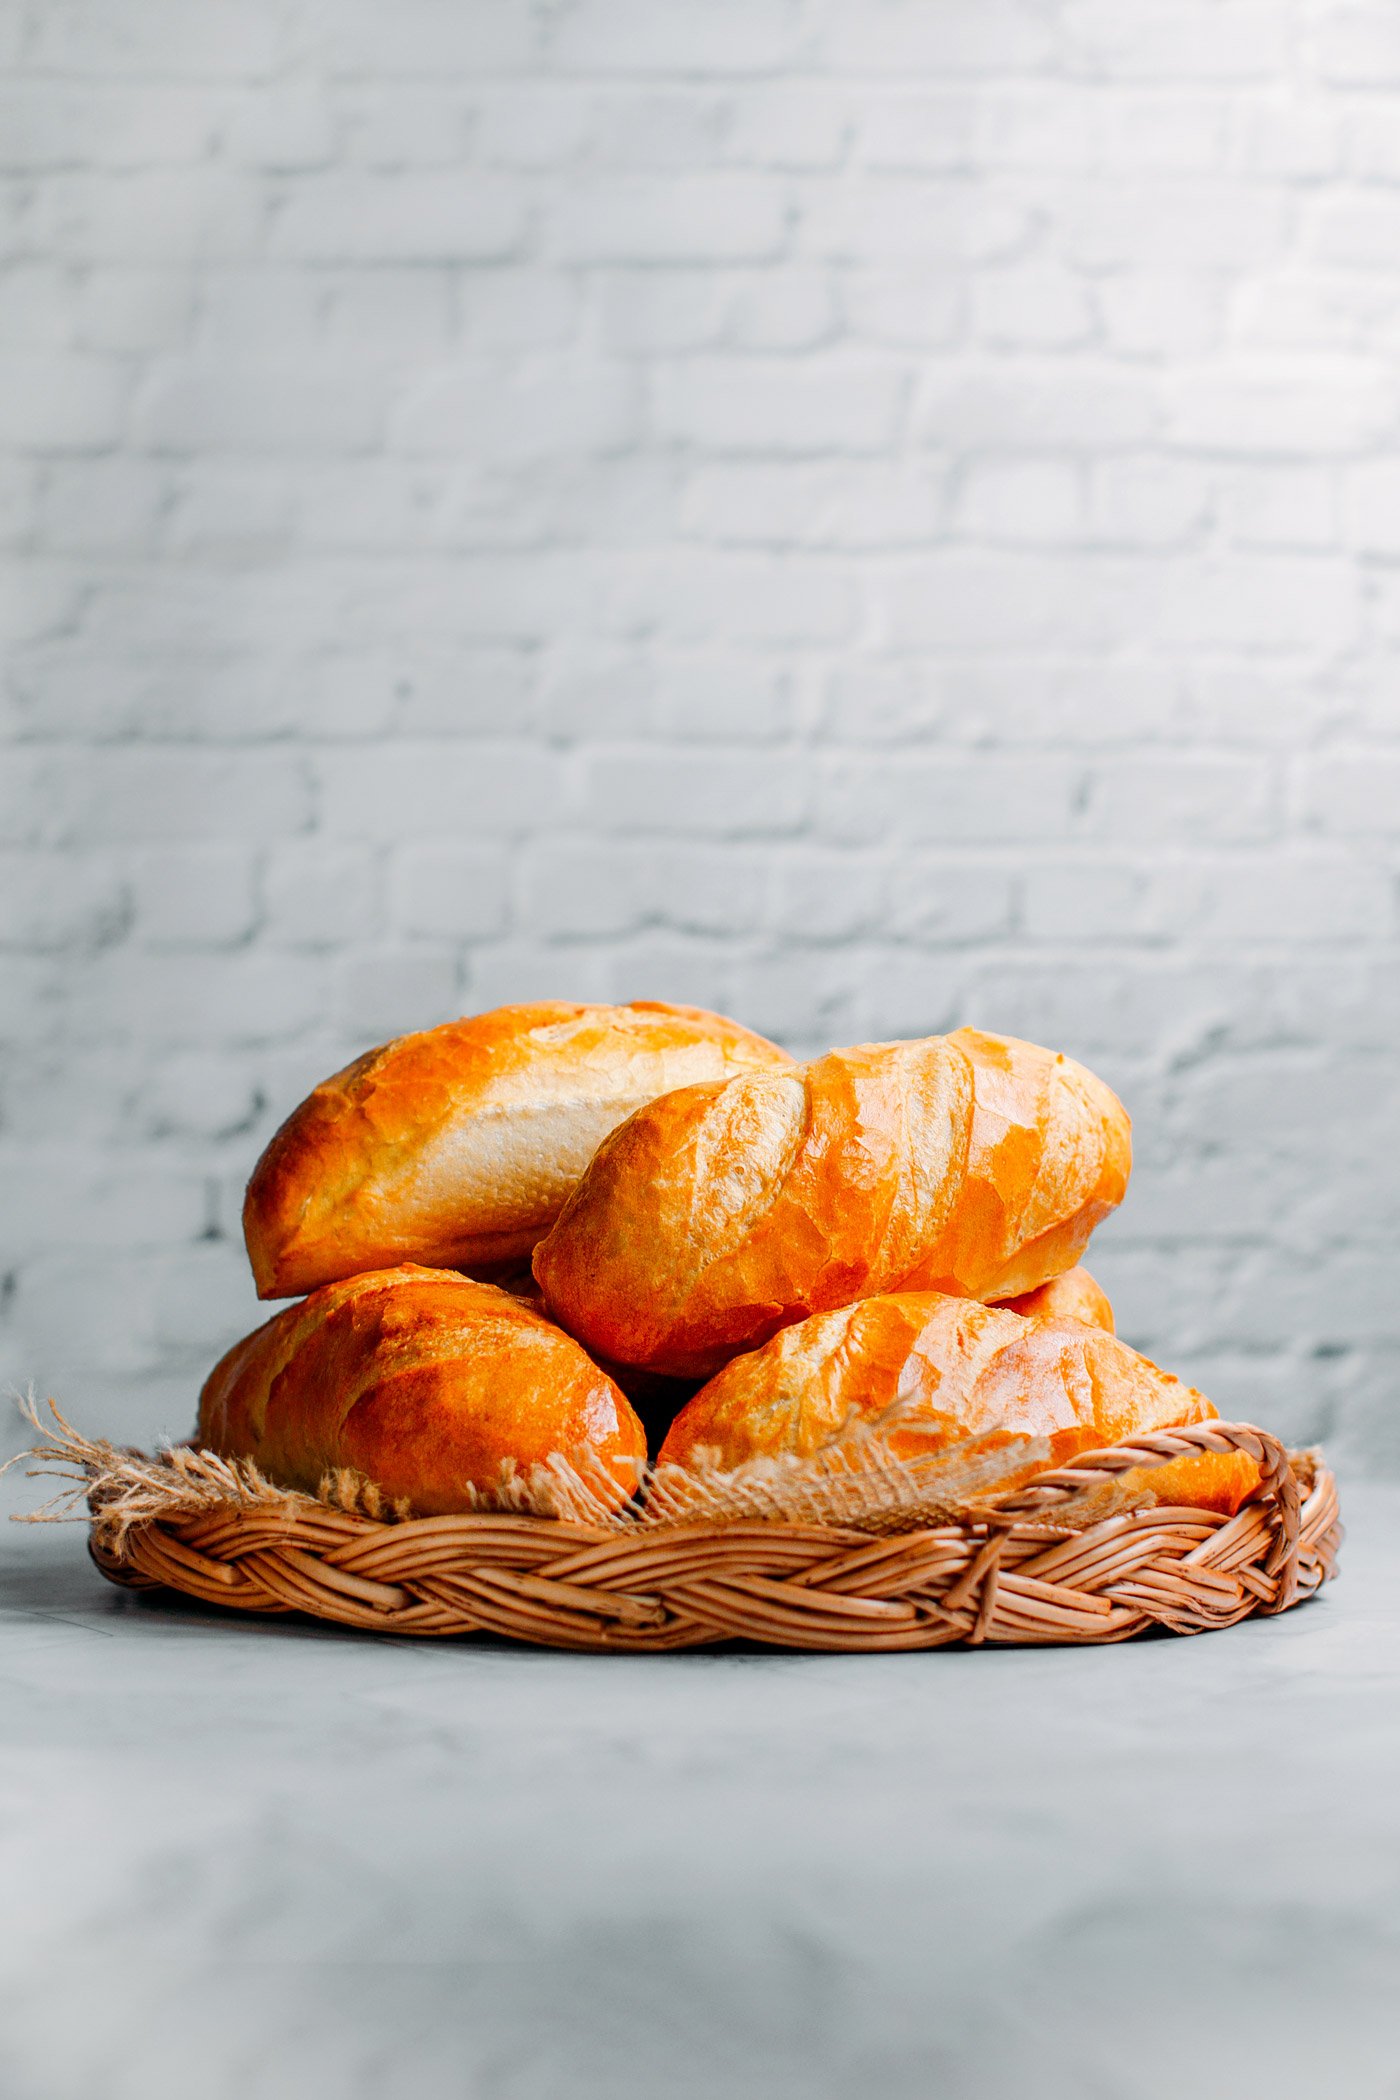
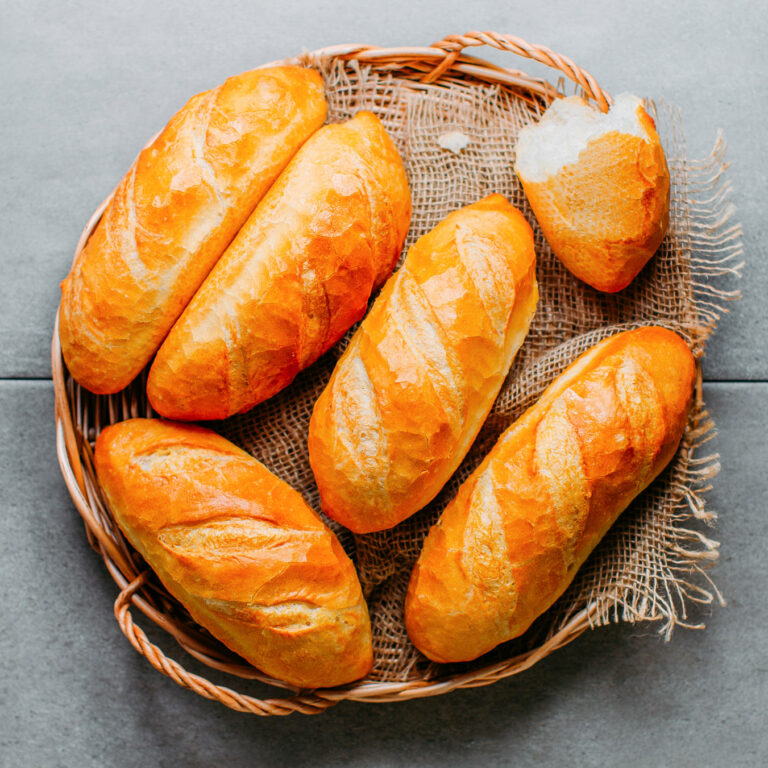
After 16-18 minutes, remove your golden brown bánh mì from the oven and let it cool. You should hear the sound of a crackling fire and see cracks appear on the crust within 5 minutes! Magical!
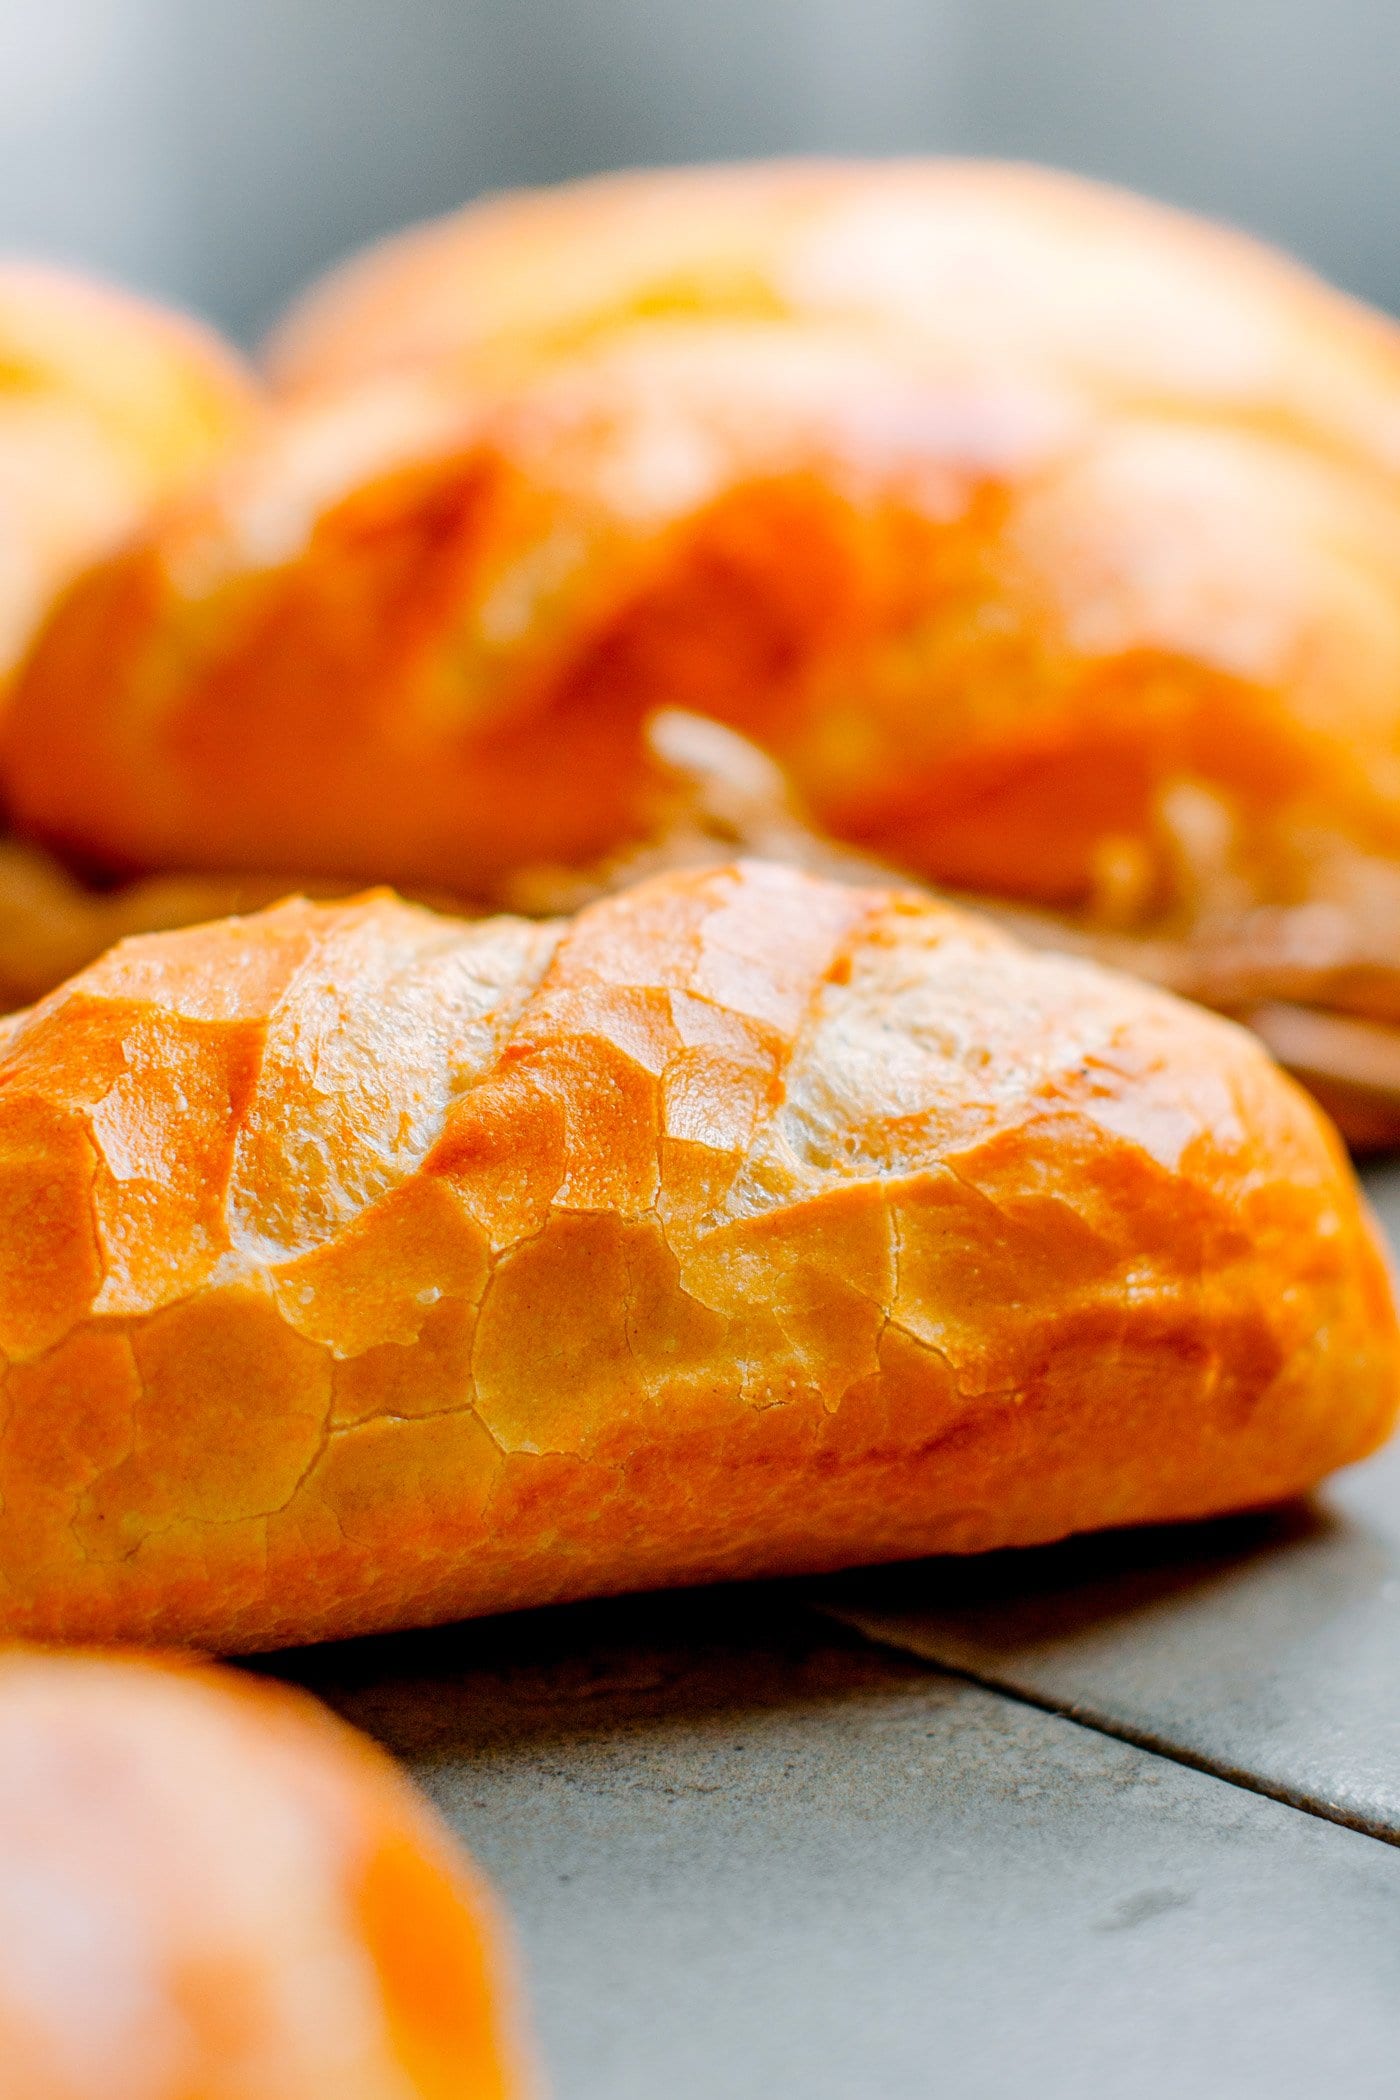
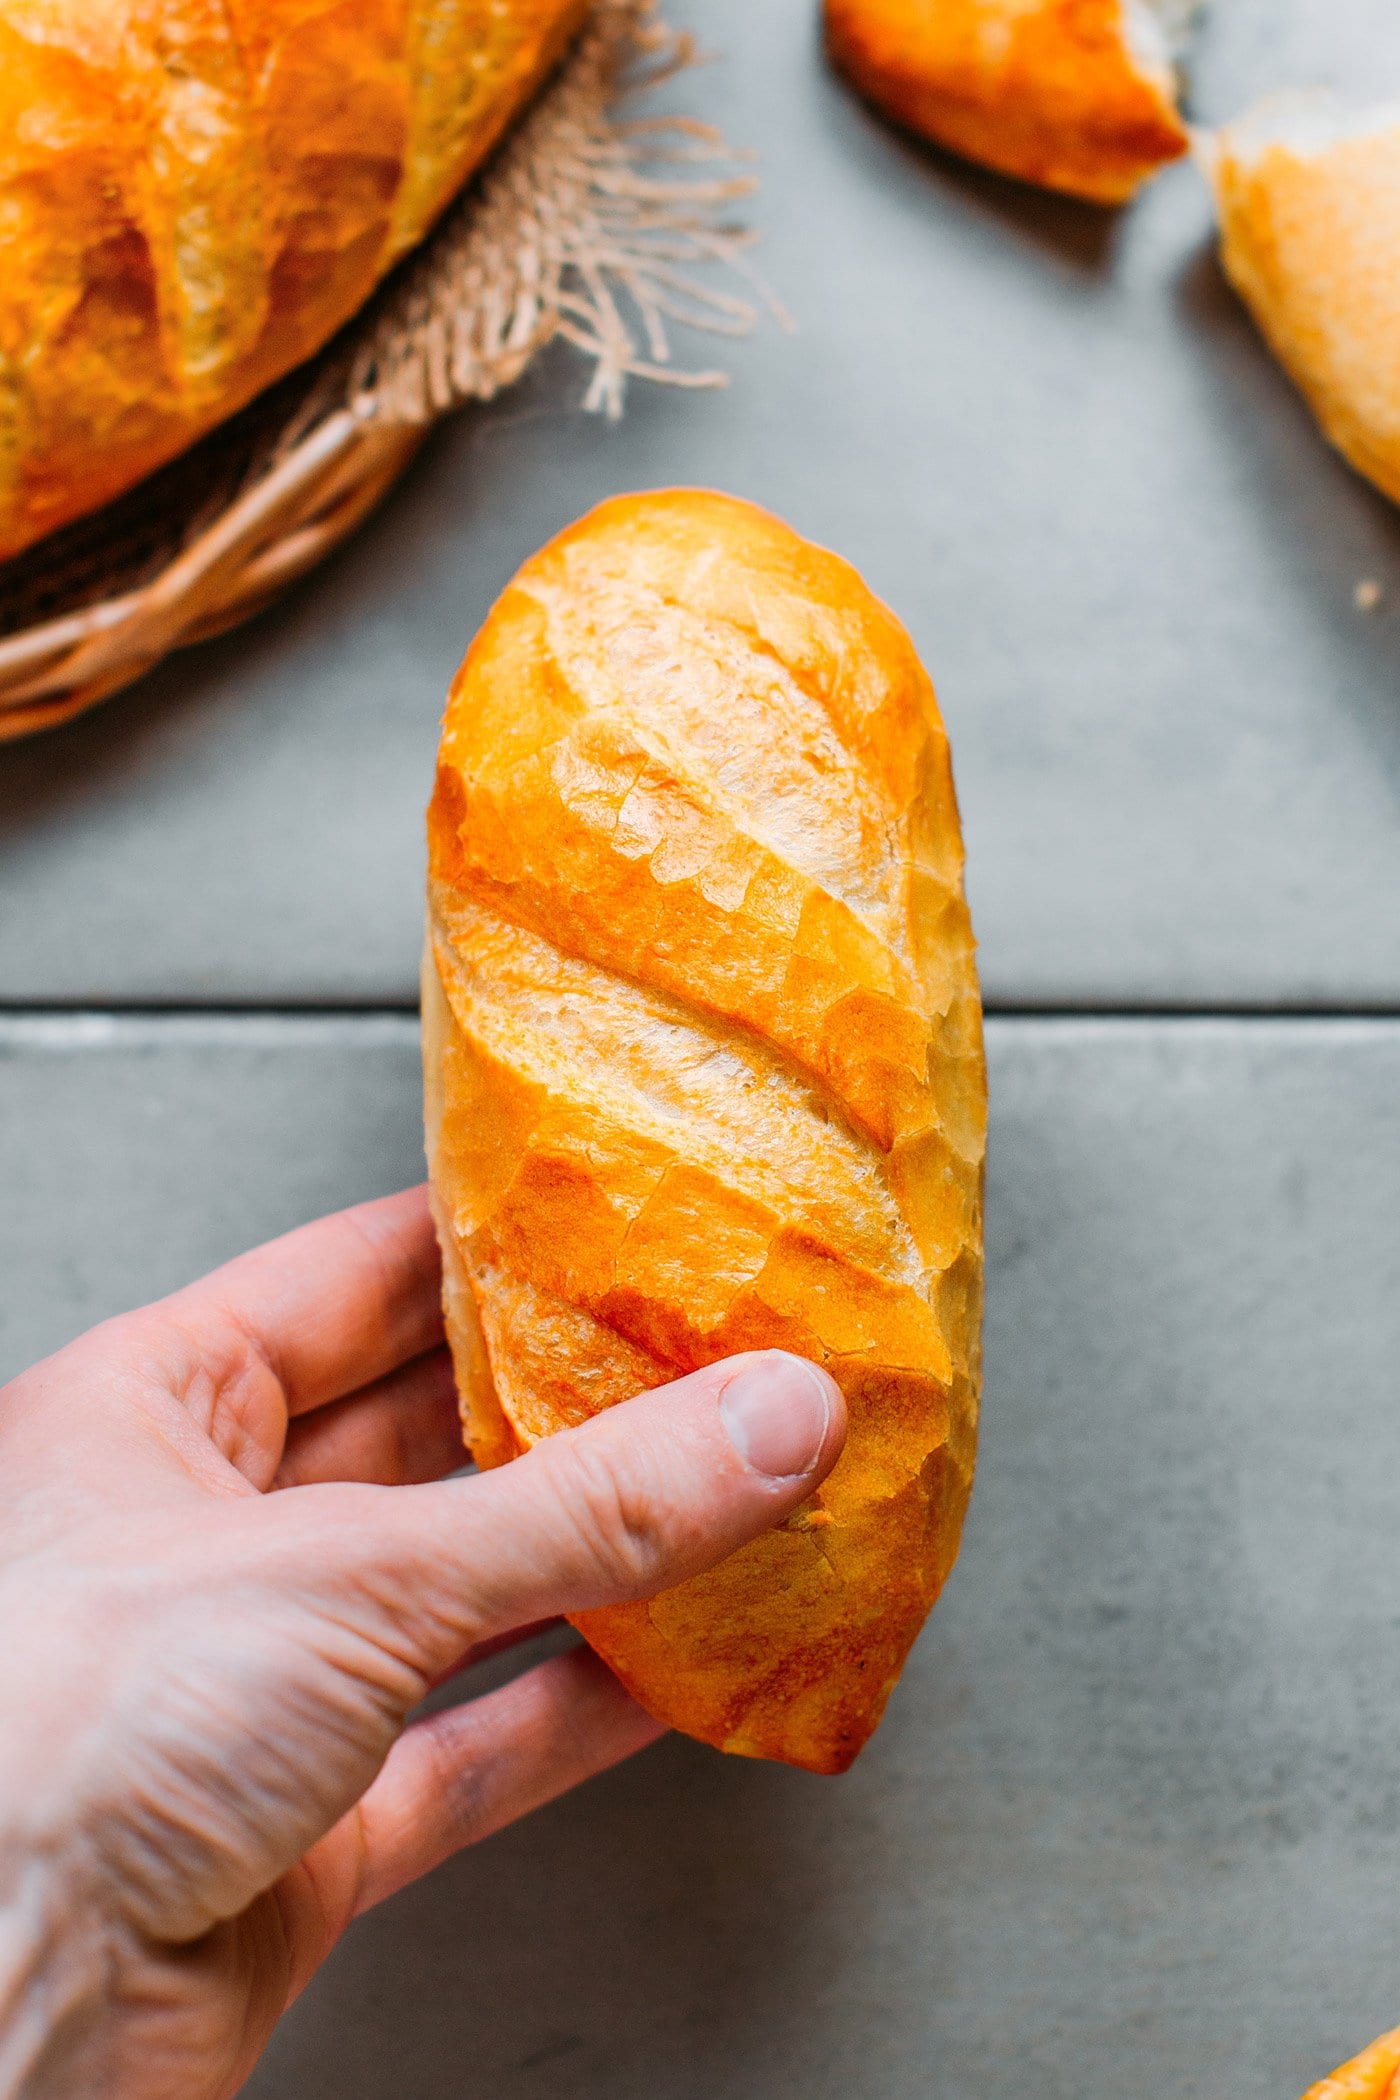
I’m so happy with how these turned out! The crust is so thin and crispy, and the crumb is incredibly light!
I would say the only thing I could not get perfectly right are the ears. I still need to work on my scoring skills. Other than that, these little bánh mì are so close to the real ones! I had my share of bánh mì in Vietnam for almost a year, so you can trust me on that!
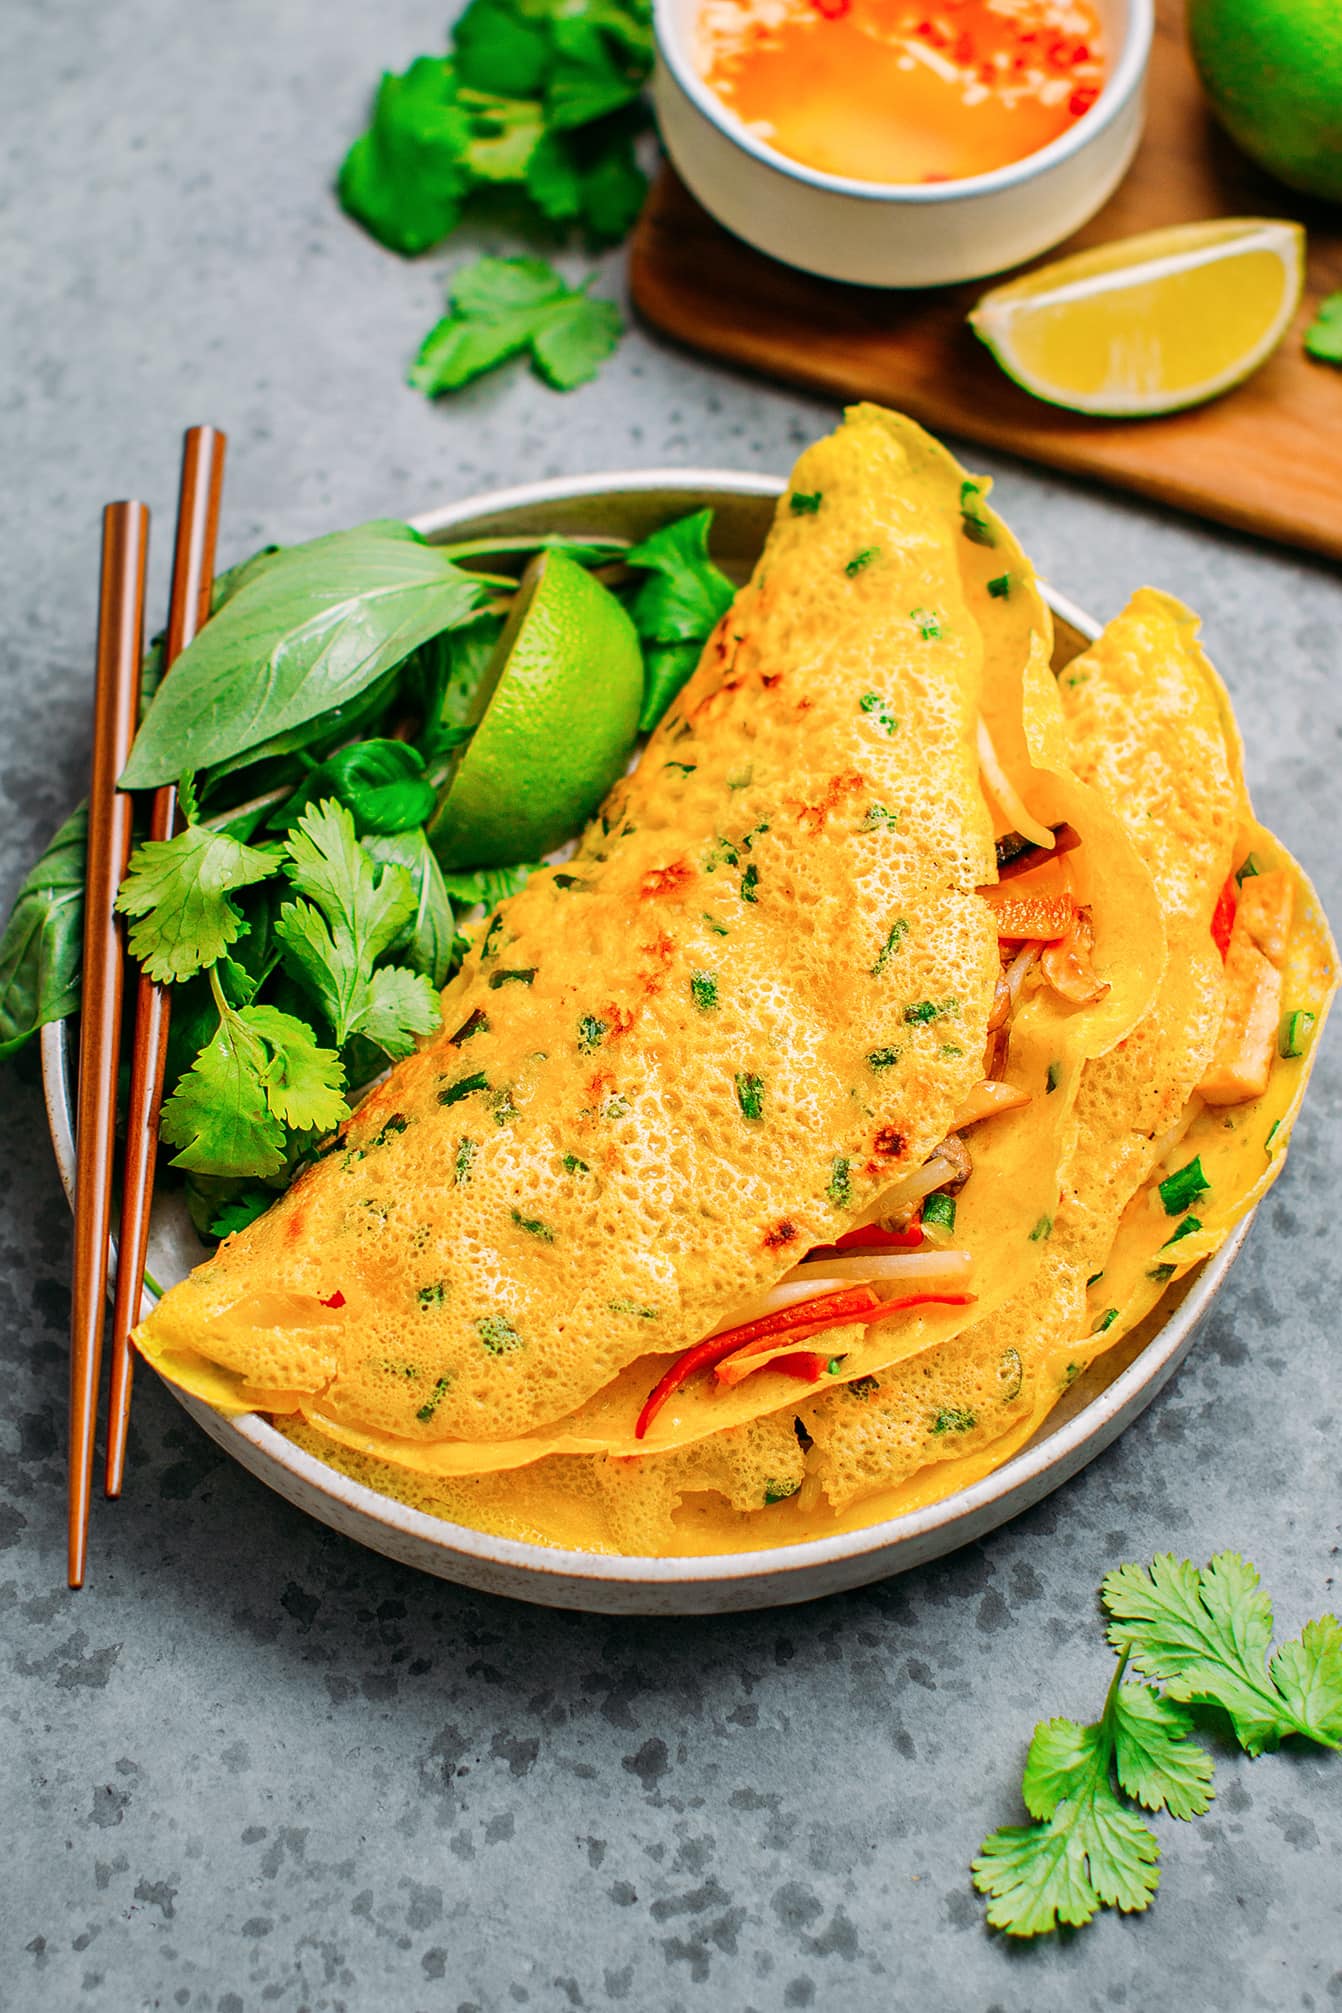
🥖 Where to Use Bánh Mì
Bánh Mì, while served as a sandwich, is usually eaten for breakfast in Việt Nam, although you can have it any time of the day. The vegan versions usually include vegan paté, mayo, pickles, some sort of vegan “meat”, Maggi seasoning, fresh cilantro, Thai basil, and many other add-ins like peanuts, crispy shallots, etc. Here are a few recipes and ideas on where to use Bánh Mì:
- Pulled Mushrooms Bánh Mì: If you want a super meaty and juicy sandwich, this recipe won’t disappoint!
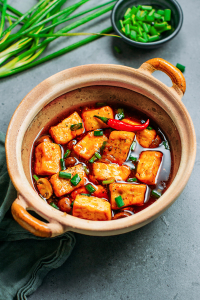
- With Vegan Beef Stew or Vietnamese Curry: Dip a piece of bánh mì to soak up the sauce, yum!
- Grilled and drizzled with chili sauce, mayo, and green onions like in this Spicy Grilled Bread. This works best with 1-2 days old bánh mì.
- Anywhere else you would use bread!
💬 FAQ
Most bread improvers will work here, however, each brand will yield slightly different results. Just for your information, the bread improver that is used by bakers in Vietnam is called S500 Bánh Mì Plus, by the brand Puratos. It contains: Starch (75%), dextrose, emulsifier (E472e), anti-oxidants (E300), enzymes: amylases: E1100.
I recommend enjoying bánh mì the same day for the best texture. After a day, it tends to lose its crispiness.
I hope you will love these little baguettes! SO light and crispy!
🇻🇳 More Vietnamese-Inspired Recipes
⭐️ Did you like this recipe? Let us know in the comments below, and tag us on Facebook, Instagram, or Pinterest!
How To Make Bánh Mì (Vietnamese Baguette)
Ingredients
- 170 ml water at room temperature
- 250 g bread flour (at least 12% protein)
- 1 tsp bread improver
- 3/4 tsp dry yeast
- 1/2 tsp sugar
- 1/4 + 1/8 tsp salt
- 1/8 tsp vitamin C from powder or a crushed tablet
- 2 tbsp vegan butter for brushing
Instructions
- Add the water, bread flour, bread improver, dry yeast, sugar, salt, and vitamin C to the bowl of a stand mixer fitted with the dough hook.
- Mix on speed 2 for about one minute, or until everything is combined. Use a spatula to scrape down the sides if needed. Now, increase the speed to the maximum (10 on a Kitchenaid), and let the stand mixer knead at full speed for about 8 minutes. Keep an eye on it as it will move because of the speed.
- Using slightly oiled hands, transfer the dough to a greased countertop or smooth surface. The dough should be elastic and very sticky, that's normal. Cover the dough with a bowl upside down and let it rest for about 20 minutes.
- Preheat your oven to its lowest temperature (about 86°F/30°C). If it cannot go that low, just turn the oven light on. Place a baking sheet filled with warm water in the bottom of the oven. Grease two baguette pans with an oiled kitchen paper towel and set aside.
- After 20 minutes, divide the dough into 6 balls of about 70g each. This is the regular size of banh mi, however if you want bigger baguettes, divide the dough into 5 pieces of 84g.
- To shape: slap a ball of dough on your greased working surface, then use your hands to flatten it into a thin rectangle. Next, roll it out into a roll of about 5-inch long (see photos and this video to get an idea of how to shape the baguettes). Transfer to the prepared baguette pan and repeat with the remaining balls of dough.
- Wet two lightweight cheesecloth and place them on the baguette pans, this will prevent the baguettes from drying and forming a crust. Place the baguette pans in the preheated oven and let the dough rise for about 2 and a half hours. Check after 1 hour and re-arrange the cheesecloth if needed (since the dough will rise, you might have to carefully remove the cheesecloth and replace it on top so it doesn't stop the dough from rising well).
- Once your dough has quadrupled in size, remove the pans from the oven but keep the cheesecloth on top. Preheat the oven to 475°F (247°C) and place an iron skillet in the bottom of the oven. This will help retain heat better. Let the oven preheat for at least 25 minutes.
- Boil about 3 cups of water. In the meantime, remove the cheesecloth and spray the dough with water. Using an oiled razor blade (or very sharp knife), score each loaf with 2-3 cuts. Tip: Hold the blade at a 45° angle (not perpendicular) and make cuts of about 1/2 cm deep.
- Spray with water once more. Now, place your baguette pans into the oven and pour the boiling water into the iron skillet. Immediately close the oven door and turn off the oven fan.
- Bake for about 17 minutes, or until the banh mi are golden brown. Do not open the door during baking. Once your banh mi have a nice color, carefully flip them upside down and bake for another 4 minutes, or until the bottom is golden brown as well.
- Remove from the oven and hear them crack! Some cracks should appear very quickly, that's one of the characteristics of a good banh mi. If you want them to have a nice shine, lightly brush them with melted vegan butter and let them cool a bit before eating.
- Banh mi are best eaten the same day, the crust is super crispy and the crumb so fluffy! You can keep them for up to 3 days at room temperature in a bread bag. They will become softer the next day, but you can reheat in a preheated oven to make them crispy again.
Notes
Nutrition

About the Author
Thomas Pagot is the founder, photographer, and recipe developer behind Full of Plants. He created the blog in 2016 as a personal cookbook for vegan recipes. Through years of recipe development, Thomas has successfully grown Full of Plants into a trusted resource for plant-based recipes.
🧀 25 Mind-Blowing Vegan Cheese Recipes!
Sign up for the Full of Plants newsletter and you’ll get new recipes delivered by email weekly, PLUS your FREE 100-page printable eBook!
Hello, Thomas! I would love to try this bread recipe. I am will to buy the necessary supplies, like baguette pans, but I don’t have a stand mixer. Do you think I could knead by hand and get the same results?
Hi Molly,
I’m afraid you won’t get great results without kneading the dough at a very high speed. It’s what develops the gluten, allowing for a better rise.
Small correction, it is possible to develop gluten without the speed. it would be to double the time of kneading! So a good work out for your arms Good luck
Thomas
Thanks for posting this recipe.
I have a problem with the total weight of the dough. 150 ml+250g flour equal to 400/6=66.6666
My final dough weight about 320g
I measured everything and no guessing
Your total dough weights suppose to be 420 g in order to get a 70g each
Do I missing something here?
Kindly regards
Hi Emos,
The total weight of the dough should be 170ml + 250g of flour so 420g. I am not sure how you ended up having a dough of 320g by combining that amount of water and flour.
Hi Thomas you mentioned having the kitchenaid at speed 8 out of 10. But the user manual says dough can only be mixed at speed 2 out of 10 otherwise the engine would stop working. I have actually used it as you mentioned at 8 out of 10 for dough and true to the manual the engine stopped working after a few minutes and I had to send the machine for repair. Just wondering which kitchenaid model you’re using and whether that has the same restrictions?
Hi Jacinta,
The dough is very soft, it’s not like a dough for some artisan bread, so the KitchenAid handles it with no issue (at least in my case, and I have made this recipe dozens of times). I am using the basic KitchenAid Artisan.
If yours is a bit older, you might want to take pauses and/or knead it at a slightly lower speed.
I kneaded mine by hand as I have never used a bread maker. They were well risen and tasted good. Just fast knead for 8-10 minutes…. Tedious but worth it.
Try this recipe couple of times now, is working very. But after shaping the dough and let it rising I saw the bubble on the dough plus when I score the dough deflation.
Hi Thomas,
looks great!
Have found mexican Bolillo much closer to Bahn mi that anything french.
Adding 40g gluten per kilo of all purpose will raise 8% to 12%
Dough improver is vit c (tightens the gluten) and all those -ase ingredients are enzymes digesting starch fiber etc feeding the yeast.
Can be replaced with a bit of sugar (inulin works too) and time.
Yeast makes its own enzymes. Slow down rise in fridge overnight for convenience.
Flavor compounds will have a chance to develop too.
A super tight roll up, stretching out dough and rolling with tension, will give a higher rather than wider bun if a special rack isn’t at hand.
Now I’m hungry for one!
Hi Pat,
Thanks! That’s right, Bolillo looks quite similar in shape, however I don’t find the texture very close to banh mi.
I have tried many ways, but without the dough improver I could simply not get the same airy texture, even when adding sugar or increasing the rising time. Vietnamese banh mi rise is done at 30-35°C (according to many videos of Vietnamese bakeries), they don’t seem to use a refrigerator.
Anyway, hope you will like them! 🙂
I’ve been trying to perfect Bahn Mi for almost 12 months.
You’re description of what works sounds very encouraging.
Will try this tomorrow and hopefully it works!
Howdy,
I’m Vietnamese and have tried a few bánh mì recipes from YouTube videos. They turned out quite nicely but still not as airy as I would like. I have to give your recipe a try soon. I’ve been into sourdough baking lately and use a dutch oven with a lid to produce steam. I wonder if that would work better for bánh mì. Of course it’ll be harder to bake multiple loaves at once. Have you ever tried adding sourdough starter? My goal is to make a light and crispy sourdough bánh mì, if that’s even possible. I would love to have someone to bounce ideas around with.
Hi Linh,
Yes, these videos will give you a French type of bread, even if they call it bánh mì, it’s quite different from the one you get in the streets.
The recipe I’m giving here will for sure give you the result you want: very light and airy. If you have access to it, you can even get the bread improver they use in Viet Nam, the brand is Puratos (get the S500 bánh mì plus).
I have never tried using a sourdough starter, so I cannot say for sure.
This looks fantastic! I’ll be trying it as soon as I get the bread enhancer nailed down.
I’m looking at how to either make some or buy a US brand (many of which, unfortunately, contain whey.) I see recipes for mixes of soy lecithin and or flour, vital wheat gluten, fruit pectin, ascorbic acid (already in your recipe) and other additives…even ginger powder.
Have you experimented with making your own?
Thanks Bev!
That’s correct, most bread improvers contain soy lecithin/starch, an emulsifier, and enzymes like amylase. I haven’t tried making my own as it would require buying all the ingredients separately and in larger amounts. If it can help, the one I use contains: starch, dextrose, emulsifier (E472e), anti-oxidant (E300), and amylases (E1100).
I made these today, after I mixed up my own bread improver from vital wheat gluten, soy milk powder, soy lecithin granules, pectin, ginger, and some vegetarian rennet. (Yeah, I had all these items in my pantry.) I only added 1 tsp. to the recipe. So, once I can verify that I have made baguettes to your specification, I’ll share those proportions.
The problem is with your instruction to turn off the oven fan. I said, “Hmmm….my oven doesn’t have that feature unless I switch from convection to regular. Does he mean shut the oven off and let the oven heat and cast iron skillet do the baking?” That’s what I did. Oops. Failure. So, I pulled the baguettes out (yes, they had quadrupled in size in about 2 hours) let the oven come back up to temperature and finished baking. So they aren’t perfect but they are edible. All this is to say, what do you mean by turning off the oven fan?
Regarding the oven, you definitely don’t want to turn if off. What I mean by turning the fan off is to put your oven on the mode where the heat comes from the top and bottom without ventilation. On my oven it’s called “Traditional” while the mode with the fan on is called “Traditional Pulse”. I think those modes are available on most ovens.
Hope your baguettes will turn out better next time Bev 😉
The taste of the bread is great , my bread did not have volume, inside was airy, but when was in resting time the towel glued in the bread and made the bread down in volume, and tips for the towel not glue I will do again.
Steph
Did you use the exact ingredients listed in the recipe?
Also, spray the towels with more water (using a spray bottle) before trying to remove them. It will make it much easier to remove the towels, and they won’t stick to the dough.
Hello again,
I baked another batch, and 475 was too hot. They were very, very brown after 15 minutes. I know my oven temp is correct because it was recently calibrated. I’ll try 450 next time. However….they did crack! Hooray!
I think the US is behind Europe as regards ovens (and cars!) My range/oven is one year old and a highly rated brand. It has Convection (the fan) and Bake (along with other fancy features.) We don’t have ovens with Traditional and Traditional Plus.
Well, each oven is different so you might have to adjust the temperature or reduce baking time a bit. Glad you had the cracks!!
We do have fancy features too on new ovens 🙂 Mine is not that recent, but I think what they call Traditional Plus is actually convection.
Try this recipe couple of times now, is working very. But after shaping the dough and let it rising I saw the bubble on the dough plus when I score the dough deflation.
Are you using bread improver? I am guessing you could try using a different brand of improver and/or reducing slightly the rising time.
Yes, Scratch Premium Dough Conditioner. I think I over-measure the yeast. Plus my oven max 450 F. It’s almost there, just the outside look. Very helpful thank a banh!!!
Would love to try this recipe but the link for the dough improver shows it is out of stock – any ideas for a substitute or replacement?
Sorry about that! You could try asking some bakery around if they can sell you some, or look online for another bread improver.
Thank you Thomas for this bánh mì recipe! I’ve been baking my own bánh mì for ages and the bánh mìs I’ve made are comparable to those at the bánh mì shops in Little Saigon, but those are nothing compared to these!
These can only be described as authentic Saigon style bánh mìs! Cottony light inside with a shatteringly crispy thin crust on the outside. I haven’t had anything like these since my childhood in Vietnam. Even back then, we only ate the crust and not the inside! That is precisely the reason why a good bánh mì is one that is feathery light with most of the weight belonging in the crust!
Since I didn’t have any bread improver, I improvised and replaced one for one some of the water with one tsp each of plain yogurt, oil, and dry milk powder. I also didn’t want to burn out the motor of my cheap non-KitchenAid stand mixer by kneading at the highest speed so I used the bread machine’s full dough cycle and only finished the last 4 minutes of kneading in the stand mixer at medium speed. 14 more minutes of kneading time compared to yours and the mixer was only slightly warmed. However, the finished dough did pass the windowpane test without any issues and the rolls rose up beautifully during proofing!
I only needed an hour and a half of proofing for the rolls to quadruple in size. So from start to finish, it only took me a little over two hours before I got to enjoy these awesome bánh mìs. Well worth the effort, and I successfully made these on the first try! This recipe is a keeper!
Thank you again for spending all the time researching this recipe and sharing it with us!
Luc
Thanks so much for your feedback Luc! I definitely wanted to make sure these were like the ones I had in Saigon, as you said the super light crumb is essential for an authentic bánh mì!
I’m glad you liked this recipe! 🙂
Made this three times to the tee every time and checked the yeast. All three times the dough didn’t to 4 times it’s normal size or while cooking. So the crust was great but crumb was to dense as the bread didn’t rise??? Soo frustrating Are you sure it’s only 3/4 teaspoon of yeast?!
Are you using a high-protein flour as well as the bread improver? Yes it’s only 3/4 tsp of yeast, and the crumb should be super light. Do you also let it rise in a warm place?
Yes to all
Then I’m not sure what went wrong. The ratio and ingredients noted on the recipe are correct and I tested this recipe times and times again.
Do you also keep the baguettes covered with a thin wet cloth? As if it dries out and forms a crust, it cannot rise well.
Your yeast could be old or dead! If you use active dry yeast, it’s best to activate it first in a bit of warm water. I hope this helps
I’m gathering the ingredients to try this at home. My market has instant yeast or rapid rise yeast. Is there a specific yeast that you should be used?
Here, in Europe we don’t have those, so I just used regular dry yeast for bread.
I researched he different yeasts and my understanding is that active dry yeast is what I’m looking for here in the US. Active dry yeast shouldn’t require proofing before mixing with the dry ingredients. But I found that it’s necessary for this recipe. I used Fleishmanns yeast and tried one batch without proofing the yeast first and it came out dense and flat. So my next batch, I mixed the yeast in slightly warm water and let it proof for 10 min until the liquid foamed. Then I added the yeast to the rest of the ingredients for kneading. That allowed for the dough to rise. Maybe that was what your other reader, Ryan experienced.
To compare, I use the same yeast for pizza dough, it has a coarse consistency. It does also foam when you mix it with warm water, but doesn’t necessarily needs to be dissolved to work well. I hope you will have success with the recipe!
It came out great! I did not get the cracks BUT the crust is super thin and cruchy! This ones going into the saved recipe box!
Thanks for your feedback Elissa!
If you didn’t get cracks, it’s probably because there was not enough moisture in the oven (or on the loaves), maybe next time try to spray a bit more water.
Hello, I cannot wait for the dough improver to make these gorgeous little baguetts. So with that said. I do have the vitamin C (is it the same as citric acid)? Can I use vital wheat gluten in place of the dough improver? I am dying to make these things.
Hi Beth,
Since this recipe is not versatile, I would really recommend sticking to the same ingredients and process. I doubt vital wheat gluten will work well. Dough improver also helps the bread rise for a longer period of time, giving the bread a super light crumb. Gluten won’t do that.
Hi
Great recipe, I have tried different recipes over the years and this is the best. Very Light in texture, crunchy on the outside just as I rember them when in Vietnam years ago. I classed it 10 /10. Thankyou.
Hi Chris,
Thanks! So glad you liked this recipe! 🙂
Hi Thomas
This is a wonderful recipe for bahn mi, and have made them a few times now. Rolls are light fluffy and crispy on the outside. My only problem is they get quite high when they are proving and the skin on them is very soft, when I slash them with a razor they deflate. I have them in my oven at 30degrees with a moist cloth over them for 2.5 hrs, there is a dish of warm water underneath as well. It’s like they are very delicate. Any suggestions on how to have a more firmer skin on them whichay stopp them deflating. Any help would be appreciated.
Cheers
Chris
Hi Chris,
You’re welcome! Regarding your problem, yes, the bread very slightly deflate when you slash them but should puff back very quickly once you put them into the oven. If you want a “firmer” texture, I would recommend trying a different brand of bread improver, not all are equal. Some will make the bread rise for a longer or shorter period of time, some will give more structure to the crumb, etc. For information, most bakers of bánh mì in Viet Nam use the bread improver S500 Plus from the brand Puratos. In case you can get your hands on this one, you should get even better results.
Hi
I am not able to get the the crackle and cracks on the bread.
Do you pour boil water into skillet and immediately put in the bread pan middle section of the oven?
Also in the process of backing, air comes out of the oven tends to smell a bit sour.
Bread turns out still nice.
Hi Maria,
Yes, I usually quickly open the door of the oven, place the baguette pan and immediately pour the boiling water into the skillet (it sizzles). Regarding the sour smell I have never experienced that, I would guess maybe you are smelling the yeast, or some kind of odor from the iron skillet.
Hi,
High protein flour is not available here in Mauritania. But we do have french flour which is the T55 and T65. Which one should I be using? Also, I couldn’t find bread improver. But I manage to buy a 2 in 1 dry yeast and bread improver combined. How much should I use?
Hi Aiza,
I would recommend checking the nutritional value on the bags of flour, it really depends on the brand. Aim for at least 12-13g of protein per 100g.
Regarding the improver, I am unsure about this as I have never used this type of 2-in-1 product, go with the recommended amount on the package instructions.
I have a steam oven with a dough proving setting. it injects steam whilst proving so I assume I don’t require the cheesecloth? I also cook at about 240c with steam as that’s as high as the oven goes.
One question, do I add all the dry ingredients first including the improver and yeast, mix and then add the water?
Hi Paul,
I’m afraid I have absolutely no experience with steam ovens, so I cannot say, sorry.
You should add the water first, it will mix in with the dry ingredients better.
hi.. I’m trying to bake the banh mi.When i proof the dough, i cover the perforated tray with a wet towel. sadly after an hour.. my towel was sticking to the risen dough. Any recommendations on this??
My dough is placed in the oven with a tray of hot water bath. Proof for an hour in the oven.
Hi Jacqueline,
First, I would highly recommend using some thin cheesecloth instead of a kitchen towel. It’s lighter, allowing the dough to rise better, and it also doesn’t stick like a towel.
Here is one tip to remove the towel without the dough sticking to it: Spray the towel with more water (using a spray bottle) before trying to remove it. It will make it much easier to remove the towels and they won’t stick to the dough.
Thank you, Thomas for the tips. The banh mi bread was airy and light as compared to my previous trials. My family like it when i served it earlier with peanut butter.
I will try to improve on my baking in future. (^_^)
That’s great! 🙂
Thomas I see many traditional cooks spreading a little oil on top of their dough before covering (their traditional local breads). Sounds unnecessary from your answer, but would it affect the recipe?
I don’t think it would really affect the recipe, as long as you don’t over do it.
Hello! I am excited to try this recipe! I was wondering if traditional banh mi recipes are vegan?
Hello Cindy,
Not all bakers in Viet Nam use the same recipe, so I would say it depends. Those who brush the baguettes with butter probably use margarine which is cheaper there. Some add some kind of fat powder, I’m not exactly sure what is inside, if it’s made from plant-based ingredients or not. Overall, yes, I would say most bánh mì are vegan.
The BEST Vietnamese baguette recipe ever! Hands down!!!! I’ve been searching for a recipe that made bread as good, if not better than the local bakeries (and we have great bakeries here) and this is it. Thanks so much, I’m sharing with everyone.
I’m so glad you liked the recipe Jacquelyn! 🙂
Thanks for your feedback!
Hi Thomas:
We tried this recipe and it is fantastic even without the bread/dough improver!!!!
As the link to the improver is dead and there are a billion improvers on Amazon — all similar but each different, could you share the ingredients of the one you use please?
Hi Nick,
Glad you liked the recipe! Yes, I shared the ingredients in a previous comment, the bread improver I use contains: starch, dextrose, emulsifier (E472e), anti-oxidant (E300), and amylases (E1100).
And if you want to use the exact bread improver they use in Viet Nam, it is called S500 Plus from the brand Puratos. Hope this helps!
Thanks Thomas: I was able to order that improver on Amazon.
for the readers Info: do not use crystalline Vitamin C instead of powder unless you know how to adjust the quantity (more crystalline)
Can the dough be made the day before? That would simplify when making these for company or a large group. Thank you.
I haven’t tried it yet, but I guess you could prepare it the night before and bake in the morning.
Hey,
Gave this a try. Really happy with the result. With practice it’ll get better I think. Fluffy inside, crisp outside, but deflated.
I think it’s deflated because when slashing the dough I seem to be dragging the blade through rather than slashing. My blade is super sharp (surgical scalpel).
My dough is fairly tacky (not sticky). So the blade seems to drag, but not really pierce through. When I try to pierce I seem to deflate the dough.
Any ideas or tips???
Hey Gary,
Glad you liked the results! Yes, it can take some practice to get it right.
Have you tried slightly oiling your blade and spraying the dough with water before slashing? It usually helps prevent the blade from dragging the dough.
Regarding the fact that they deflate, it is normal they just very slightly deflate after scoring. If they deflate too much, it can be due to a too long rise (or the bread improver used is not the right type for this recipe). Some bread improver will be stronger than other and will allow the dough to rise for a longer period of time.
So I’m thinking, if anyone could tweak a gluten free version of this old favourite, it would be Thomas. But it sounds like all roads lead to wheat..
I’m afraid this type of bread is so light, a gluten-free version sounds like mission impossible 🙂
Hi, since I cannot get flour with more protein, does it work if I add pure gluten flour to the normal wheat flour and thus increase protein amount? 😀
I haven’t personally tried, but I guess you could replace a small percentage of the flour with vital wheat gluten to get the correct protein percentage.
This has been extremely helpful, I really appreciate all the work you and your translators have put into making this. Honestly it boggles my mind that virtually every banh mi place in the UK defaults to Sainsbury’s level stodgy baguettes (or occasionally some kind of sourdough which is even worse).
Something that occurs to me after making them, though – have you ever tried a Scottish crispy morning roll? Apart from the shape, I think they’re actually pretty similar – soft to the point of being almost insubstantial on the inside, and crackly on the outside. There’s a couple of well-like banh mi shops in Glasgow and I wonder if they wouldn’t do better to use those for their sandwiches rather than the baguettes they’re currently using…
Thanks for your feedback Paul!
I agree, what those places are selling is very far from authentic banh mi.
I have never tried Scottish morning rolls though, so I am not sure, banh mi seem a bit more crumbly that these.
Hi Thomas!
I’ve tried this recipe a few times, but can never get a puffy banh mi in the end.
Every time I score the baguette with my well-oiled razor it deflates it significantly. Also my wet cheese cloth keeps sticking to the baguette during rude time and it also deflates it after I have to peel it off from the surface of the bread.
I end up with really delicious but rather flat, disk loaves! I am so close to executing your recipe successfully but would love more help with my mistakes.
Any tips? Much appreciated!
Hi Linda,
I’m sorry to hear you are having trouble with this recipe!
First, if your cheesecloth is sticking to the dough, simply spray it with water using a spray bottle. Then you should be able to peel the cheesecloth super easily.
The fact that your dough deflates significantly is probably due to the bread improver you are using, it might not be strong enough and/or doesn’t allow a long rising time. I would recommend trying another brand.
These sound like good suggestions! Thank you for the great reply!
I’ve tried this twice now. I’ve had all the issues as above. The first time I tried it I had a flour that was 23g protein and it was like rubber. The second time I used the same flour as listed in the link. I measured and remeasured everything. The dough was very “wet”. It was very difficult to work with and it looked nothing like your pics when rolling the baguette it was more like an ooze instead of having a real baguette form. It was so wet and it never rose. My cheesecloth was damp as was the the dough and it still stuck. Maybe it stuck because the dough was so wet? I’m wondering if I have a bad improver. I ordered the S500 and am hopeful it solves my problem. I can’t imagine that it will but maybe I’m wrong. I was using red star active dry yeast. I whisked my yeast into the water before adding other dry ingredients and mixing. Would that impact it?
Sorry to hear you are having trouble with the recipe Matt.
The dough should be soft and just very slightly sticky. Not all brands of flour are equal so you might have to add just a bit more to get the good consistency.
The cheesecloth probably stuck because of the wet dough, however it still usually does stick a bit. That’s why you need to spray water on it before trying to remove it.
Bread improver is really important to this recipe, I tried different ones and got totally different results.
Whisking yeast into the water before adding the dry ingredients is not a problem.
4th time was a charm! My oven isn’t the best so I need to tweak the temp and time ever so slightly. The S500 was a game changer. I have an excellent grilled pork marinade for the sandwich just needed to learn how to make the right bread. The bread was SO light inside you taste all the yumminess of the pickled daikon/carrots cucumber, protein, jalapeno, spread etc without a mouth full of thick bread but still have the ever important crunch. It was possibly one of the best Bahn Mi sandwiches I’ve had in years and I made it from home! I’ve been able to prep everything else very well but I could never make the bread. Now with a few minor tweaks due to the oven it should be perfect. Thanks Thomas!
I’m so glad you finally had success with the recipe Matt!
Yes, the bread improver is really a key ingredient to get the texture right 🙂
Thanks for your feedback and rating!
I’m having the same issues as Matt. I can’t find a source S500 that ships to Hawaii.
Hi Terri,
Then, I would recommend trying to find another bread improver that has similar ingredients.
Hi! This is it!!! I have been searching for years to find it. My bánh mì has the perfect light and cottony crumb with a super ___ crust! I’m still missing “crispy”! Please help.
Hi Tuy,
Is your oven hot enough? Do you bake the banh mi until they are fully golden brown?
Also, you may try using a different bread improver.
What brand would you recommend for the bread improver? The oven is hot.
You can find the brand I recommend in the post 🙂 It’s the S500 Bánh Mì Plus.
Thank you Thomas for the recipe, is the closest to the real thing I have ever tried. Do you happen to know the ratio for the coconut powder and fat if it was to be used in this recipe?
Hi Michelle,
I’m afraid I cannot give you a ratio as I haven’t tried it. I doubt it really affects the flavor or texture anyway.