This post may contain affiliate links. Please read our disclosure policy.

This vegan blue cheese is simply mind-blowing! Naturally cultured and prepared with just 5 ingredients, it makes use of traditional cheese-making techniques. The result is a sharp, creamy, and rich vegan blue cheese like you have never tried before!
IT IS HERE. The vegan blue cheese recipe is finally here, guys!
I’m really, really excited about this recipe. First, because I have been working on it for several months, and second, because it tastes exactly like blue cheese.
⭐️ Why You Should Try This Recipe
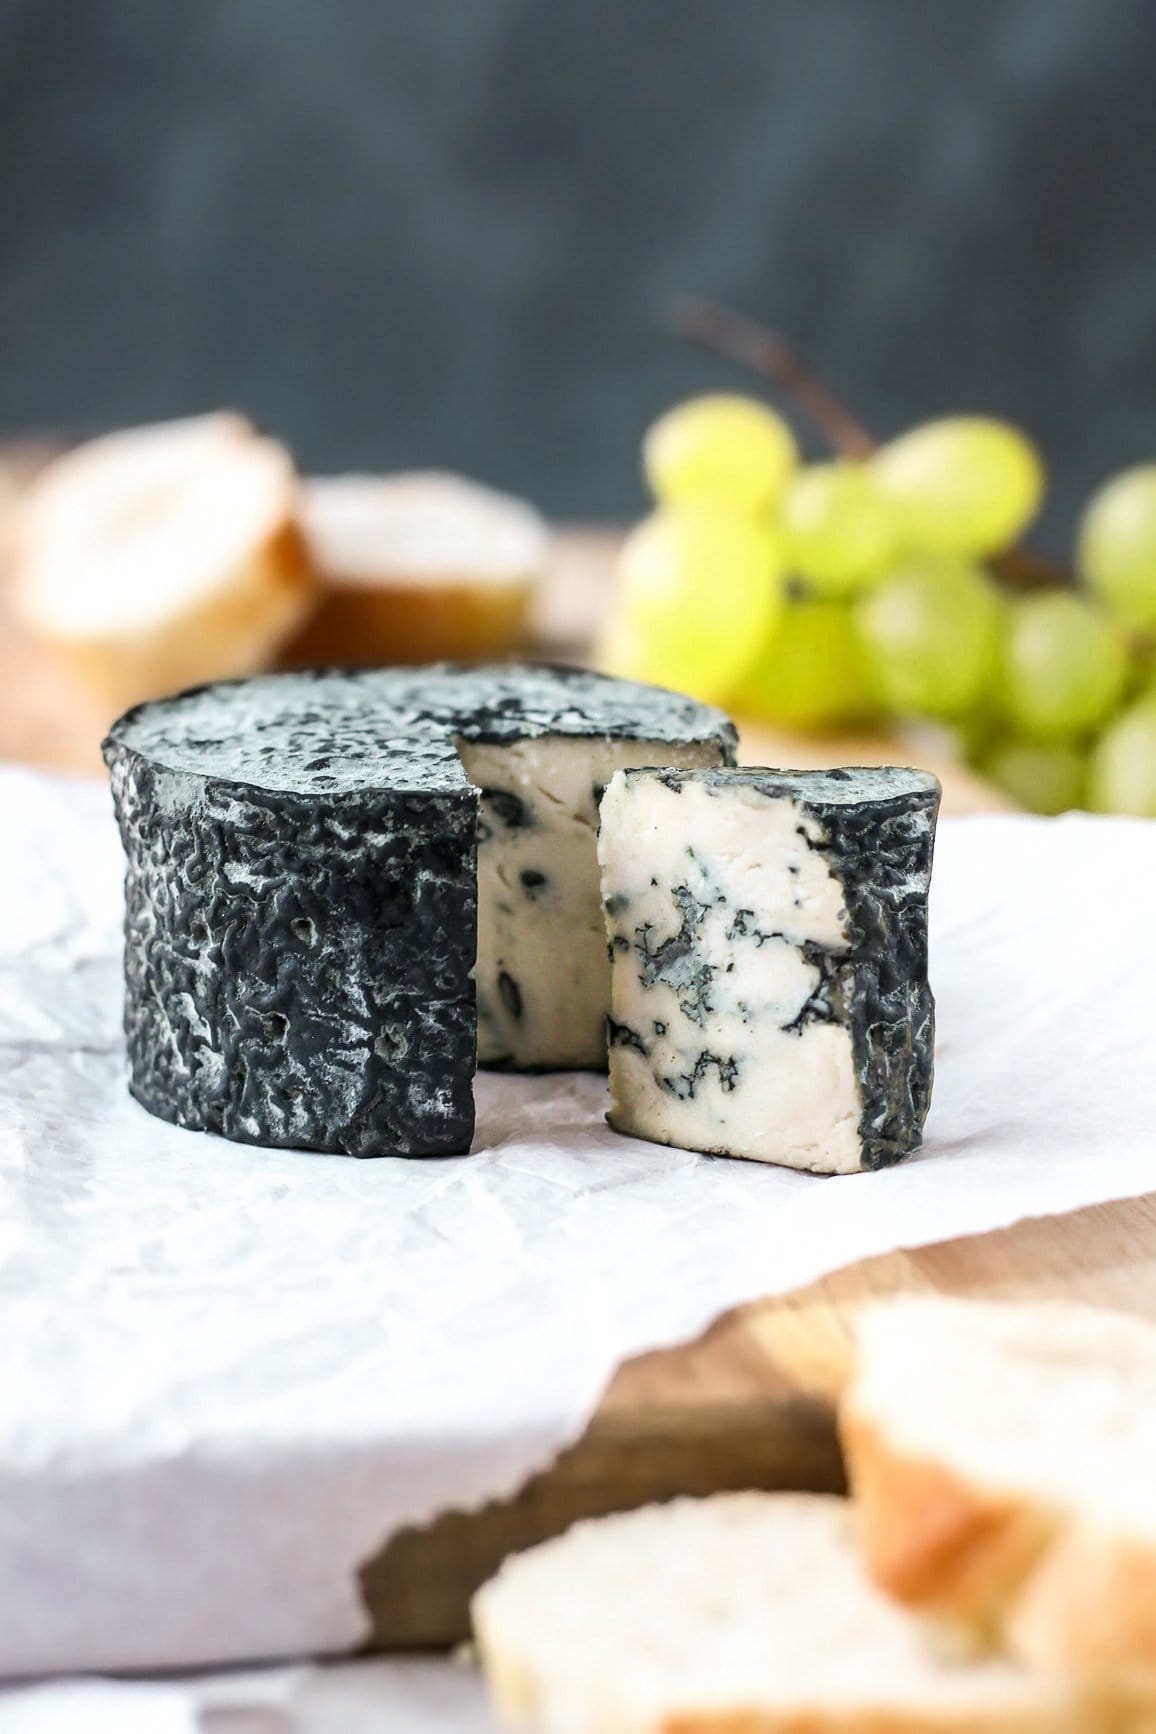
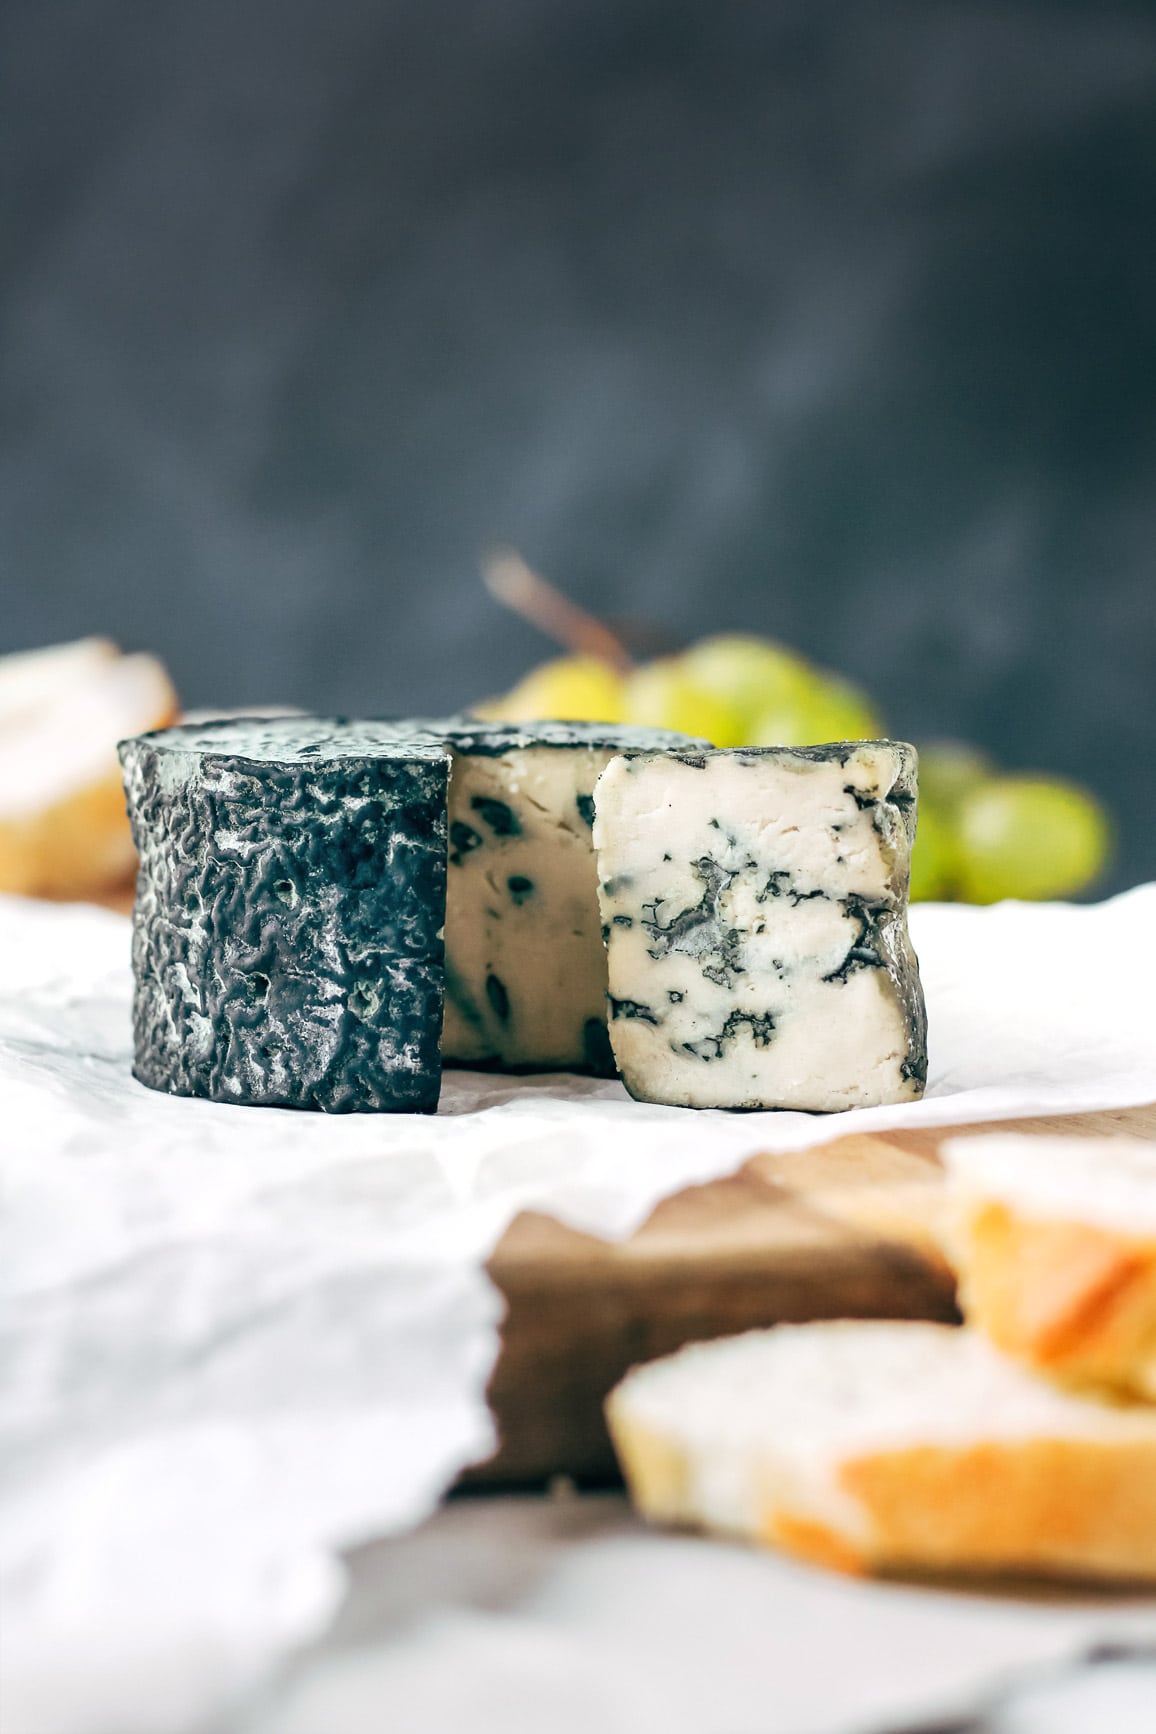
- The texture is just perfect. It’s creamy so you can spread it easily on a slice of bread, but firm enough to cut it into slices. Plus, it has those natural blue veins that are so characteristic of blue cheese.
- It has that rich and strong aroma. This cheese is actually even stronger in taste than my vegan aged camembert! Non-vegans could not believe it was not “real” blue cheese!
- It’s a fun experiment. Whether you are new to vegan cheese making or made some before, the process of making this blue cheese is interesting and exciting at the same time. You will see the mold slowly grow over a few weeks!
- It’s a reader’s favorite. With 244 ★★★★★ ratings, this recipe is a must-try! James said “Just tasted my first batch of this. It is quite simply, the best vegan cheese I have ever made. All thanks to you Thomas – another epic recipe.”
🧀 What is Blue Cheese
Blue cheese is a type of semi-soft cheese that is made with Penicillium roqueforti cultures. This edible mold not only creates a sharp and piquant flavor, but it is also responsible for the blue/green veins inside and outside the cheese.
Historians say that Gorgonzola is one of the oldest types of blue cheese, appearing around AD 879.
🥛 Ingredient Notes
Just like my vegan aged camembert, this blue cheese is made with just 5 ingredients. Here is what you will need:
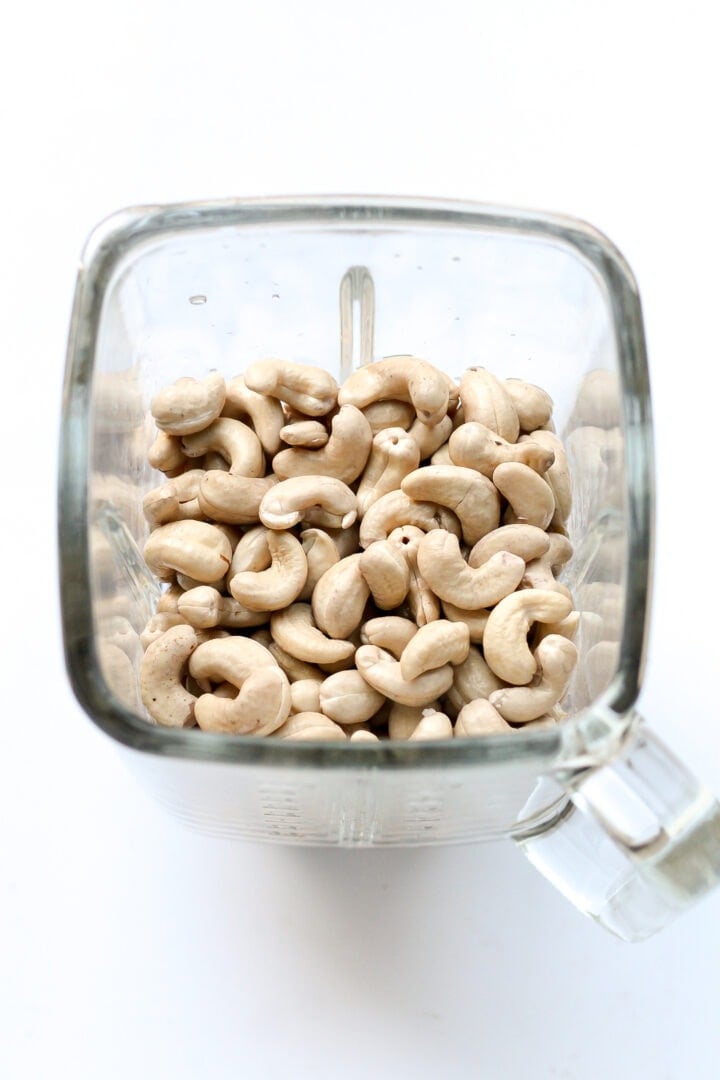
- Cashews – The base of this cheese is raw cashews. They bring the perfect amount of creaminess and richness. Do not use roasted cashews.
- Probiotics – To give the blue cheese its tangy flavor, we will be using probiotics that will trigger the fermentation process. I recommend using either Acidophilus or Mesophilic. The latter is specifically made for cheese making and yields a superior flavor.
- Mold culture – Penicillium roqueforti is the mold that will give the cheese its rich flavor and blue color.
- Coconut oil – The coconut oil is here to add creaminess, it also helps the mold grow since it requires a lot of fat. I recommend refined coconut oil, that has been deodorized.
- Salt – Salt not only enhances the flavor but also prevents bad mold from growing.
About the Penicillium roqueforti: You can get the penicillium roqueforti mold here. It might seem a little bit expensive but a little goes a long way. For 4 pieces of cheese, you will only need 1/8 tsp. It can be stored in the freezer for months.
🥣 How to Make Vegan Blue Cheese
The recipe is actually pretty easy to make; the hardest part is to be patient since the whole process will take over a month.
Prepare the cashew cream
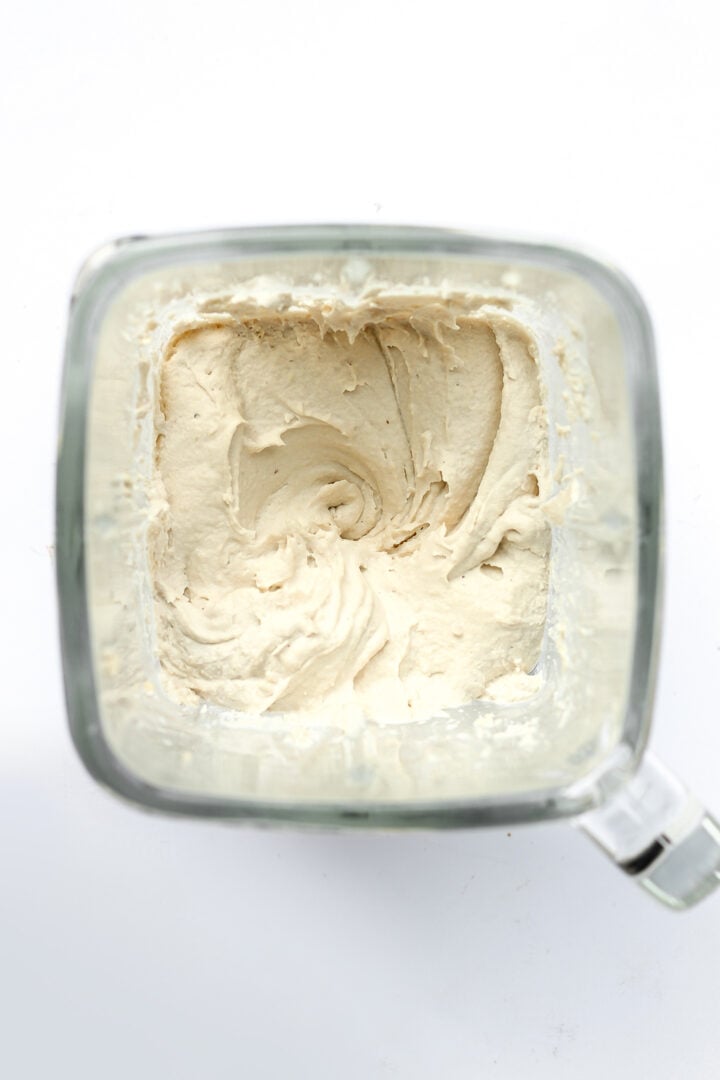
Start by soaking the cashews in water for at least 5 hours or overnight. Then, blend them with water and coconut oil until it forms a smooth cream. Next, add the probiotics and penicillium roqueforti and blend again.
Transfer the cashew cream to a bowl and cover it with plastic film to touch. It needs to ferment at room temperature for one day to kick off the fermentation process.
Shape the cheeses
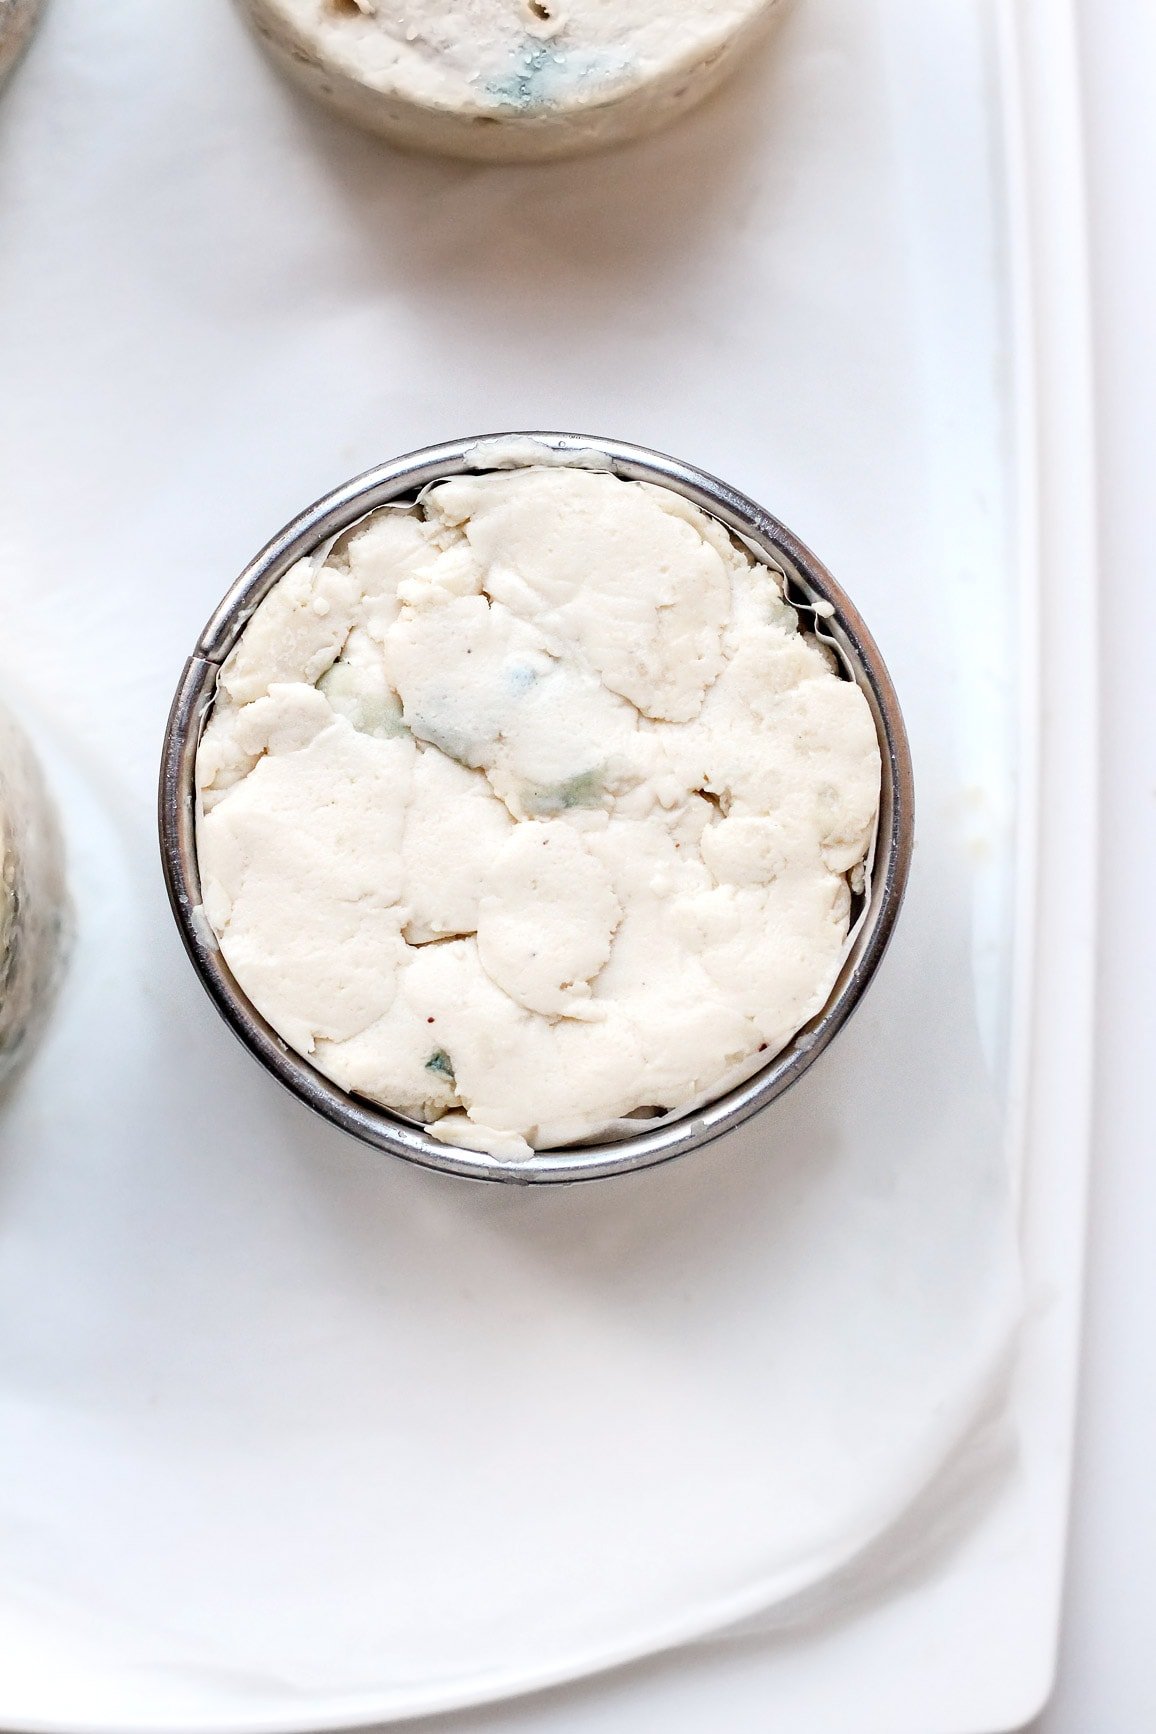
Next, it’s time to shape the cheeses. Line springform pans or cookie cutters with parchment paper and fill each one with cashew cream. Note: the size or shape of your pans doesn’t matter too much, so use what you have on hand.
Place the cheeses (still in the pans) in a container and refrigerate overnight.

Salt the cheeses
The next day, it’s time to remove the cheeses from the pans and salt them. Salt will help with mold growth, so it’s essential. To do so, sprinkle sea salt on the top and sides of each cheese and use your finger to rub the salt. Very carefully flip the cheeses and sprinkle salt on the opposite side.
Place the cheeses on parchment paper and put them back in the container.
Age the cheeses
It’s not time to age the cheeses and let the mold grow! Age the cheeses in your refrigerator at a temperature of about 47-52°F (8-11°C) and flip them every day.
After 7 days, you should start to see some light blue/green mold spots; it’s a good sign! Continue the process for another 7 days.
Crumble and re-shape
After a total of 14 days, your cheeses should be a bit firmer and almost completely covered with blue mold. It’s now time to crumble them.
Why crumble the cheeses?
It’s the blue mold that gives the cheese its characteristic flavor. The problem is that the mold needs to be in contact with the air to grow, so you need to have many small openings inside the cheese for better mold growth. Regular blue cheeses are often pierced several times with a skewer to make holes. I tried this way but with no success. After several tries, I thought of scrambling the cheese into little pieces and then forming it again without pressing too much to leave large holes inside it. It worked!
Using clean hands, scramble the cheese in a large bowl (just like you would scramble tofu). Next, line springform pans or cookie cutters with parchment paper and re-fill them with the cashew cream without pressing too much to leave large holes on the inside.
The final step is to keep flipping the cheeses every day and wait…Your cheeses will be ready in 3 more weeks, but if you are patient enough to wait for an extra 2 weeks I promise you won’t regret it! It will become even stronger and sharper.
Serve this blue cheese alongside vegan camembert, onion chutney, and grapes and you have one of the best vegan cheese platter!

📔 Tips
- Age the cheeses in a container during the complete aging process. Mold needs humidity to grow. That’s why you need to keep the cheeses in a small box or container in your refrigerator. If you were to let the cheeses uncovered, they would dry out before the mold gets a chance to grow.
- Do not omit any ingredient. This recipe is not versatile, so I do not recommend substituting or omitting any ingredient.
- Use latex gloves. By using gloves each time you handle the cheeses, you reduce your chances of seeing bad mold growing. Latex gloves are pretty cheap and come in large boxes, so do not hesitate to get yourself a box.
- If you are making vegan camembert at the same time: I recommend you keep them in two separate boxes. Mold can transfer very easily, and you could end up with white mold on your blue cheese or blue mold on your camembert.
- Regarding the appearance of the cheese. The rind of this blue cheese is dark blue because I didn’t scrape the sides. Be aware the rind is edible, but if you prefer the exterior to be white, you can gently scrape the mold using a clean knife every two weeks. I prefer to leave the rind because it looks cooler, and after about a month, it will become a little bit firmer. Creamy inside + firm rind = perfect cheese to me.
💬 FAQ
Yes, blue cheese contains a natural mold that is called Penicillium. This type of mold gives the cheese its flavor and color.
Blue cheese has a sharp and tangy taste with subtle piquant/spicy notes.
As long as it’s good mold, yes!
It’s very easy to tell if a cheese has gone bad; just smell it. If it has a rotten eggs smell, you should trash it. If there is some pink or black fuzzy mold, it’s not good either.
Roquefort is a type of blue cheese that is only produced in a specific area of France. It is a protected designation of origin.
No, this vegan blue cheese does not melt. It will only become softer once heated.
Yes, once the ripening process is done, you can freeze it for up to 3 months.

Disclaimer
- The links provided here for Penicillium Roqueforti may not redirect to a fully vegan product as Amazon sellers change product references frequently. Be aware that non-vegan ones are grown on lactose, meaning they contain *traces* of lactose. Considering the amount used, you could still consider your cheese 99,99% vegan. It’s up to you to choose which one fits your beliefs best. One more thing, fully vegan Penicillium roqueforti exists; you will have to do your own research to locate it.
- Many people have been making this cheese without giving any credit back and labeling it as their own. I worked really hard to create this recipe from scratch and had to do a ton of experiments before releasing it, so please give credit by tagging @fullofplants on Instagram or linking to this website.
Final Words
I hope this recipe will prove it’s possible to make everything with plant-based ingredients. If you are not vegan yet, you don’t have to give up on cheese anymore!
Please let me know if you try this recipe, and feel free to ask if you have questions about the process!


Vegan Blue Cheese
Ingredients
- 3 cups raw cashews
- 2 tbsp refined coconut oil
- 1/8 tsp mesophilic culture or 6 capsules vegan probiotics (Acidophilus)
- 1/8 tsp penicillium roqueforti in powdered or liquid form
- 5 tbsp filtered water
- sea salt
Instructions
The day before
- Soak the cashews in filtered water for at least 5 hours or overnight.
Forming the cheese
- Drain the cashews and place them in a large glass bowl. Bring a large pot of water to a boil. Once boiling, pour the water directly onto the cashews. Let sit 1-2 minutes, and drain the cashews again. This step will help kill possible bacteria.
- Transfer the cashews to the bowl of a blender or food processor. Add the coconut oil and 5 tablespoons of filtered water. Blend on high speed, scraping down the sides from time to time, this step might take about 10 minutes, depending on your blender. You should get a smooth, thick mixture.
- Open the probiotic capsules and add the powder to the blender.
- Add the penicillium roqueforti. If your penicillium roqueforti is in powdered form it works the same way as the liquid one. Blend for another 10-15 seconds.
- The mixture should be smooth but thick. If needed, add 1 tablespoon of water at a time until smooth. Do not add too much water otherwise the mixture will be too liquid, you want a thick consistency.
- Transfer to a clean bowl, cover with plastic film, and let sit at room temperature in a dark place for about 24h. This step is important to let the cheese ferment.
- The following day, place the bowl in the refrigerator for about 4 hours to make the mixture easier to work with.
- After that, line a baking sheet or flat plate with parchment paper. Place 4 small springform pans on top (I used two 3-inch cookie cutter rounds for each cheese, stacked).
- Cut strips of parchment paper and lay them in 4 small springform pans. You want to cover the bottom and sides of the pan. You can also use plastic film if you prefer. The goal is to prevent the cashew mixture from touching the metal. Fill each pan with the cashew mixture and press it down using plastic film, so it doesn't stick to your hands.
- Place a container upside down on the plate where the cheeses sit. This step is essential to keep some humidity inside. It's important for good mold growth. Place the cheeses in your refrigerator (you will age the cheeses covered in your refrigerator during the whole aging process).
Aging
- After 2 days, sprinkle salt over the top of the cheeses, and lightly rub with clean hands. Carefully flip the cheeses using a small plate lined with parchment paper, and remove the springform pan. Sprinkle salt on top and the sides, rubbing gently. You will only salt once. The cheeses will still be very soft, but they will be easier to work with after a few days.
- Flip the cheeses every day, always using clean hands. You can use gloves or work with a plastic film to make sure you are not touching the cheeses.
- Blue mold should start to appear after about 7 days. The mold will be slightly darker or lighter, depending on the humidity and temperature of your fridge.
- After 2 weeks, scramble the cheese into little pieces (just like when you scramble tofu) in a clean bowl. The cashew mixture will still be quite soft, so try to make small pieces. For this step, I highly recommend wearing latex gloves.
- Lay strips of parchment paper into springform pans and fill each pan with the scrambled cheese without pressing too much. This step is important to create holes inside the cheese as the mold needs to be in contact with air to grow. You can remove the cheeses from the springform pans right after shaping them. Place the cheeses on the baking sheet or plate, cover them with a plastic box or container, and place them back in the refrigerator.
- Continue to flip the cheeses every day for the next 3 weeks, always using clean hands or gloves. This step only takes a few seconds every day.
- After a total of 5 weeks, the inside and the outside of your cheeses will be covered with blue mold. They will be ready to eat soon!
- Wrap each cheese in cheese paper or aluminum foil and wait another 3-7 days. The longer you let them age in the refrigerator, the stronger the taste.
- The cheese will keep for about one month in the refrigerator and will become firmer and sharper.
Notes
- Age the cheeses in a container during the complete aging process. Mold needs humidity to grow, that’s why you need to keep the cheeses in a small box or container in your refrigerator. If you were to let the cheeses uncovered, they would dry out before the mold gets a chance to grow.
- Do not omit any ingredient. This recipe is not versatile so I do not recommend substituting or omitting any ingredient.
- Use latex gloves. By using gloves each time you handle the cheeses, you reduce your chances to see bad mold growing. Latex gloves are pretty cheap and come in large boxes so do not hesitate to get yourself a box.
- If you are making vegan camembert at the same time: I recommend you keep them in two separate boxes. Mold can transfer very easily and you could end up with white mold on your blue cheese, or blue mold on your camembert.
- Regarding the appearance of the cheese. The rind of this blue cheese is dark blue because I didn’t scrape the sides. Be aware the rind is edible, but if you prefer the exterior to be white, you can gently scrape the mold using a clean knife every two weeks. I prefer to leave the rind because it looks cooler and after about a month it will become a little bit firmer. Creamy inside + firm rind = perfect cheese to me.
Nutrition

About the Author
Thomas Pagot is the founder, photographer, and recipe developer behind Full of Plants. He created the blog in 2016 as a personal cookbook for vegan recipes. Through years of recipe development, Thomas has successfully grown Full of Plants into a trusted resource for plant-based recipes.
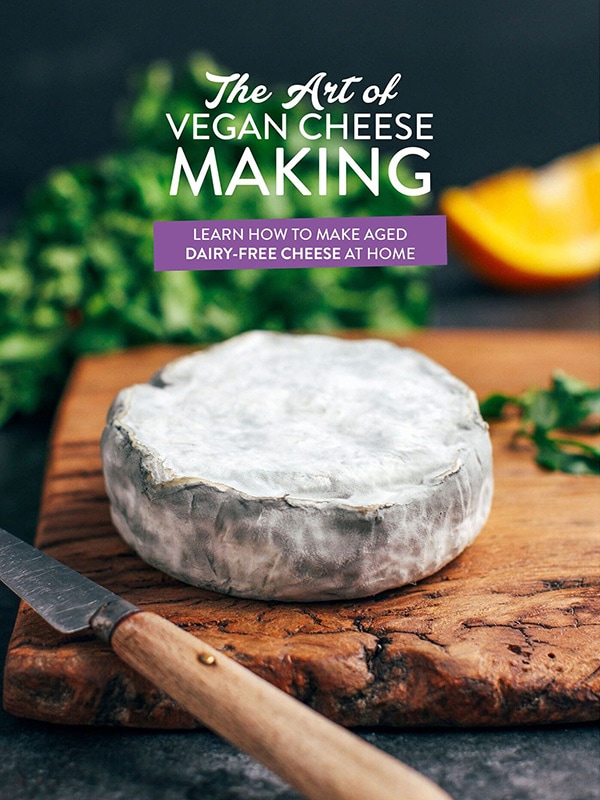
🧀 25 Mind-Blowing Vegan Cheese Recipes!
Sign up for the Full of Plants newsletter and you’ll get new recipes delivered by email weekly, PLUS your FREE 100-page printable eBook!
Hi, Thomas! Thanks for recipe from cold Siberia. It’s great idea to make real blue cheese, not fake. We almost made blue cheese. We want to know, what is the flavor. Is it really like blue cheese? And before blue mold, there is white mold. Is it OK?
Hi, Thomas!
Yesterday, I removed my cheeses from the springforms. They are in nice shape already.
But the smell! The fantastic smell that I remember from the days I ate those cottage cheese sweets glazed with chocolate (they are very popular in our country)!
Well, I cheated a little, actually. As I said, I am alergic to dairy protein, but I do consume ghee (melted butter), which has all dairy protein removed in the process of melting. So, I used this instead of coconut oil. And, actually, 5 spoons of it and only 3 spoons of water. I do not know, maybe this has some impact on the smell also. But it is really fantastic!
And one more thing. I added additionally some mesophilic culture, which is used for making soft cheese. Maybe, this also has an impact.
Hi Vytautas,
I’m so glad to hear that! 🙂 Yes mesophilic culture has an impact on the taste of the cheese, it is usually used in the making of blue or camembert cheese to add a subtle buttery flavor. I did not use it here because I have no links for a vegan mesophilic culture yet. Good luck for the aging process!
This looks fabulous! Can this be made in one larger spring form pan? I already have 6″, 8″, 9″, 10″ and 12″ pans. I really want to try this cheese but don’t want to buy any more bake ware.
Thanks Rose!
Sure, the size of the spring form pan doesn’t really matter.
This looks amazing! I have food intolerances and cannot have cashews 🙁 Would pine nuts work in this recipe?
Thanks.
I never tried with pine nuts (mostly because they are super expensive), but I think it would work.
3 weeks into the culturing process and I have no blue growing on the cheese. Otherwise my cheese looks beautiful. I am wondering if the culture I purchased that you recommended got to hot in shipping. I will have to try again. Thank you for sharing.
I hope my blue starts growing soon. I will keep on watching and waiting.
Are your cheeses stored in the refrigerator in a box? The mold cannot grow without some moisture. It can take longer to appear if your fridge is too cold, but 3 weeks and no mold is not a good sign unfortunately.
About the culture, I’m not sure it really matters if it was “hot” when it arrived. I recently brought a bottle of penicillium candidum to a friend and the bottle stayed in my bag for a day. It still worked, just make sure to store it in the freezer when you are not using it.
Yes, they are wrapped in cheese paper. Stored in a plastic box. There is moisture in there. I can see a few beads of it when I check it out. The penicillin is stored in the freezer.
Hi Cindy,
Did this end up working out for you? I’m on the exact same boat- week 3 and no blue mold yet 🙁
Hi Thomas. Thank you so much for this recipe. I’m going to make it as a Christmas present for my vegan friend who desperately misses blue cheese! Quick question (and sorry, it’s a stupid one!), does it need to be made in a metal pan? I have some small glass dishes that would be the perfect size, can I use them instead? Or is the pan just used for forming the shape an when they’re ‘aging’ they are out of the pan and on a baking sheet in a tub? Sorry, Justin a bit confused about that process and want to make sure I get it right! Thanks so much for your help 🙂
Hi Vick,
That’s a nice christmas present idea! 🙂 Your friend won’t be disappointed!
You don’t have to use a metal pan, you can definitely use a glass or plastic pan/dish. Make sure to line the sides and bottom with parchment paper or plastic film so it’s easier to remove the “cashew cream” from the pan (it’s a little bit sticky at the beginning but firms up after a few days). It’s just to shape the cheese at the beginning, then they are aged without the pans on a baking sheet, in a box in your refrigerator.
Good luck!
Hi Thomas. Thanks for getting back to me and for clarifying that. That was the only step I was struggling with so much appreciated!
Wish me luck!
Hi again. So everything is going to plan. I started to see blue mould after a week and scrambled the cheeses after two. The only thing is, some of the mould is like a round, fluffy ball on the outside. Is this normal?? When does it start to form a rind like in your pictures?
Sorry about the questions, just want to make sure I’m on the right track!
Thanks for all your help 🙂
Hi Vicky,
I’m not sure what you mean by fluffy ball? You are only at two weeks, the rind will form but you have to be patient, I would say in 2-3 more weeks you should have a nice rind. Be aware that the rind is not that important, as long as you have blue inside the cheese the taste will be there.
Also, it’s possible to get a rind that forms more quickly by not scrambling the cheese and only piercing it, I talked about this method in the article. In my opinion it’s still better to “scramble” the cheese to have more holes inside and have a better mold development.
Does the probiotic used have to specifically be the one suggested or can I use a probiotic blend that I currently take myself?
Not at all, most probiotics will work, just use the one you have on hand, you can even use rejuvelac.
Just tasted my first batch of this. It is , quite simply, the best vegan cheese I have ever made. All thanks to you Thomas – another epic recipe 🙂
I’m SO glad to hear you enjoyed your blue cheeses! 🙂 Thanks for the feedback James!
Hi, my little cheeses are in the fridge now for 2 weeks and there is mold on them! But how do you know that it’s the right kind of mold? It’s hairy and white and blue… Does that sounds okay? 🙂
Hi Barbara,
If there is mold, you are on the right track! Yes the mold should be white and blue/green with some variations of color, it sounds good 🙂 Don’t worry if more blue mold cover the white after some time.
As long as there are no pink mold it’s okay.
Hi Thomas, I am so excited to be trying this recipe! Everything was going very well, until I checked it this morning [it has been fermenting overnight]. There are pink mould spots across the top. Does this mean the batch is ruined?
That doesn’t sound good…Pink mold is bad mold, I’m afraid you cashew cream has been contaminated and it will probably smell like ammonia very soon. I would recommend making another batch, make sure everything is very clean, use latex gloves if you have some, and don’t place the cashew cream in a room that is too warm.
Hi Thomas! I got very pink dots on the surface of my cashew cream cheese.. It happend twice, the fisrt time I throw it out but this time I’vr only removed theses pink little dots and there’s no bad smell… I always put some salt on the top e a pinch in it.. can this be some kind of reaction with the probiotics or is this really bad bacteria?
Hi Waleska! As long as you removed them and the smell is pleasant there is no problem.
I wouldn’t recommend putting salt on top though, it creates moisture that stays on the cashew cream for hours at room temperature, this might be what creates that pink mold. You should only salt the cheeses after the fermentation process.
Thank you for the answer! There’s no bad smell. In fact I ate it yesterday and I’m still alive. 😀 However, I made some research about what could it be and got some theories like a sort of “kahm yest” (I don’t know if it aplies here) or some reaction occoured with the probiotic strain because they’re just tiny dots with a very strong pink, it’s not a pink area. I was afraid it was “E. colli”, but I found out that some probiotics bacterias goes pink too.. About this reaction theory I found this page in wich a issue about cheese in general going pink is discussed: http://microbialfoods.org/what-causes-pink-cheese-defect/
Good to hear you are still among us! Thanks for sharing the article, interesting.
I’m not sure it’s because of the probiotic though as I used acidophilus many times and got pink mold only once or twice out of many batches.
Hi Thomas, thanks so much for your recipes. I’m on the fermenting process for both the camembert and blue and it’s been 12 hours at 70° and I tasted them and they are not tangy. Is this normal, or should I wait 24 hours until they are slightly tangy before I place them into the molds and refrigerate them? When I made cashew cream cheese from a different recipe I was supposed to wait until it tasted tangy before I refrigerated it. Is this the same? Thank you for your time.
It should be tangy, if it’s not then let it ferment for another 12 hours.
Well, I just put it in the fridge at a controlled temperature anyway, now it’s been a few days and I’ve been flipping them everyday and keeping them covered. They are tangy now but no mold has grown yet. The outside looks like a different color almost like its drying out, should I change the box it’s in or is this normal? And because it took longer for the tang to start does that mean it will take longer for the mold to start or do i have to start over?
Hi, Thomas
The mold started appearing on the 7th day as you said, about a week ago. This Saturday was the 14th day already, so I “crumbled” my cheese and packed it back by pressing very lightly. I say “crumbled” in quotes because it is so creamy it does not crumble. I nipped it into small pieces. Everything so far is plain excellent. The smell, the creaminess, the look of the greenish-blue mold is stunning. Think you very much once more.
Great! Yes it’s not exactly crumbling, more like making very small pieces and reforming the cheese into the pans without pushing too much.
Let me know what you think about it in a few weeks 😉
what culture did you use to get your results?
Hi there! I am currently trying out both this recipe and your camembert, and because our kitchen is always so hot I am aging them in the fridge in tupperware containers. They are sitting on parchment paper as I rotate them each day and there is a lot of moisture. Should I change out the paper and dry the interior of the container? Waiting game is tough haha! Thanks!!
Hi Jennifer,
Tupperware container are great to age the cheeses, especially the blue one that requires a little bit more moisture. Yes I recommend you change the parchment paper every two day (for the first week or so, until the cheeses become firmer) and dry the interior of the boxes with a clean paper towel. You don’t have to do this everyday, just when there are too many water drops inside.
I posted earlier that the cheese culture did not work out. The blue didn’t grow. I think the penicillin culture is no good.
I continued to age the cheese hoping. Nothing. What I did find is now that the cheese has aged longer, I can grate it. It makes the most beautiful grated cheese. It also slices and holds its shape well. I wish there was a way I could post photos. My flop ended up being a success.
do you think your culture was old? or you did not process it correctly? mine is powder so i followed directions.
if all else fails did you get any “veins” to be able to say it was “blue cheese?”
thanks
wendy
Thomas, I’m at day three of flipping the cheese and the exterior is very wet. I have it on parchment. The inside of the plastic box is dry. The cheese seems to be getting firmer though. Do I salt the cheese every time I flip it or just on the first day? Thanks for your help.
i put mine on parchment today and found a plastic lid like you said. Rose, i am not salting every day, just that one day it said !!
arrrrgggghhhh. i am not seeing any blue, green or veining. The cheese itself is ripe and yummy like a camembert but i don’t want to start a new batch of blue until i find out what went wrong.
anyone else? i am using the powered culture from Cultures for Health from Amazon. could it be old? should i use more?
i really want to wow my customers with a veined cheese. help
Hi there! I think I’ve skimmed the comments thoroughly, but my apologies if I’ve missed you answering this already: Could you tell me a little bit about the daily flipping? I’m just wondering about its importance, and what to do if I go away for a few days and won’t be around to flip (say, at Thanksgiving time). Is it crucial to do it Every day?
This recipe looks great and I am eager to try it out! Having some of this for the winter holiday season would be extra special 🙂
Hi Ingrid,
The flipping is a lot more crucial for the camembert cheese since you want a uniform white rind. It’s not as important for the blue cheese since the blue mold will grow in the openings, inside the cheese. I still recommend to flip it regularly to make sure the cheese has the same texture everywhere (if you don’t flip it at all there are great chances the cheese will be moist at the bottom and dryer at the top). It is totally okay though if you forget to flip it for 2-3 days, it won’t have a negative effect on the outcome, don’t worry.
Great! Thank you for the information!
Hi Thomas! I am happy to report that after six weeks, I finally broke into my blue cheese (I just did one large round instead of 4 small rounds), and it was AMAZING! Myself and several non-vegan friends enjoyed it with wine for a vegan cheese night and we were all thoroughly impressed. I will be starting another batch soon to enjoy in another 5+ weeks. It is worth the wait!
Hi Ingrid,
That’s awesome! I’m glad to hear you loved the blue cheese 😉 I agree, definitely worth the wait! I would recommend making several batches so you can age some of them for up to 3 months.
The fact that your non-vegan friends enjoyed it too means a lot to me, thanks for your feedback 🙂
Hi thomas,
I am wondering if my fridge was too cold (i think it got down to like 40 something), and that the mold stopped growing. Ever since i scrambled it the mold has not grown and its barely on there compared to got it covered the outside initially.
What can i do to fix this? Can i put it in a bit warmer area (50 something) and buy normal blue cheese to get it going again? I have the powdered mold and i dont know how i would go about spraying it on the outside….
40°F is definitely too cold. You should aim for about 46-50°F. Please be patient, it takes time for the mold to grow again on the outside. Actually, you don’t even have to wait for it to grow on the outside (except for the look), sometimes I wrap my cheeses 1 week after scrambling and age in the refrigerator for another 7-10 days. They taste delicious and are still mostly white on the outside.
No need to spray again, the mold is already there in your cheeses.
Hi, has anyone here successfully made this cheese (i.e. The mould has grown as it should) using the powdered mould? My first attempt with the powdered mould was a failure, but I over salted the cheese so that could have been the reason. I’m going to try again using the same batch of powdered mould. I’ve seen others mention they’ve had no mould when using powdered but no one say they’ve had success with powdered mould.
Hi Adriana, Yes I have had success with powdered blue mould. I didn’t soak it either, just added it to the blender. If it was possible I’d add a photo but I can’t see how to do that. My first batch was ruined y hot weather, (but not by lack of blue mould growing) so I bought a small camping fridge that can b adjusted to 10 degree C, and I had success then.
Good luck, keep trying.
Thanks so much for the info and good to know it’s worth giving it another go with the powdered mound.
maybe that is a clue Adrianna, don’t soak it just put it in. Berylvt did you also add the 5tbsp of water?
Hmm, now i have to make a decision. I’m about to blend the ingredients, I have the soaked mould in the fridge. Do I use it or try the straight powdered mould? As we now know the straight powered works I may try your method Berylvt. I’ll let you know here if the mould has grown in about a week’s time. Fingers crossed.
I did not add extra water because I used the powdered mould. I only added enough water to make the cashews creamy, as little water as possible actually.
i am right there with you. i had no mold very expensive and very disappointed. i will try again also but ya know if its not going to happen i don’t want to keep waiting 2 months for nothing.
the cheese is yummy like a strong brie or camembert but i need to know what is going to come out before i start to sell it.
Just thought you’d like to know it looks like my second batch of blue cheese is a success. Spots of blue/green mould started appearing exactly on day 7. Hooray! This time I used Berylvt’s method of sprinkling the powdered mould directly in the blender with rest of the ingredients. I’ll let you know how the rest of the process goes.
Adriana did you add the 5 tbsp of water to the blender also on the second batch
Yes I did add the 5 tbsp of water as I thought the mix would otherwise be too thick to blend. The mixture came out the perfect consistency once blended, not too wet at all..
I made this recipe starting on Aug 2, it took until Aug 31 for me to see much blue and it was Sept 6 before there was a lot of blue, I have only an under counter fridge and it gets very cold. I was sure to change my baking paper every other day and wipe out the cover of my 3 cheeses. They are now very very blue and taste great but I am concerned now as I’m seeing white fur on the one I have cut into. Will they still be safe to eat? There is no other mould colour or smell.
White mold is totally normal, it usually grows with the blue mold. As long as it is not fuzzy white mold that brows in spots, it’s safe to eat.
Hi Adriana,
Liquid or powdered, it works the same, no one is better than the other. Do you store your powdered mold in the freezer?
Thanks Thomas, I’m still thinking it was the over salting which stopped the mould growing the first time. I now have a new batch fermenting today. Yes I keep the powdered mould in the freezer. I did wonder though if my probiotic was active. I’ve using acidophilus capsules, but they are not keep in the fridge nor does it say anywhere on the bottle to keep them in the fridge.
No problem with the acidophilus capsules, I also keep them at room temperature and they still work great. I don’t think you have to keep them in the fridge.
I really hope you will have success this time with your cheeses! I know how frustrating it can be to have no mold growing (It happened to me when started working on these recipes due to many things like wrong aging temperature, using tap water, etc). The worst was when I aged my cheeses in a garage and forgot to cover them one day…well the mice had a great meal.
Hi Thomas. I am currently aging my cambembert and have just started the blue cheese. I had a question – when you crumble the cheese back into the springform pans, are they meant to remain in the pans the remainder of the time?
Thank you for this amazing recipe. I’m really looking forward to this experiment.
Hi Eric,
That’s a good question, I forgot to give this information in the recipe. No they are not meant to stay in the pans. Since the cheeses are already firmer than at the beginning you can just remove them from the pans when you have shaped them or wait until the next day.
Thanks Thomas – I’m sure that may be an obvious answer once I am at that point, but thank you for clarifying!
Hi Thomas,
I’m at the 2 week mark and just re-packed the cheese, I was happy to finally see some green on the surface. My cheese was too moist to crumble, so I just mixed it up a bit and packed it lightly into the spring-form pan. I didn’t add much water when I first made the cheese, so I’m curious as to why it might be so soft, almost like it just came out of the blender on day one. I’m going to leave it uncovered in the fridge to see if that helps. I do like the flavor, so I’m hoping the texture improves over the next three weeks.
Hi Rose,
Awesome, you are on the right track! When I mean “crumble” it’s more about making small pieces with your hands and pack it lightly.
Blue cheese is meant to be softer than other cheeses, you want that creamy texture. It will firm up more in the next few weeks, don’t worry.
Whew! Thanks for the recipe and advice!
Hi Thomas,
It’s been 5 weeks and I finally cut into the cheese. It has a few spots of mold on the exterior, but no veining on the inside. It has a blue cheese taste, but it’s very salty to the point that it’s almost not edible. Have you ever measured the salt before sprinkling? I’ afraid that “sprinkling” can be very subjective and in my case may have ruined the cheese. I think I’ll start the process again and try measuring the salt.
Hi Rose,
You only salted the cheese once right? I never had any problem with a too salty cheese, I would say I use about 1/4 tsp salt on each side (depending on the size of the cheese obviously). If you have no mold on the inside it’s because the holes were not large enough.
Thanks for the clarification. I know I used more than 1/4 teaspoon of salt. When I first made the cheese I thought I had to salt it every time I flipped it and salted it on day one and two. I also didn’t understand about pressing the crumbled cheese into the mold. I hope I can master the technique because the cheese tastes good even though it’s salty.
If you salted it twice then that’s the reason. Regarding the “crumble” part, I meant making small pieces of the cheese with your hands (the size of an hazelnut for example) and pack it into the mold without pressing too much to keep some air between each pieces. If you have trouble with this part I recommend you skip this and pierce the cheese instead, use a clean skewer and pierce it many times everywhere (I would say about 50 times), it can be horizontally, vertically, etc it doesn’t matter. This way you will have holes inside the cheese where the blue mold will be able to grow. I hope this helps and your next batch will turn out better!
I’m starting my next batch today. Thanks for your help!
Hello, Thomas,
Five weeks for my blue cheese ended last Saturday. So, we and my wife had a little taste party. Invited a friend also, she is not using dairy for health reasons. Both look and taste surpassed all our expectations. Simply brilliant! For the next batch, I’m going to triple the number of cheeses. Also, your camembert is on the list for a test batch. Thank you exceedingly!!!
Hey Vytautas,
That’s awesome! 🙂 I’m so happy to hear you enjoyed the blue cheeses, that made my day! That’s such feedback that pushes me to work harder on vegan cheese (and non-cheese) recipes!
I would recommend to make several batches instead of tripling the recipe (making one batch a day for example), it’s safer because it can happen that the cashew cream turns bad during the fermentation (at day 2), if it happens you won’t waste too much cashews. I had this problem a few times, it can be because of the water, or a too high temperature in the house.
Good luck, and let me know when you make the camembert!
Hi Thomas. My blue cheese has been ageing nearly 3 weeks and still no spots of mold, but it’s definitely not gone bad. It smells and tastes amazing, and is getting sharper as it ages. Do you think it’s definitely too late for any mold to appear?
me too. please help.
Hi Beth,
3 weeks and no mold is not a good sign and I doubt it will grow now. I’m not saying the cheese will be bad to eat but it means you won’t find the taste of blue cheese. Humidity is important for penicillium roqueforti to grow, are you aging the cheeses in a box in your fridge? Did you salt them at the beginning? Salt also helps the mold grow.
Thanks for the reply, Thomas 🙂 Yes, I did all of the things you’ve mentioned, it’s really weird. The cheese has a very faint blue cheese taste to it and it’s delicious but, as I said, no mold. I might give it another week and eat it if it still tastes good. I have another blue I made a couple of days ago, fingers crossed that works better. Thanks for the cheese recipes, I’ve made the Camembert too, it looks amazing. 🙂
Thank you, Thomas, for your hard work. I just got the recipe and am reading all the comments. I wonder if where one is making the cheese — country, state, city — has an effect on it, as location can have an effect on the making of bread. I live in California, near the beach, where temperatures are rarely below 40 degrees (winter) or above 85 degrees (peak summer), so I imagine I should have no difficulties. But I used to live in the mountains of New Mexico where I had to change all my recipes for the baked goods I made. Never made cheese there, but I imagine that would be different. Is there any advice you can give about making adjustments for locations? (I am dying to make this blue cheese — and the camembert!)
Kathy, like me, you will have a hell of a time trying to get vegan culture in the USA. If by some slight chance ( i have talked to everyone but GOD ) you do come across some or you find an outlet for a vegan culture, please get in touch with me asap. wgrossman at hvc dot rr dot com.
thank you in advance
wendy
Honestly I have no idea, but I guess the temperature and humidity of your country will have some effects. Since you are living in California and probably have a refrigerator you should be good, both cheeses can be aged in a fridge with no problem.
Hey Thomas!
Thank you for taking so much time & patience to answer all these questions, it’s really amazing you are so dedicated to make this recipe work for everyone.
I have had the blue cheese in my fridge for 9 days now. It looks and smells very good, but there is no mold yet, would you recommend maybe to pierce it with a skewer? Or should I just wait a few more days and scramble everything together?
Hey Tess,
No problem! Depending on the temperature and humidity the mold can take from 7 to 15 days to appear. If no mold appears in the next few days I would mix one tablespoon of filtered water with 1/16 of penicillium roqueforti. Transfer the cashew cheeses to a large bowl and mix them with the water. It will make the cashew cream a little bit softer and increase the aging time, but at least you will give it more chance to grow blue in the future. Then transfer the cashew cream into your springform pans (or whatever container/mould you used). No need to resalt them. Once they will be firmer (I guess after a few days), then make small pieces and lightly pack them into the springform pans to leave some holes, or pierce the cheeses with a skewer. Both methods work, the first one yield a better visual inside but taste will be very similar.
Hey Thomas,
is there a risk of producing mycotoxines during the culturing process with the penicillium roqueforti or the penicillium camemberti ? Especially in combination with the nuts?
I am from Germany and a read about that.
Hi Conny,
I never heard of that. I ate a lot of cashew cheeses and I’m still here 🙂
thomas i am trying a new batch. on day 4 i put the culture right into the blender this time and used filtered water, not tap water. i got my plastic box, the cheeses are a bit on the wet side but i have high hopes. one question. is the salt for taste or for the rind to grow?
Well, salt is essential to develop a nice rind and kill bad mold. It also helps a lot with the flavor.
lol i don’t know why i said i cultured on day 4 , I salted. i use this very course salt from greece. i might get some regular kosher salt and do it again. I see another post where you suggested adding more culture if the blue does not appear. i will keep that in mind.
by the way even tho the blue did not appear, my first batch had a stunning flavor. we are calling it barely there blue.
Wendy, I squished/crumbled one of my blue cheeses that didn’t form mold (they had fermented well and smelt great so I knew they weren’t off) with part of a new batch that did. They aren’t going moldy all over the outside but are moldy on the inside like the real deal and taste amazingly like it too. Amazing recipe, Thomas!
thanks lady….great to know. monday is day 7 i will give it to day 14 and if i have no mold, i will re-blend with more culture. if that does not work, i am going to think that my culture is off. ???
Thanks Beth 😉
Just wanted to thank you Thomas for this wonderful recipe. I had my doubts that it would be as easy to make as you suggest and would taste anything like the real thing, but it is easy and tastes amazing. I’ve just had my first taste at the 5 week stage and it tastes just like a ripe Gorgonzola. I added a little more salt at the crumbling stage as I thought then it was a bit bland for me, but then I have a salty palette. I will be maturing the other two cheese the extra two weeks as recommended. I now know they will taste out of this world. Thanks again for doing the hard work of experimentation for all us blue cheese craving vegans.
Thank you Adriana for the kind words! 🙂 I’m so glad you liked this recipe!!
If you are patient enough you can let them age for a longer time (3 months for example), they will become stronger in taste.
3 months, wow. I’m about to make a second batch, I’ll see if I can put some aside for that long.
Will vegan cheese made like this melt too?
No it doesn’t melt.
Thomas, ok so with my second batch i did not get the veining , again. i just added more culture and blended it. and put it back in the fridge. i am using your method of Tupper ware and the mixture is very wet. is this OK?
also i am starting to wonder if my culture is off? i went to an online store the cheese maker and they offer the culture in, PA, PS, and PV> what is the difference and will either or all of the work?
thank you in advance i know i am a pain but i am determined to make this work.
Since how long your second batch is aging?
I’m not sure what you mean by “very wet”, it should have the texture of fresh cheese. It should be soft but still holds its shape.
The penicillium roqueforti, if in powdered form should be rehydrated with some water (something like a tablespoon) before adding to the blender. It’s better to do this because the mold is uniformly distributed.
PS, PA and PV are different kind of penicillium roqueforti. Some are stronger in taste than others, and some are growing faster. For example, the PV and PA molds are growing faster than the PS and have a stronger taste in the end.
Hi Thomas, second batch day 2. i did not keep it out for a day i put it right into the fridge. The first batch was done as instructed with the culture in cooled down boiled water etc. this time, i read a post where someone had added it right to the blender and got good results.
i am not going to re salt them unless you think its the right thing to do.
Wendy, day 2 is not enough to judge if you will get a mold or not, you should wait at least 7-10 days, and at this time it will stil be very subtle.
Well, I never tried but I think it should work too if you added the cultures directly to the blender. Be patient and hopefully you will see some blue mold growing, little by little.
By the way, no need to re-salt, once is enough.
Thanks dude. will let you know what happens. i will still turn them every day.
xoxox fingers crossed
Hi Thomas,
This is my 2nd batch of the blue cheese. After 2 weeks, the exterior had some nice mold growing. I poked holes in it early on and when I cut it open after 2 weeks there wasn’t any veining going on inside. I crumbled the cheese and re-packed it as you suggest. I’m wondering if your intention of crumbling and re-packing is simply to redistribute the mold from the exterior to the interior, almost as if to “fake” the veining. I’m still enjoying the first batch, even without the veins. Thanks again for this marvelous recipe!
Hi Rose,
Not at all, it’s not to fake the veining or redistribute the mold (it’s already present everywhere in the cheese). The thing is, blue mold grows in contact with air, so if you want to have blue inside the cheese, you need holes. I found out that sometimes it’s not enough to pierce holes, since the cheese has a lot of moisture the holes usually close up after a few days. “Crumbling” the cheese into small pieces and not packing it too much when placing it back into the mold is the best way to have good veining inside.
I think I’m going to re-pack it again. My crumbles were pretty big and I might have packed it too much. Thanks again for your guidance.
Please start a business and sell your cheeses online… Like Miyoko’s! I beg you 🙂
Thank you so much Thomas! Just tried my bleu cheese after five weeks and it is FANTASTIC!! Amazing flavor and texture… best bleu cheese EVER!! Gonna let the second one go two more weeks if we can wait that long 😉 LOL On to Camembert next! Can’t wait to see what you create in the future…you’re a genius!
Thank you so much for your feedback Jeanne!! I really appreciate it.
Trust me, the additional two weeks of wait will be worth it!
Good luck with your camembert making 🙂