This post may contain affiliate links. Please read our disclosure policy.
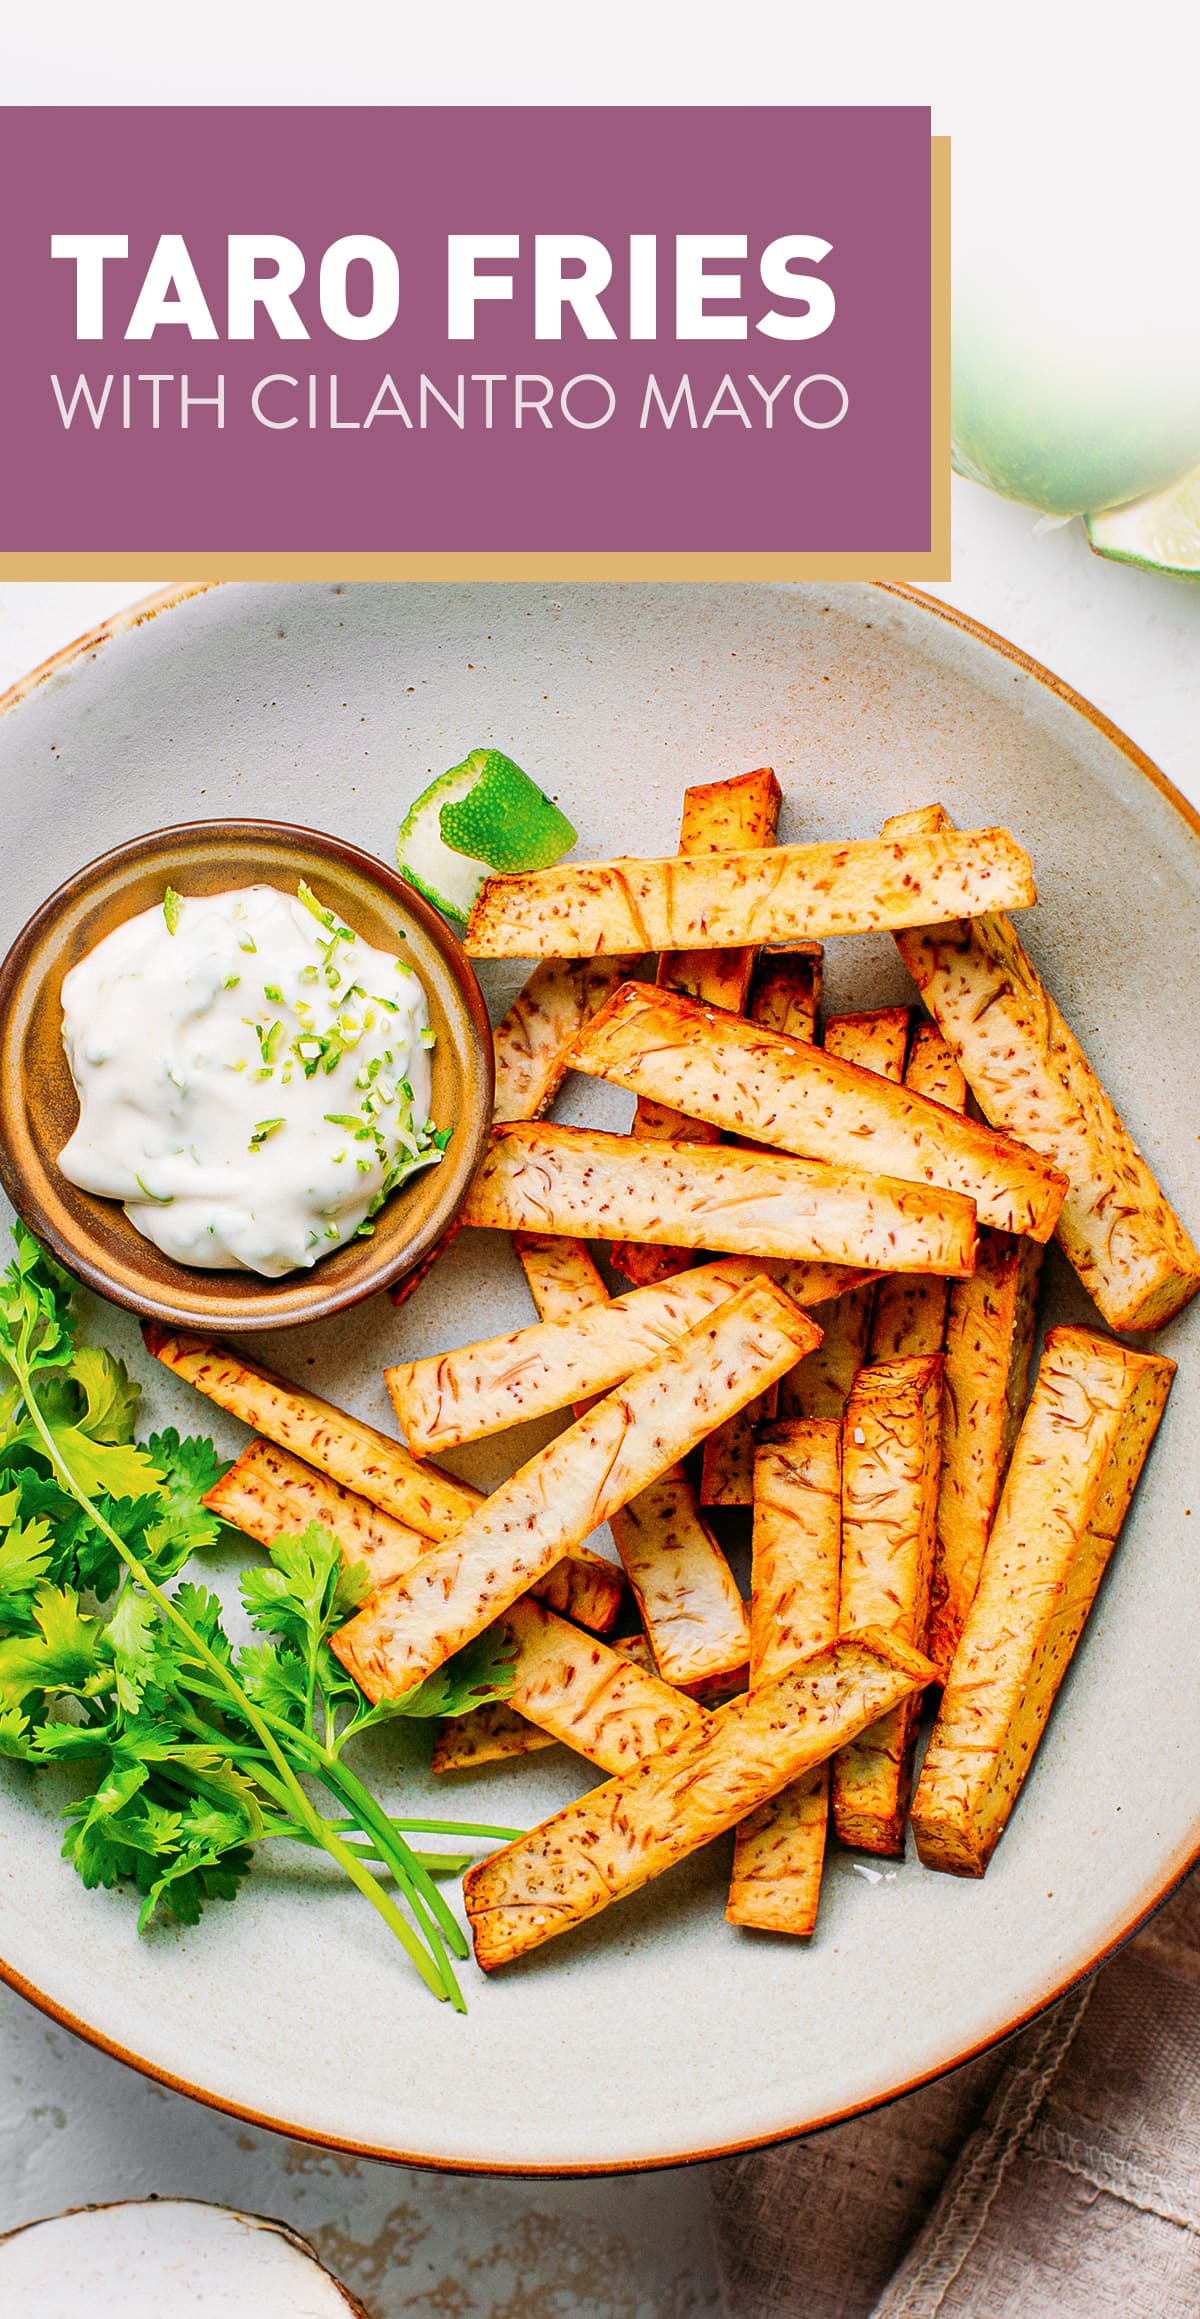
Crispy on the outside and tender on the inside, these taro fries are served with fresh and zesty cilantro and lime mayo! A delicious appetizer that makes use of this uncommon root vegetable!

Have you ever wondered what to do with taro roots? I have got you covered with these crispy taro fries!
📘 What is Taro
Taro is a starchy root vegetable that was originally grown in Asia but has now become popular in many countries around the world. It has brown outer skin and white flesh with purple specks.
Once cooked, it tastes mildly sweet with a texture similar to a potato.

🍟 How to Make Taro Fries
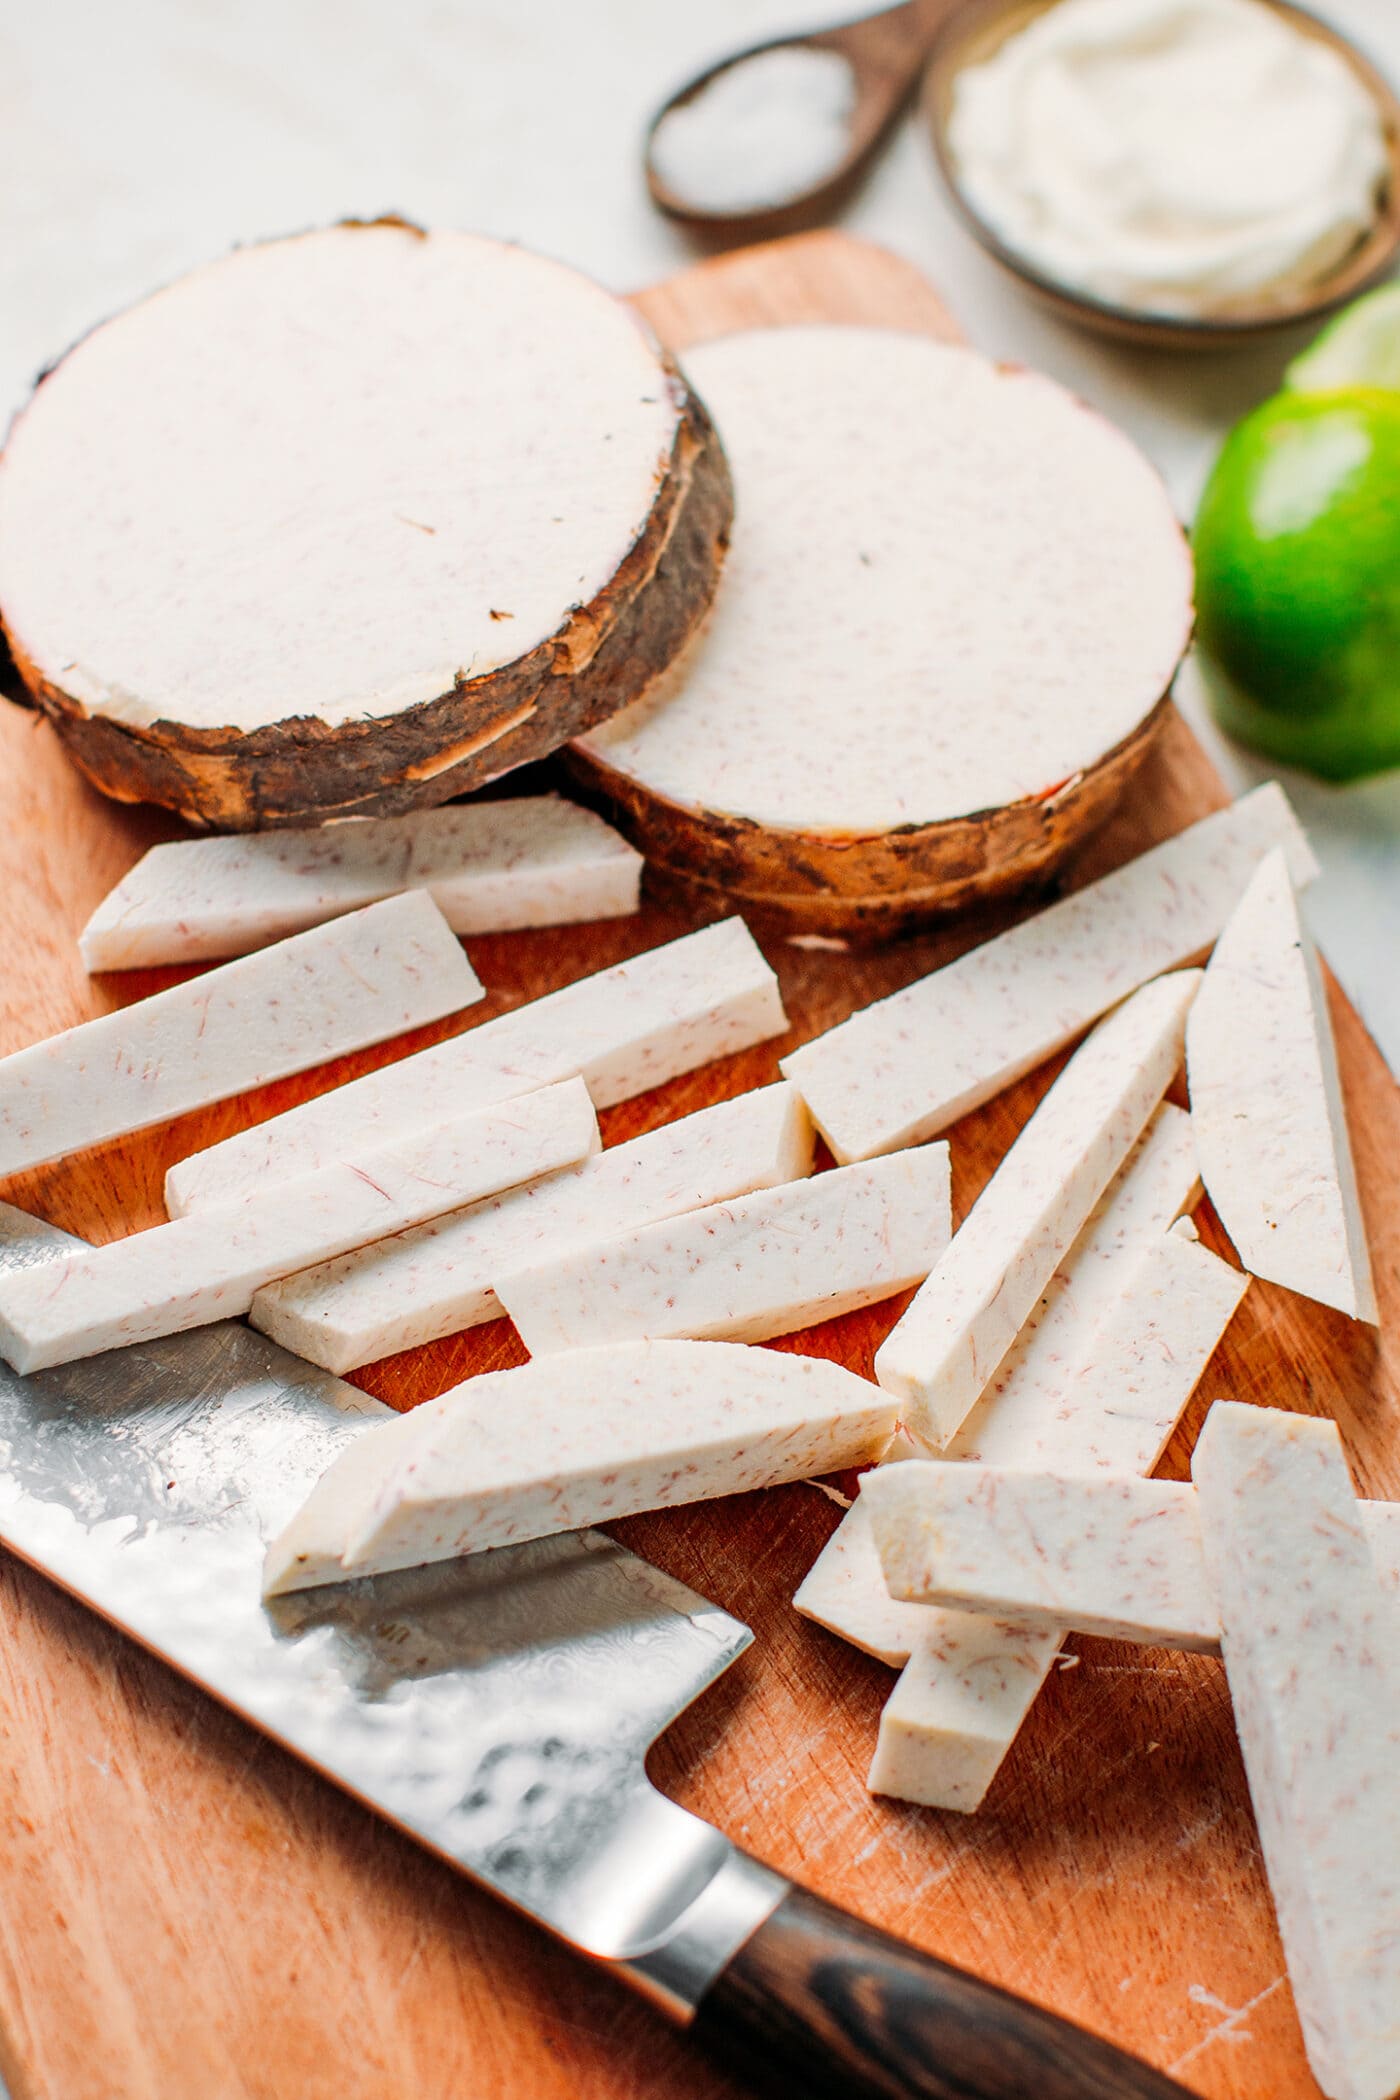
First, start by slicing and peeling the taro roots. I usually start by cutting thick slices and then peeling them. It’s easier this way compared to peeling the whole taro root.
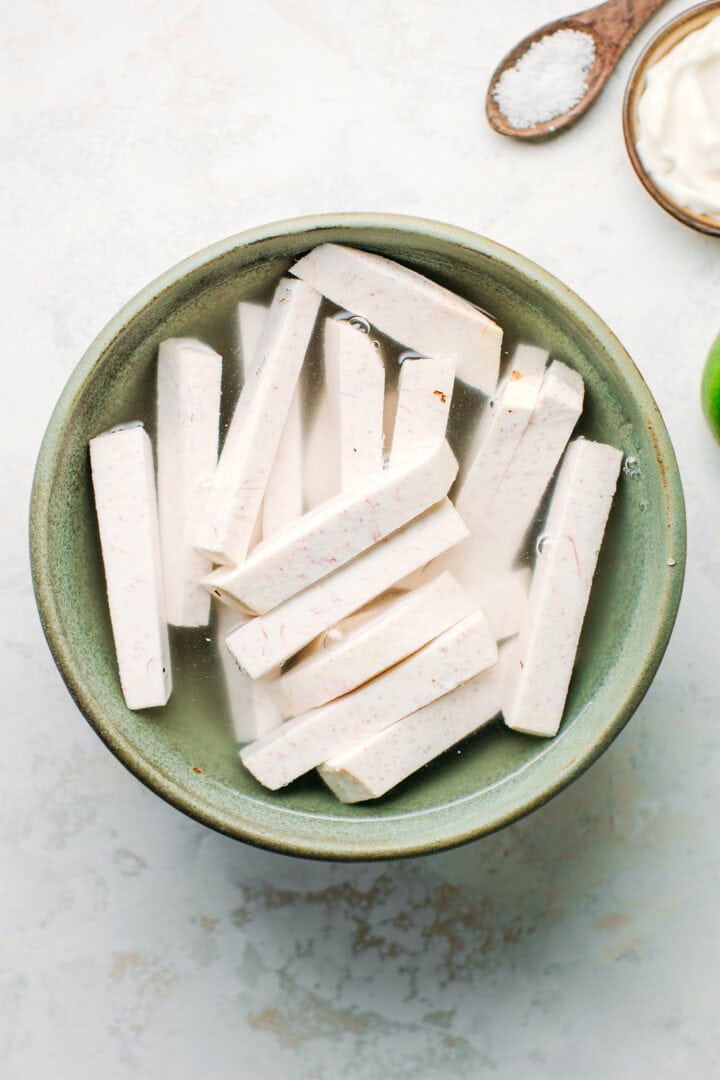
Next, soak the taro strips in salted water for about 30 minutes. This step will help remove some of the starch and yield crispier fries!
Once soaked, drain well and place the taro strips on a few sheets of kitchen paper towel or a clean towel to remove the excess water.
Finally, fry the taro strips for 4-5 minutes or until golden brown.
A quick tip: the oil should not be too hot, or your fries might burn before being cooked through. I recommend testing the temperature with just one taro fry and adjusting the heat accordingly.
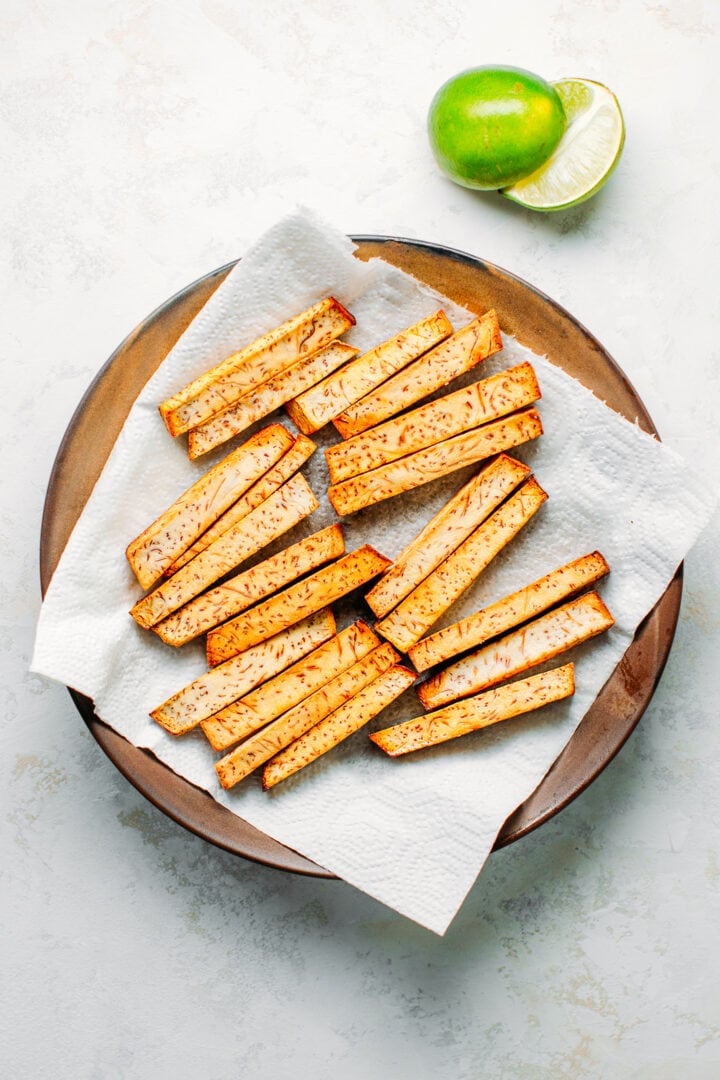
Once the fries are golden brown, remove them from the oil and transfer them to a plate lined with kitchen paper towels to remove the excess oil.
Sprinkle with salt, and enjoy with the mayo!
🥬 How to Make Cilantro Mayo
The mayo is a key element to this recipe. It’s what brings most of the flavor, as the taro fries have a very mild and subtle flavor. To prepare the cilantro mayo, you will need:
- Vegan mayo – Use store-bought vegan mayonnaise or homemade vegan mayo!
- Cilantro – For that fresh and herby flavor. Not a fan of cilantro? Substitute with parsley, dill, or basil!
- Lime – We will use both lime juice as well as lime zest for a zesty and tangy flavor.

To make the cilantro mayo, simply stir together the vegan mayonnaise, finely chopped cilantro, lime juice, and lime zest. It’s that easy!
Note: if you want a lighter option, feel free to substitute vegan yogurt for the mayo, you can then season the dipping sauce with salt to taste.

💬 FAQ
All types of taro will work. Here, I went with the larger kind, not the smaller type called Eddoe.
I would not recommend it. I tried baking these taro fries but didn’t like the overall texture. It was too dry. You might get better results by first boiling the taro strips for a few minutes before coating them with oil and roasting them.
Yes, an air fryer works great for this recipe! Simply coat the taro strips with a tablespoon of oil and air-fry for about 7-8 minutes or until the taro fries are golden brown.
As with most fries, these are best served immediately if you want them crispy.

I hope you are going to love these taro fries! It’s super easy and quick to make, crispy and savory, and it makes a great introduction to taro if you have never tried it before!

🧋 More Taro Recipes
Let me know in the comments if you try this recipe!


Taro Fries with Cilantro Mayo
Ingredients
Taro Fries
- 1 medium taro about 14 ounces – 400g
- 1/4 tsp salt
- 2 cups oil for frying
Cilantro Lime Mayo
- 1/2 cup vegan mayo
- 1/4 cup finely chopped cilantro
- 2 tsp lime juice
- 1/2 tsp lime zests
Instructions
- Using a sharp knife, cut the taro root into 1/2-inch thick slices. Peel each slice and rinse them under cold water. Next, cut each slice into 1/2-inch thick strips or wedges.
- Transfer the taro strips to a large mixing bowl. Cover with about 3 cups of water and add the salt. Soak the taro for about 30 minutes.
- Next, drain the taro strips and rinse them under cold water. Spread the taro strips on a plate lined with a kitchen paper towel to remove the excess moisture.
- Add the oil to a deep frying pan and heat over medium heat. Once the oil is hot, carefully add the taro strips and fry for 4-5 minutes, stirring from time to time to make sure the fries are golden brown on each side.
- Once the fries are golden brown, remove them from the oil using a slotted spoon and transfer them to a plate lined with parchment paper. Sprinkle with more salt to taste and let cool for a few minutes before serving with the cilantro mayo!
Cilantro Lime Mayo
- In a small bowl, stir together all of the ingredients.
Notes

About the Author
Thomas Pagot is the founder, photographer, and recipe developer behind Full of Plants. He created the blog in 2016 as a personal cookbook for vegan recipes. Through years of recipe development, Thomas has successfully grown Full of Plants into a trusted resource for plant-based recipes.

🧀 25 Mind-Blowing Vegan Cheese Recipes!
Sign up for the Full of Plants newsletter and you’ll get new recipes delivered by email weekly, PLUS your FREE 100-page printable eBook!